Table of Contents
Table of Contents
There’s something utterly enchanting about the aroma of cookies baking in the oven that transports me back to my childhood kitchen. I’d often find myself perched on a stool, eagerly watching my grandmother whip up her famous cookies that brought our family together. Fast forward to today, and I’ve created my own version of that nostalgia-packed treat: Nutella Shortbread Sandwich Cookies. These heavenly delights are not just cookies; they’re a warm embrace on a cold day, a burst of joy amidst life’s chaos—each bite is a bite of pure happiness.
What makes my recipe special? It’s the delicate balance between the rich, buttery shortbread and the creamy, irresistible Nutella filling. Unlike store-bought varieties, my Nutella Shortbread Sandwich Cookies boast a melt-in-your-mouth texture and are entirely customizable. Whether you’re hosting a cozy get-together or treating yourself to a sweet afternoon snack, these cookies are the ultimate comfort food. Today, I’ll show you how to recreate these mouthwatering treats in your own kitchen—complete with professional tips, tricks, and heartfelt stories that make baking even more enjoyable!
What Are Nutella Shortbread Sandwich Cookies?
Nutella Shortbread Sandwich Cookies are a delightful fusion of classic shortbread and luscious chocolate hazelnut goodness. The origin of shortbread dates back to medieval Scotland, where it was a luxurious treat reserved for special occasions. Today, we’ve taken this timeless cookie and given it a new life by adding the beloved Nutella, making each bite a harmonious blend of buttery goodness and chocolatey richness.
When you take your first bite, expect a delightful crunch that melts away to reveal a creamy, sweet center. The nuttiness from the hazelnuts enhances the flavor profile, creating a cookie experience that’s not only indulgent but also memorable. Perfect for family gatherings, birthday parties, or simply as a sweet escape after a long day, these cookies are sure to impress everyone who takes a bite!
Why You’ll Love This Recipe
Heavenly Taste and Texture: You won’t find anything quite like the combination of buttery shortbread paired with smooth Nutella. The shortbread is crumbly yet melt-in-your-mouth, while the Nutella adds a creamy sweetness that elevates the experience.
Cost-Effective: Unlike gourmet cookies from patisseries that can dent your wallet, this homemade version is incredibly budget-friendly. With just a few simple ingredients, you can create a batch that is not only delicious but also much less expensive than buying them.
Customizable Options: Make it your own! Swap Nutella for your favorite chocolate or nut spread, add a sprinkle of sea salt for a savory touch, or even replace the hazelnuts with almonds if you prefer. The possibilities are endless!
Quick and Easy: While they might look fancy, these cookies are straightforward to make. You don’t need to be a pro baker to impress! Plus, the chilling time allows you to multitask, so you won’t feel overwhelmed.
Perfect for Every Occasion: Whether you’re looking for a treat to bring to a potluck, a sweet gift for a friend, or a cozy night in, Nutella Shortbread Sandwich Cookies fit any scenario seamlessly.
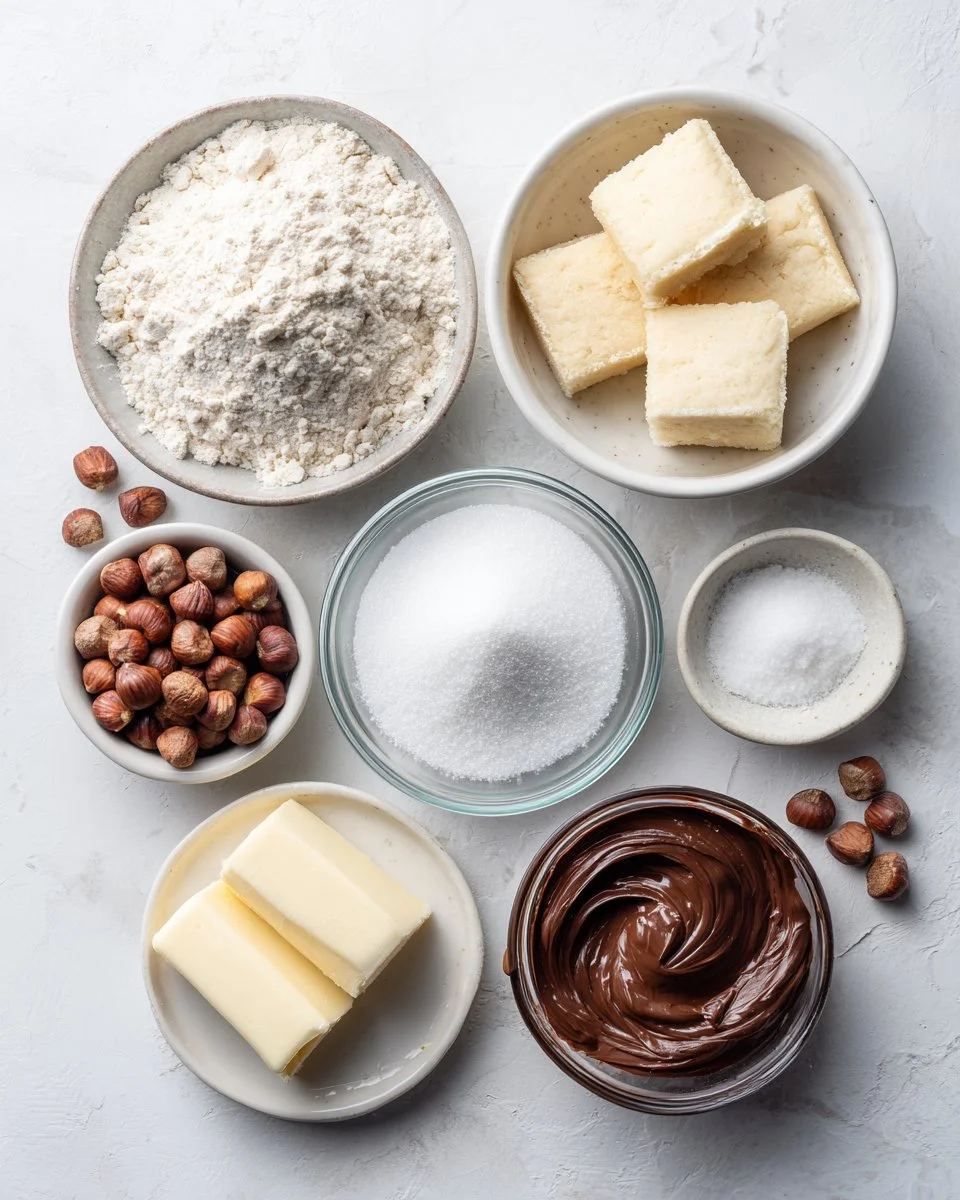
Ingredients
- ½ cup hazelnuts: Toasted for that extra nutty flavor; alternatively, you can use almond flour for a gluten-free version.
- 2 cups all-purpose flour (spooned and leveled): For the perfect structure.
- ½ teaspoon Kosher salt: Balances the sweetness.
- 1 cup unsalted butter (at room temperature, equiv to 2 standard sticks): Choose quality butter like Kerrygold for the best flavor.
- ½ cup granulated sugar: This adds just the right amount of sweetness.
- ½ teaspoon vanilla extract: A splash of pure vanilla makes a noticeable difference.
- 13 ounces Nutella (chocolate hazelnut spread): Don’t skimp on this; quality brands are key!
- Confectioners’ sugar (for dusting): Adds a lovely presentation and sweetness.
Prep Notes: Make sure your butter is at room temperature for easy creaming. If you need a dairy-free option, vegan butter can work in a pinch!
Step-by-Step Instructions
Line Two Large Baking Sheets: Preheat your oven to 350°F (175°C) and line two large baking sheets with parchment paper or a Silpat mat. Set aside.
Toast and Pulse the Hazelnuts: Place hazelnuts in a skillet over medium heat. Toast them for about 5-7 minutes until fragrant, stirring occasionally. Let cool, then pulse them in a food processor until finely ground. Set aside.
Mix Dry Ingredients: In a medium bowl, whisk together the pulsed hazelnuts, all-purpose flour, and salt. Set this aside too.
Make The Dough: In a stand mixer or electric mixer, beat the room-temperature butter and granulated sugar on medium-high speed until light and fluffy, about 3 minutes. Add the vanilla extract and mix well. Gradually incorporate the dry ingredient mixture, mixing on medium speed until just combined. The dough may be slightly sticky—this is perfect!
Chill the Dough: Transfer the dough onto a piece of plastic wrap, press it into a ½-inch-thick disk, and wrap it tightly. Chill in the fridge for at least 1 hour or up to 3 days. This step is crucial for maintaining shape during baking.
Roll Out the Dough: Dust a clean working surface with flour. Roll the chilled dough to about ¼-inch thickness. If you experience any cracks, simply press them back together. Cut out cookies using your preferred cutter (2½-inch diameter fluted round works perfectly). Arrange the cookies on the lined baking sheets, leaving space between them to expand slightly.
Chill Again: To achieve perfectly shaped cookies, cover the cutouts with parchment paper and chill in the fridge for an additional 30 minutes.
Bake: Bake in the preheated oven for 9-11 minutes. Look for a set cookie with slightly golden edges; the tops will still appear pale. If you prefer a crunchier cookie, add 1-2 minutes to the baking time.
Assemble: Allow the cookies to cool completely on a wire rack. Once cool, pipe a generous amount of Nutella onto half of the cookies, then top them with the remaining cookies. Dust the assembled cookies with confectioners’ sugar for an elegant touch!
Expert Tips & Tricks
Storage Recommendations: Store your Nutella Shortbread Sandwich Cookies in an airtight container at room temperature for up to a week. They can also be refrigerated for longer freshness!
Make-Ahead Instructions: You can prepare the dough ahead of time and freeze it. Just wrap it tightly in plastic wrap, then place it in a freezer bag. When you’re ready to bake, just thaw it in the fridge overnight.
Troubleshooting: If your cookies spread more than desired, it may be due to warm dough or an insufficient chill time. Always ensure your dough is properly chilled before baking.
Chef’s Tip: For shallow impressions, and to prevent sticking, lightly dust your cookie cutter with flour before cutting into the dough.
Experiment with Flavors: Adding a pinch of cinnamon or a splash of orange zest can give your cookies a unique twist; mix things up according to your taste!
Serving Suggestions
Serve these delightful Nutella Shortbread Sandwich Cookies alongside a warm cup of coffee or a glass of cold milk for the ultimate treat. They also make a lovely centerpiece for dessert platters at parties. For a touch of elegance, arrange the cookies on a beautiful cake stand and sprinkle them with fresh raspberries or mint leaves—perfect for impressing guests at tea time or special celebrations!
Variations & Substitutions
Fillings: Feel free to substitute Nutella with other spreads like almond or peanut butter. For a fun twist, mix in some crushed Oreos or sprinkles!
Gluten-Free Option: To make these cookies gluten-free, substitute all-purpose flour with a gluten-free blend that’s designed for baking.
Seasonal Variations: For a festive touch during the holidays, add peppermint extract to your filling or dip the edges in melted chocolate and sprinkle with crushed candy canes.
Nutrition & Storage Info
- Prep Time: 20 minutes
- Cook Time: 20 minutes
- Total Time: About 1 hour 40 minutes (includes chilling time)
- Yield: Approximately 24 sandwich cookies
- Estimated Calories: About 150 calories per cookie
- Storage Instructions: Keep cookies in an airtight container at room temperature for 5-7 days, or refrigerate for additional freshness; for longer storage, freeze unassembled cookies and fillings.
FAQ Section
Can I use salted butter instead of unsalted?
It’s best to use unsalted butter to control the amount of salt in the recipe. If using salted butter, omit the added salt.What if my dough is too sticky?
If the dough feels overly sticky, dust your work surface and rolling pin with additional flour while rolling it out.Can I use a different nut?
Absolutely! Almonds or walnuts are great substitutes for hazelnuts, just remember to toast them for extra flavor.Should I chill the cookies before baking?
Yes! Chilling helps them keep their shape while baking and prevents spreading.How do I know when the cookies are baked?
Look for edges that are slightly golden and a soft set in the center. They will firm up as they cool.What is the best way to assemble the cookies?
Use a piping bag or a small spoon to evenly distribute the Nutella, then gently press the top cookies on.Can I make these cookies vegan?
Yes! Substitute vegan butter for the regular butter, and ensure the Nutella is a vegan-friendly brand.Can I freeze the finished cookies?
Yes, but for best results, freeze unfilled cookies and assemble them fresh before serving.What’s the best way to store leftover Nutella?
Keep any leftover Nutella in a sealed container at room temperature. It should stay fresh for several weeks.Can I add flavors to the Nutella filling?
Yes, a splash of vanilla or a pinch of sea salt can enhance the Nutella flavor beautifully!
Conclusion
Nutella Shortbread Sandwich Cookies are more than just a treat; they’re a journey back to cherished family moments and sweet comfort. The delightful crunch paired with luscious Nutella makes these cookies a solid choice for any occasion! I encourage you to give this recipe a try; I bet you’ll fall in love with them just like I did! Don’t forget to leave comments with your baking experiences or any unique twists you added. And if you loved these cookies, check out other scrumptious recipes on my blog—there’s always something delightful waiting for you!
Can’t-Miss Easter Dirt Cake Casserole Recipe You’ll Love!
Happy baking!

Nutella Shortbread Sandwich Cookies
Ingredients
Method
- Preheat your oven to 350°F (175°C) and line two large baking sheets with parchment paper or a Silpat mat.
- Toast hazelnuts in a skillet over medium heat for about 5-7 minutes until fragrant. Let cool, then pulse in a food processor until finely ground.
- In a medium bowl, whisk together the pulsed hazelnuts, all-purpose flour, and salt. Set aside.
- In a stand mixer, beat the room-temperature butter and granulated sugar on medium-high speed until light and fluffy, about 3 minutes. Add vanilla extract and mix well. Gradually incorporate the dry ingredient mixture, mixing on medium speed until just combined.
- Transfer the dough onto plastic wrap, press it into a ½-inch thick disk, and chill in the fridge for at least 1 hour or up to 3 days.
- Roll out the chilled dough to about ¼-inch thickness on a floured surface. Cut out cookies using your preferred cutter.
- Arrange the cookies on the lined baking sheets and chill in the fridge for an additional 30 minutes.
- Bake in the preheated oven for 9-11 minutes, or until the edges are slightly golden and the tops appear pale.
- Allow the cookies to cool completely on a wire rack. Once cool, pipe a generous amount of Nutella onto half of the cookies, then top them with the remaining cookies.
- Dust the assembled cookies with confectioners’ sugar before serving.