Growing up, the aroma of chickpea hummus wafting through the kitchen signaled a special gathering. As a child, I remember watching my grandmother whip up a batch using her well-loved food processor that had clearly seen better days. Lips smacking, my family would scoop the creamy goodness with warm pita bread and fresh veggies, creating a whirlwind of laughter around the table. That comforting ritual sparked my passion for food, and today, I’m excited to share my own twist on this beloved chickpea hummus recipe.
This recipe stands out from others you’ll find because it combines peanut butter for a unique creaminess, paired with aromatic spices like coriander and cumin. It’s not just hummus; it’s a journey back to cherished memories and family love. You won’t just learn to make hummus; you’ll learn to create a dish that brings people together, igniting warmth and joy in every scoop. Get ready to blend, taste, and enjoy, as I guide you through this easy, flavorful, and unforgettable chickpea hummus recipe.
What Are Chickpea Hummus?
Chickpea hummus has its roots in Middle Eastern cuisine, where it has been enjoyed for centuries as a staple dip and spread. Traditionally made from ground chickpeas, tahini, garlic, and olive oil, each ingredient plays a vital role in developing that quintessential creamy texture and earthy flavor.
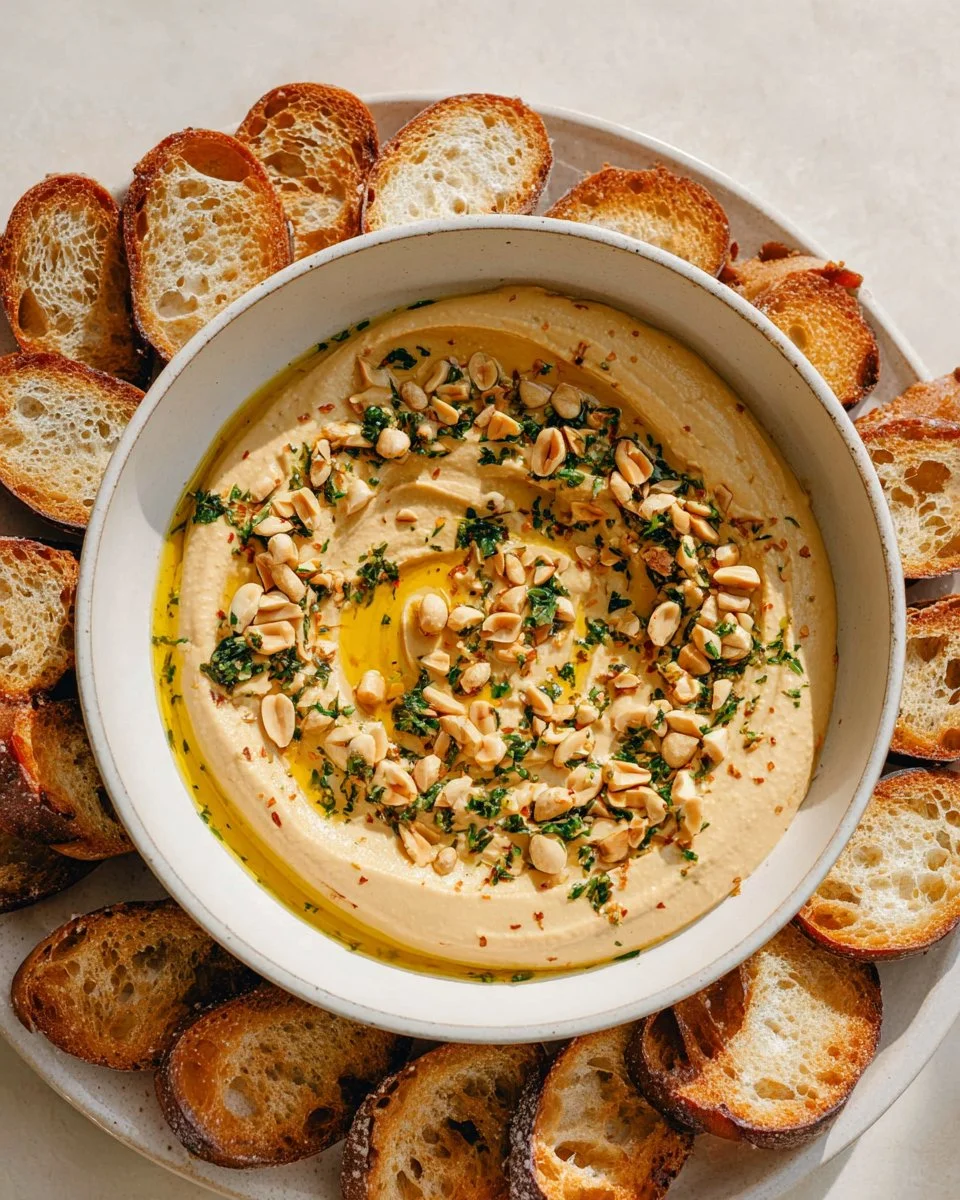
The taste profile of chickpea hummus is a delightful contrast of savory and nutty, with a hint of tanginess from the lemon juice. When made perfectly, you’ll experience a smooth and velvety texture that practically melts in your mouth. What makes my recipe unique is the addition of peanut butter, which gives it an unexpected depth and richness.
This hummus is ideal for entertaining, meal prepping, or simply enjoying alongside your favorite veggies or warm pita. It’s an invitation to share a piece of culinary history right in your kitchen.
Why You’ll Love This Recipe
Flavor Explosion: Unlike store-bought varieties that can be bland, my chickpea hummus bursts with flavor and character. The combination of fresh garlic, zesty lemon, and warm spices creates a better taste than anything you’d find in a plastic tub at the supermarket.
Cost-Effective Indulgence: Making this hummus at home is not only cheaper than buying it but also allows you to whip up large batches that can last throughout the week. With just a few simple ingredients, you’ll be amazed at how far a single can of chickpeas can stretch!
Customize It Your Way: This recipe is a blank canvas! Want a spicier kick? Add some cayenne pepper. Craving a sweeter version? Toss in roasted red peppers or even a bit of maple syrup. The options are endless, allowing you to tailor this dish to suit your taste.
Easy and Quick: Even if you’re a novice in the kitchen, this hummus comes together in just minutes. You don’t need to be a culinary whiz to impress your friends and family with this easy recipe.
Nutrition Packed: Packed with protein, fiber, and healthy fats, chickpea hummus is a delicious way to sneak nutritious ingredients into your diet. Perfect for a healthy snack or appetizer!
Ingredients Section
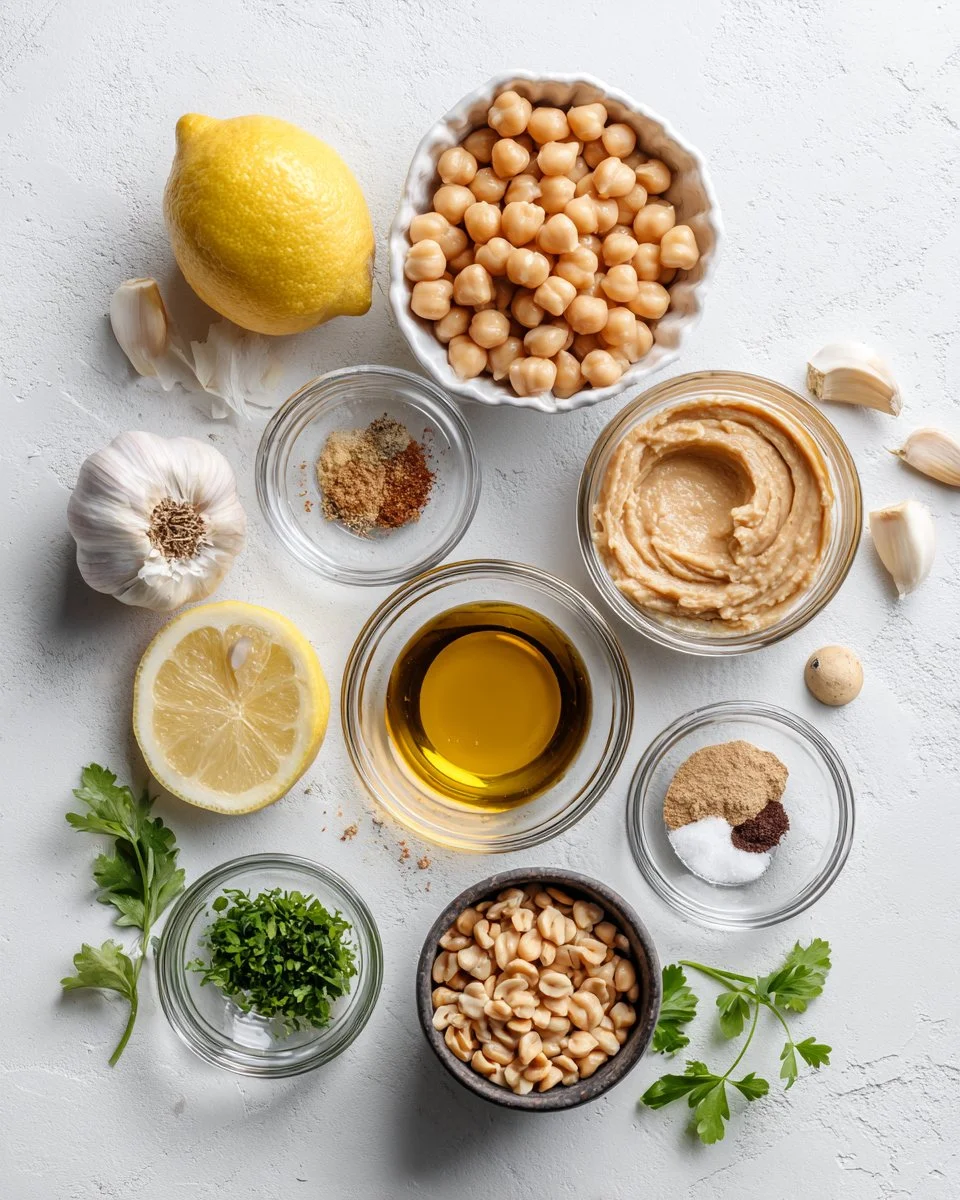
To create your own delicious Chickpea Hummus, you will need the following:
- 1 x 400g can chickpeas, drained (liquid reserved): Helps create a creamy texture. For a better taste, choose organic brands such as Eden Foods if available.
- 2 cloves garlic: Fresh is best! Adjust to your taste; roasting the garlic offers a milder flavor.
- 1/4 cup peanut butter: This adds a delightful creaminess—opt for natural, unsweetened peanut butter like Teddie or Justin’s.
- Juice of 1/2 lemon: Freshly squeezed lemon juice is essential. Using bottled juice won’t have the same bright flavor.
- 1 teaspoon ground coriander: Adds a lovely aromatic quality.
- 1 teaspoon ground cumin: Essential for that rich, earthy flavor.
- 1 teaspoon onion powder: For a depth of flavor.
- 1/2 to 1 teaspoon salt, to taste: Adjust based on your preference.
- 1/3 cup reserved chickpea liquid: Vital for achieving the desired consistency; add a bit more if you like it thinner.
- Fresh herbs (for topping): Think parsley or cilantro for a pop of color.
- Roasted peanuts (for topping): Crunchy garnish for added texture.
- A sprinkle of cumin (for topping): A little extra flavor never hurts.
- A drizzle of olive oil (for topping): Enhances richness and presentation.
Pro Tip: For best results, ensure your peanut butter is at room temperature. This facilitates a smoother blend and a creamier texture.
Step-by-Step Instructions
Drain and Reserve: Drain the chickpeas, ensuring to reserve the liquid in a bowl for later use. This step is critical for achieving that perfect creamy consistency later.
Blend Ingredients: In a food processor or high-speed blender, add the drained chickpeas, peanut butter, garlic, lemon juice, cumin, coriander, and salt. Pour in 1/3 cup of the reserved chickpea liquid.
- Chef’s Tip: If you find blending tough, pulse the mixture a few times before fully blending.
Blend to Perfection: Blend the mixture for 2 to 3 minutes, stopping periodically to scrape down the sides. Your goal is to achieve a smooth and creamy texture; taste and adjust seasoning as needed.
A Secret Ingredient: To keep your hummus fluffy and fresh, toss in an ice cube and blend again. This little trick will make a world of difference in texture.
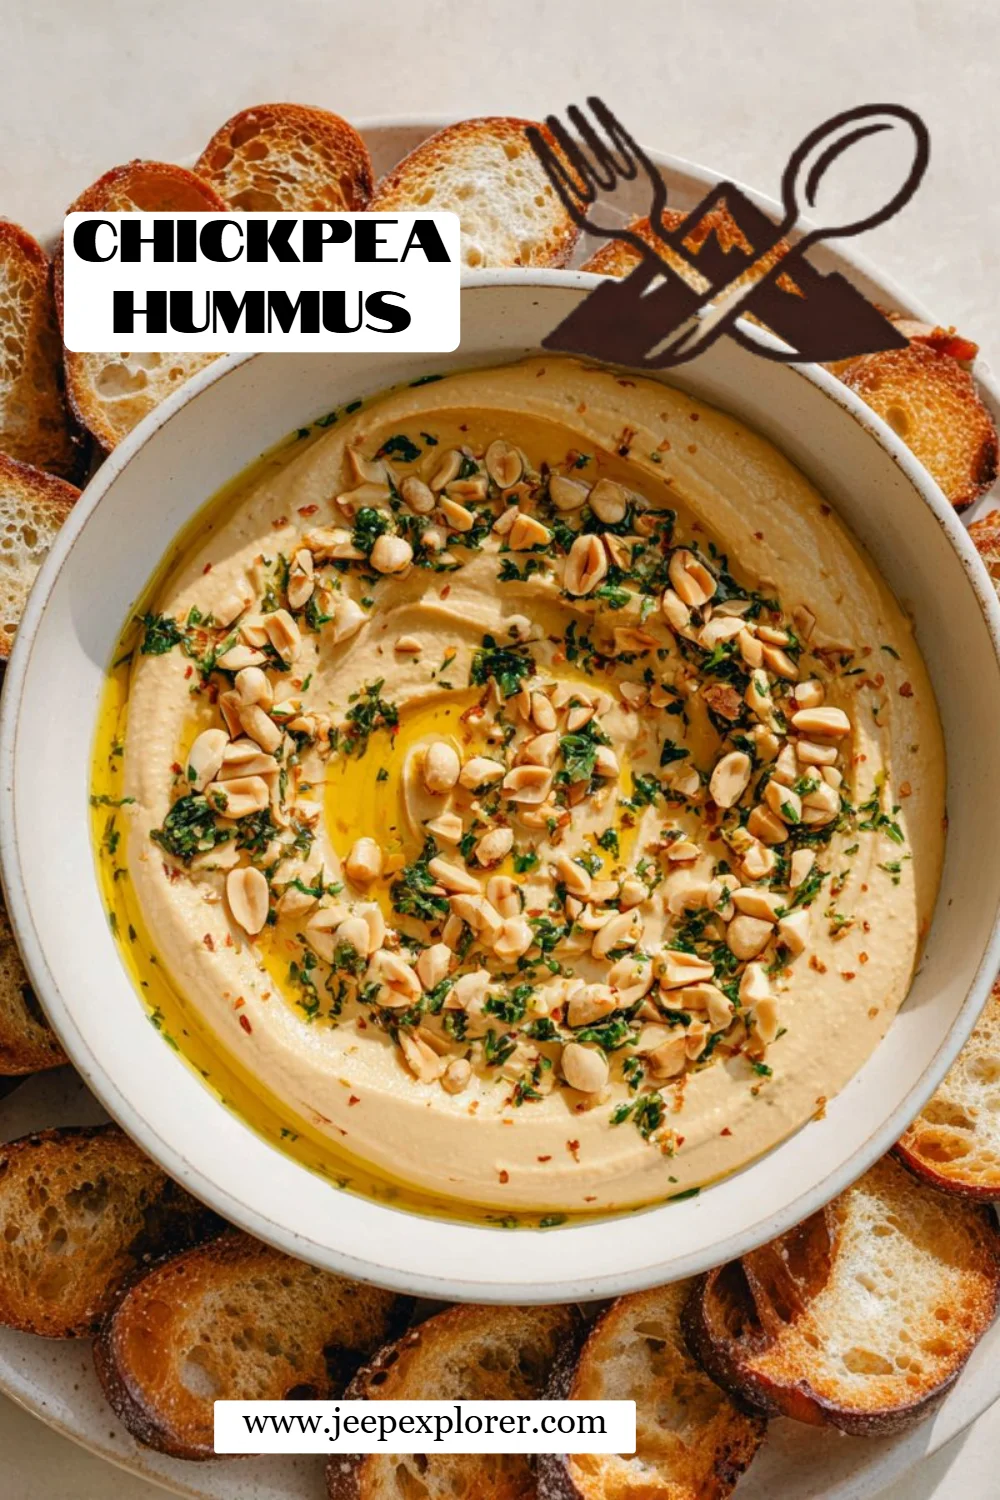
Garnish and Serve: Spoon the hummus into a bowl and top it with fresh herbs, roasted peanuts, a sprinkle of cumin, and a generous drizzle of olive oil. Feel free to make it visually appealing!
Common Mistake: Don’t rush the blending process. The longer you blend, the creamier your hummus will be!
Expert Tips & Tricks
Use Quality Ingredients: Always opt for high-quality olive oil and fresh ingredients for maximum flavor.
Storage Recommendations: Your chickpea hummus will last in the fridge for about 4-5 days, stored in an airtight container. For longer storage, freeze it in portion-sized containers for up to 6 months.
Make-Ahead Instructions: This hummus is perfect for making ahead of time! It tastes even better when the flavors have melded together after sitting in the fridge.
Troubleshooting Tips: If your hummus is too thick, add more of the reserved chickpea liquid or a splash of olive oil until you reach your desired consistency.
Experiment with Texture: For a chunkier hummus, pulse instead of blending continuously to leave a few chickpeas intact, providing more textural interest.
Dried Chickpeas Tip: If you’re feeling ambitious, soak and cook dried chickpeas instead of canned ones for deeper flavor.
Serving Suggestions
Chickpea hummus is incredibly versatile! Serve it with warm pita bread, crunchy veggie sticks, or crispy baked chips for a satisfying snack. You can also use it as a spread for sandwiches or wraps, enhancing meals effortlessly.
For special occasions, display the hummus in a beautiful bowl garnished with colorful toppings like sliced bell peppers, olives, or a drizzle of red pepper oil for an impressive touch. Perfect for gatherings, BBQs, or a cozy night in!
Variations & Substitutions
Feel free to embrace creativity when making this chickpea hummus!
Flavor Combinations: How about roasted red pepper hummus? Just blend some roasted red peppers into the mix! Or try adding fresh herbs like basil or sun-dried tomatoes for a twist.
Dietary Adaptations: Need a nut-free version? Substitute the peanut butter with tahini, or simply omit it for a classic flavor profile.
Seasonal Treats: During the fall, add in roasted pumpkin or squash for a fun seasonal variation; you’ll be amazed at how delicious it is!
Nutrition & Storage Info
- Prep Time: 10 minutes
- Cook Time: 0 minutes
- Total Time: 10 minutes
- Yield: Approximately 4 servings
- Estimated Calories per Serving: 150 calories
- Storage Instructions: Refrigerate in an airtight container for up to 5 days. For longer storage, freeze in portion-sized jars for up to 6 months.
FAQ Section
Can I use dried chickpeas instead of canned?
Absolutely! Just soak and cook them according to package instructions before rinsing and using in the recipe.How can I adjust the spiciness?
Add a pinch of cayenne pepper or chili powder for a kick, or exclude the spices if you prefer mild flavors.What can I do if my hummus is too thick?
Simply blend in more reserved chickpea liquid or olive oil until you reach your desired consistency.Can I make this nut-free?
Yes, substitute the peanut butter with tahini or omit the nut butter entirely for a traditional taste.How do I store leftovers?
Keep your hummus in an airtight container in the refrigerator for up to 5 days. Freeze for longer storage.What should I serve with hummus?
Pair it with pita bread, fresh vegetables, or use it as a spread on sandwiches for a delicious touch.Can I make this ahead of time?
Definitely! Making hummus in advance enhances the flavors as they meld together in the fridge.Is this a good option for meal prep?
Yes! Hummus is great for meal prepping and can be portioned for snacks throughout the week.Can I add other flavors to the hummus?
Yes, get creative! Try adding roasted garlic, sun-dried tomatoes, or herbs for additional flavor.Does this recipe make a lot?
It yields about 4 servings; perfect for snacking or as a party platter!

Conclusion
This chickpea hummus recipe has a special place not just in my kitchen but in my heart. It reminds me of family, laughter, and the joy of shared meals. I’m excited for you to whip it up and create your own memories around the table. Please give it a try, and I’d love to hear your thoughts! Share any feedback or family reactions in the comments below. And don’t forget to check out my other exciting dips and spreads on the blog!
Decadent Chocolate Beetroot Muffins: Grain Free, Paleo, and Guilt Free!
Happy blending!

Chickpea Hummus
Ingredients
Method
- Drain the chickpeas, reserving the liquid in a bowl for later.
- In a food processor, combine drained chickpeas, peanut butter, garlic, lemon juice, cumin, coriander, and salt.
- Add 1/3 cup of reserved chickpea liquid and blend for 2 to 3 minutes until smooth.
- If blending is tough, pulse a few times before fully blending.
- For a fluffier hummus, add an ice cube and blend again.
- Spoon hummus into a bowl and garnish with fresh herbs, roasted peanuts, a sprinkle of cumin, and a drizzle of olive oil.