Do you ever find yourself reminiscing about the comforting, wholesome meals of your childhood? I do, especially when I think about the simple joys of homemade milk alternatives. One of my recent favorites is spelt milk – an inviting, nutty drink that takes me back to those cozy family breakfasts. Picture this: steaming bowls of oatmeal topped with fresh berries and a generous splash of creamy spelt milk. It’s pure bliss!
Homemade spelt milk is not just a tasty addition to your pantry; it’s a nutritious powerhouse that stands out from the options lining supermarket shelves. Unlike most store-bought varieties laden with additives, making your own ensures you’re serving only pure ingredients. Plus, the aroma as it blends will captivate your senses. I promise this spelt milk recipe is a game changer — it’s easy to whip up, and it brings that heartfelt warmth of home into every glass.
In this post, I’ll guide you through the simple steps to create your own spelt milk. Get ready to learn about its origins and health benefits, and how to enjoy it in various delightful ways!
What Are Spelt Milk?
Spelt milk is an alternative dairy milk made from spelt grains, a nutrient-rich ancient grain that’s been around for thousands of years. Originating from the Middle East, spelt has found favor in many cultures for its robust flavor and health benefits. When blended and strained, it transforms into a creamy beverage that is subtly sweet with a hint of nuttiness, making it a unique addition to your diet.
In terms of texture, spelt milk is smooth and well-balanced, providing a lovely foundation for smoothies, coffees, and baking. Its rich taste pairs beautifully with both sweet and savory dishes. If you’re looking for a dairy alternative, spelt milk is perfect for lactose-sensitive folks or those simply seeking to shake things up in the kitchen. Give it a try, and you’ll find it becomes a staple in your home!
Why You’ll Love This Recipe
Health Benefits: Spelt is a whole grain, packed with fiber, vitamins, and minerals. Unlike many store-bought alternatives that may contain added sugars or preservatives, homemade spelt milk offers wholesome goodness in every sip.
Flavor Profile: With a delightful nutty flavor, spelt milk adds a unique twist to your morning coffee or afternoon smoothie — far superior to any cardboard-tasting option you’d find in grocery stores.
Cost-Effective: Making spelt milk at home is economical. A 100-gram (1/2 cup) serving of spelt berries, a little water, and a pinch of salt will yield a delightful 1 liter (4 cups) of fresh milk. You’ll save money while enjoying a healthier product!
Customization Options: Want to experiment? You can customize your spelt milk by adding flavors like vanilla, cocoa, or even a pinch of cinnamon, making it suitable for everyone’s palate.
Simple to Master: This recipe is beginner-friendly! Within an hour, you can have homemade spelt milk ready to enjoy. Plus, that sense of accomplishment? Priceless.
Ingredients
{image_template}
100 grams (1/2 cup) spelt berries: Look for organic spelt berries to ensure quality. If you’re in a hurry, you can try using spelt flour instead, although the texture will vary.
1 litre (4 cups) water: The fresher the water, the smoother the milk will taste.
Pinch of sea salt: This enhances the overall flavor of the milk. Use a high-quality sea salt for the best results.
Prep notes: Soaking the spelt berries is crucial for softness. Use room temperature water for soaking, and ensure you rinse them thoroughly before blending to achieve the smooth texture you crave.
Step-by-Step Instructions
Soaking Spelt Berries:
- Place the spelt berries in a bowl and cover them generously with water. The grains will expand, so leave enough room! Refrigerate for at least 12 hours (up to 24 hours for the best results).
Draining and Rinsing:
- Once the spelt has soaked, drain and rinse them well under cold water. This step is essential to remove any residue that might impact the flavor.
Blending:
- Add the soaked spelt berries to your blender along with 1 litre (4 cups) of water and a pinch of sea salt. Blend on high speed until it reaches a creamy consistency — about 1-2 minutes. You’re looking for a thick and velvety texture.
Straining:
- Strain the mixture through a fine mesh sieve or nut milk bag into a clean bowl or pitcher. Use a spatula to help push the liquid through, yielding as much milk as possible. (Tip: Don’t throw away the spelt pulp! It can be a great addition to bread or porridge.)
Storing:
- Transfer your homemade spelt milk to a sealed bottle or jar. Store it in the refrigerator for up to one week. Shake well before using, as natural separation may occur.
Chef’s Tip: For a creamier finish, blend longer and experiment with the water-to-spelt ratio based on your preference!
Expert Tips & Tricks
Soaking longer is better: Letting the spelt berries soak for up to 24 hours will yield an even creamier milk.
Blending Temperature: Use cold or room-temperature water when blending for the best results. Hot water can cause the spelt to cook and create an unwanted texture.
Experimentation: Try adding vanilla extract, dates, or a spoonful of honey for sweetness, or a cocoa powder for a chocolate treat.
Storage: For optimal freshness, store in glass containers. They’re more eco-friendly and easy to clean.
Make Ahead: Make a large batch on the weekend and use it throughout the week. It can also be frozen in ice cube trays and thawed as needed.
Troubleshooting: If the milk ends up too gritty, try straining it again using a fine cheesecloth; this will catch the smaller particles for a smoother finish.
Serving Suggestions
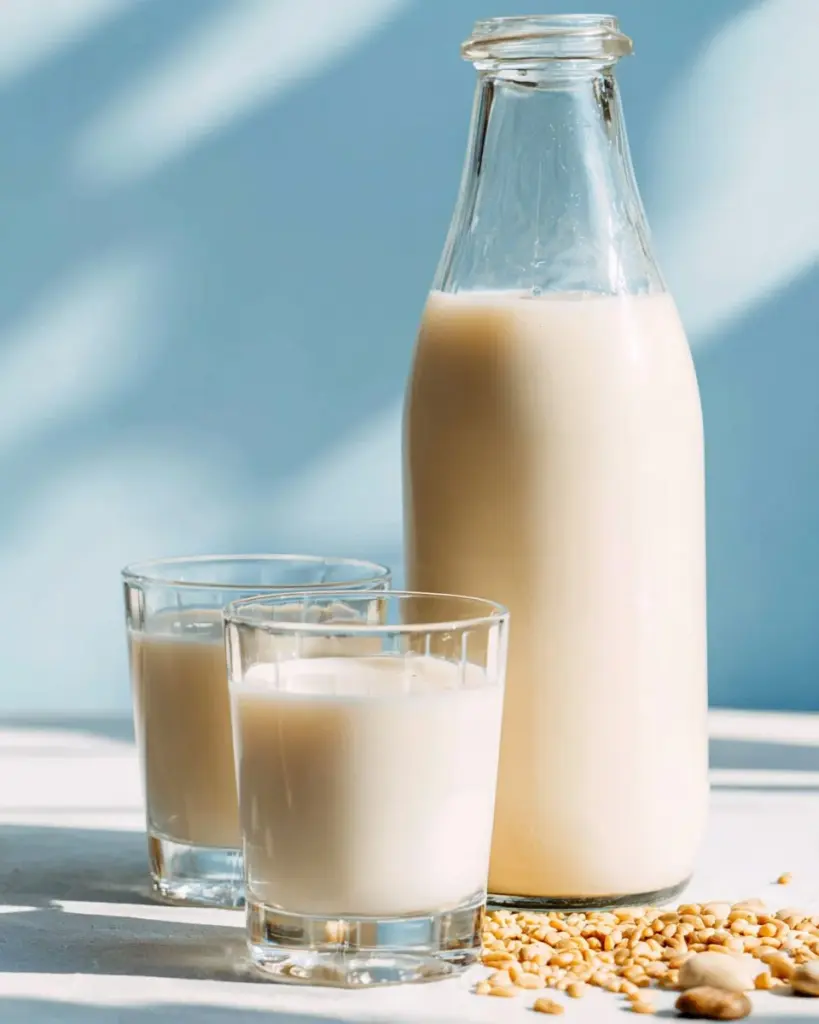
Enjoy your spelt milk in myriad ways! It’s fantastic in coffee as a creamy latte, splashed over granola or oatmeal, or even as a base for smoothies. For a lovely presentation, pour it into a beautiful glass and garnish with a sprinkle of cinnamon or cocoa powder.
This spelt milk would be perfect for brunch settings or casual family dinners, making every occasion feel special. Don’t forget to serve a slice of your favorite homemade bread alongside it!
Variations & Substitutions
Flavored Spelt Milks:
- Experiment with adding a tablespoon of cocoa powder for a chocolate version or vanilla extract for that classic touch.
Dietary Adaptations:
- If you’re gluten-free, try substituting with a gluten-free grain like quinoa to create a similar milk alternative (note that the taste will differ).
Seasonal Flavor Swap:
- During fall, add pumpkin spice; in summer, blend in fresh strawberries for a refreshing twist.
Nutrition & Storage Info
- Prep Time: 12 hours (soaking), 15 minutes (active time)
- Total Time: Approximately 12 hours 15 minutes
- Yield: 4 cups (1 liter of spelt milk)
- Estimated Calories: Approximately 120 calories per serving
- Storage: Keep the spelt milk in a sealed container in the refrigerator for up to a week. You can also freeze for longer storage — just thaw when ready to use.
FAQ Section
Can I make spelt milk with spelt flour?
- Yes, but the texture will differ, and you may need to adjust the water amount.
Is spelt milk suitable for baking?
- Absolutely! Use it in any recipe that calls for milk as an alternative.
How can I sweeten my spelt milk?
- Add a bit of honey, maple syrup, or sweet dates while blending to achieve your desired sweetness.
Can I use spelt milk in savory recipes?
- Yes! It works well in soups and sauces, providing a creamy texture.
Why is my spelt milk gritty?
- This can happen if the spelt isn’t blended long enough or strained thoroughly. Always blend on high until creamy, and strain again if needed.
Is spelt milk safe for children?
- Yes, it is a safe dairy alternative for children unless there are specific allergies.
How do I know when my spelt milk has gone bad?
- A sour smell or off-taste indicates that it has spoiled; always give it a sniff before using!
What should I do with leftover spelt pulp?
- You can add it to baked goods like muffins or pancakes, or mix it into oatmeal.
How does spelt milk compare nutritionally to almond milk?
- Spelt milk typically has more protein than almond milk and offers a broader nutritional profile.
Can I make flavored spelt milk in a blender?
- Yes! Add ingredients like berries or cocoa directly into the blender when making your spelt milk for customized flavors.

Conclusion
Spelt milk is not just a delicious beverage but a family favorite that brings warmth and nostalgia into your kitchen. Once you try making it, I believe it’ll be hard to go back to store-bought versions. I invite you to give this recipe a whirl and share your experiences! What did you enjoy adding to yours? And don’t forget to explore more delicious recipes right here on the blog, where comfort and flavor come together beautifully!
Savory Shepherd’s Pie Baked Potatoes: The Ultimate Comfort Food Upgrade
Homemade Spelt Milk
Ingredients
Method
- Place the spelt berries in a bowl and cover them generously with water. Refrigerate for at least 12 hours.
- Once the spelt has soaked, drain and rinse them well under cold water.
- Add the soaked spelt berries to your blender along with 1 litre of water and a pinch of sea salt. Blend on high speed until creamy, about 1-2 minutes.
- Strain the mixture through a fine mesh sieve or nut milk bag into a clean bowl or pitcher.
- Transfer your spelt milk into a sealed bottle or jar and store it in the refrigerator for up to one week. Shake well before use.
- Soaking spelt berries longer (up to 24 hours) yields creamier milk.
- Use cold or room temperature water when blending for best results.
- Add vanilla extract, dates, or cocoa powder for sweetness.
- For optimal freshness, store in glass containers.
- Make ahead by preparing a large batch over the weekend.