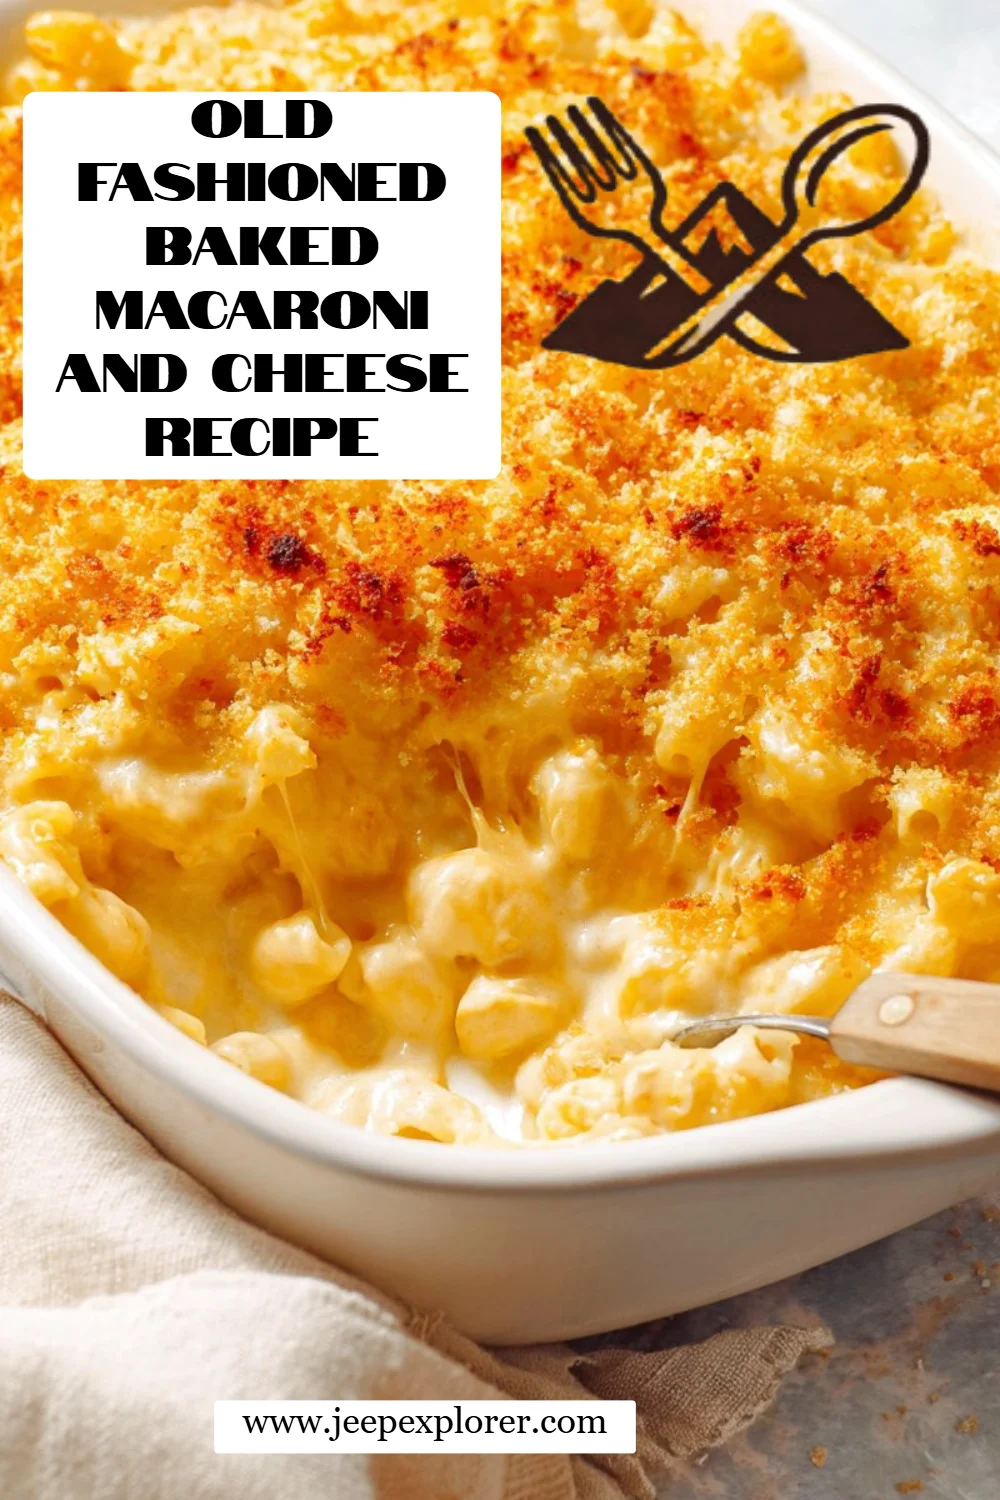
Irresistibly Cozy Old Fashioned Baked Macaroni and Cheese Recipe
There’s something magical about the smell of bubbling cheese wafting through the kitchen on a chilly evening. I still remember my grandmother’s old, hand-written recipe card for her Old Fashioned Baked Macaroni and Cheese Recipe. As a child, I’d dash into her house, charmed instantly by the warm, cheesy aroma mingling with the scent of her soft, sweet cornbread. Those evenings were filled with laughter, family stories, and of course, that ultimate comfort food made with love.
What sets this macaroni and cheese apart from the store-bought varieties? It’s all in the time, effort, and those wholesome ingredients. With a blend of sharp cheddar, Gruyere, and a sprinkling of Parmesan, the flavors marry beautifully, creating a heavenly creamy texture that coats each piece of pasta. It is truly richer, fresher, and more satisfying than any boxed version you might find.
In this blog post, I promise to share all my tips, tricks, and a few heartfelt memories that make this recipe special. You’ll learn how to whip up a batch for your own family gatherings or cozy weeknight dinners, evoking nostalgia and creating new memories to cherish.
What Are Old Fashioned Baked Macaroni and Cheese Recipe?
The history of macaroni and cheese dates back to the 1700s when it was documented in Italy as "maccheroni." The dish made its way across the ocean to America, where it has since become a beloved comfort food, especially in Southern cuisine.
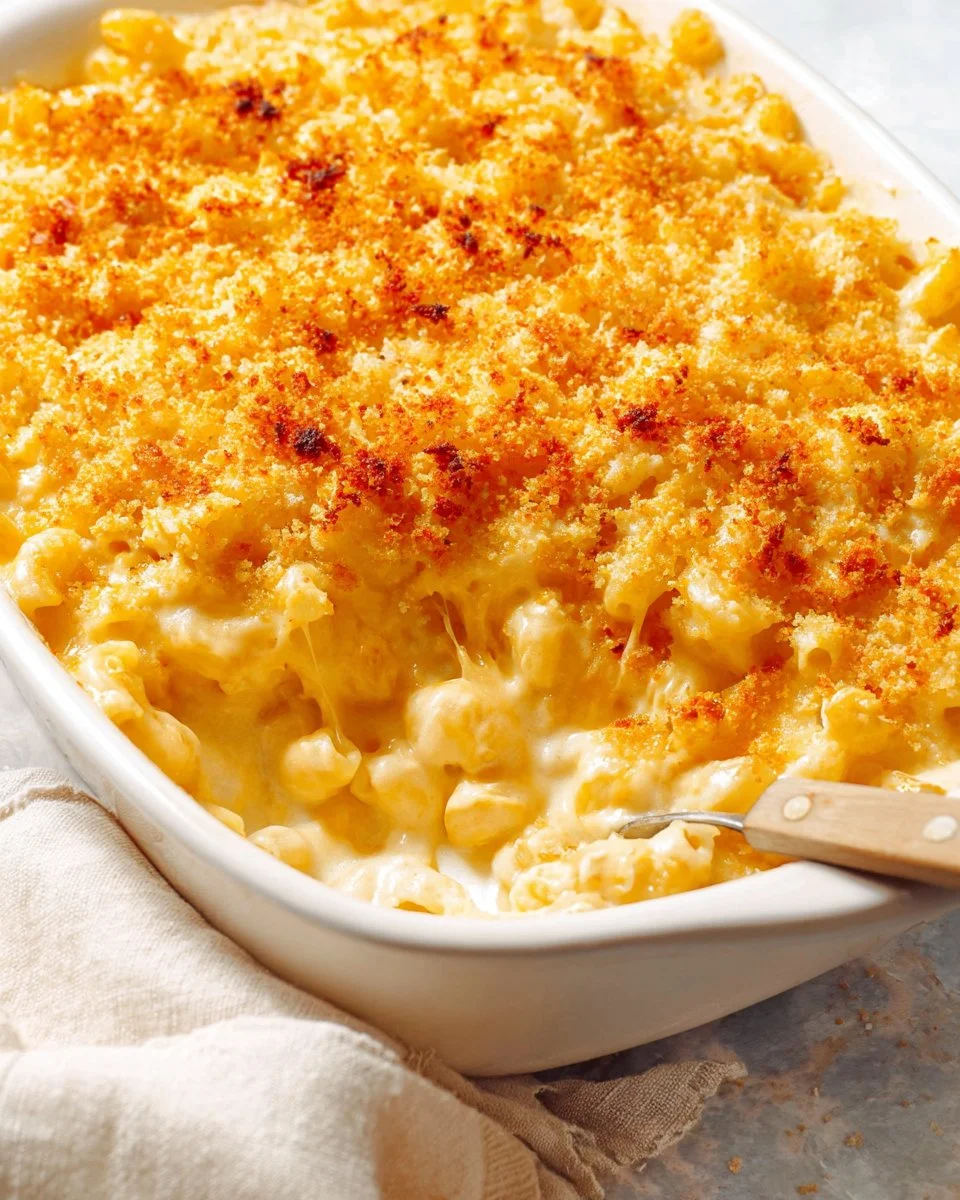
The Old Fashioned Baked Macaroni and Cheese Recipe showcases a medley of rich and creamy cheeses enveloping perfectly cooked pasta. You can expect to savor a delightful combination of gooey and nutty cheese flavors, with a golden crunchy topping that perfectly contrasts the soft pasta.
What makes this dish unique is that it’s not just the blend of cheeses but also the nostalgia it brings. It’s perfect for family dinners, holiday gatherings, or simply as a cozy meal at home. Whenever I make it, I can hear my family’s laughter echoing through the years, reminding me that some dishes make lasting memories.
Why You’ll Love This Recipe
Homemade Goodness: Skip the processed ingredients of store-bought mac and cheese. This recipe uses real cheese and wholesome ingredients, resulting in a dish with authentic flavor. Your taste buds will thank you!
Customizable Creations: One of the best things about this baked macaroni and cheese is its versatility. Whether you want to add your favorite veggies or spice it up with jalapeños, the options are endless! You can easily tailor it to suit your family’s tastes.
Affordable Comfort: Making this dish costs a fraction of what you’d spend on restaurant meals. Plus, you’ll be left with plenty of leftovers for tasty lunches or late-night snacks.
Heartfelt Connections: Foods made from scratch have a special way of bringing us together. This recipe encourages those heartwarming moments around the dining table where family stories are shared, and laughter fills the air.
Simple to Prepare: Despite its rich flavor, making this recipe is straightforward and can be achieved in about an hour. Whether you’re an experienced cook or a kitchen newbie, you can make it with confidence!
Whenever I make this, it feels like wrapping up in a warm blanket on a cold day. Now, let’s dive into the ingredients you’ll need!
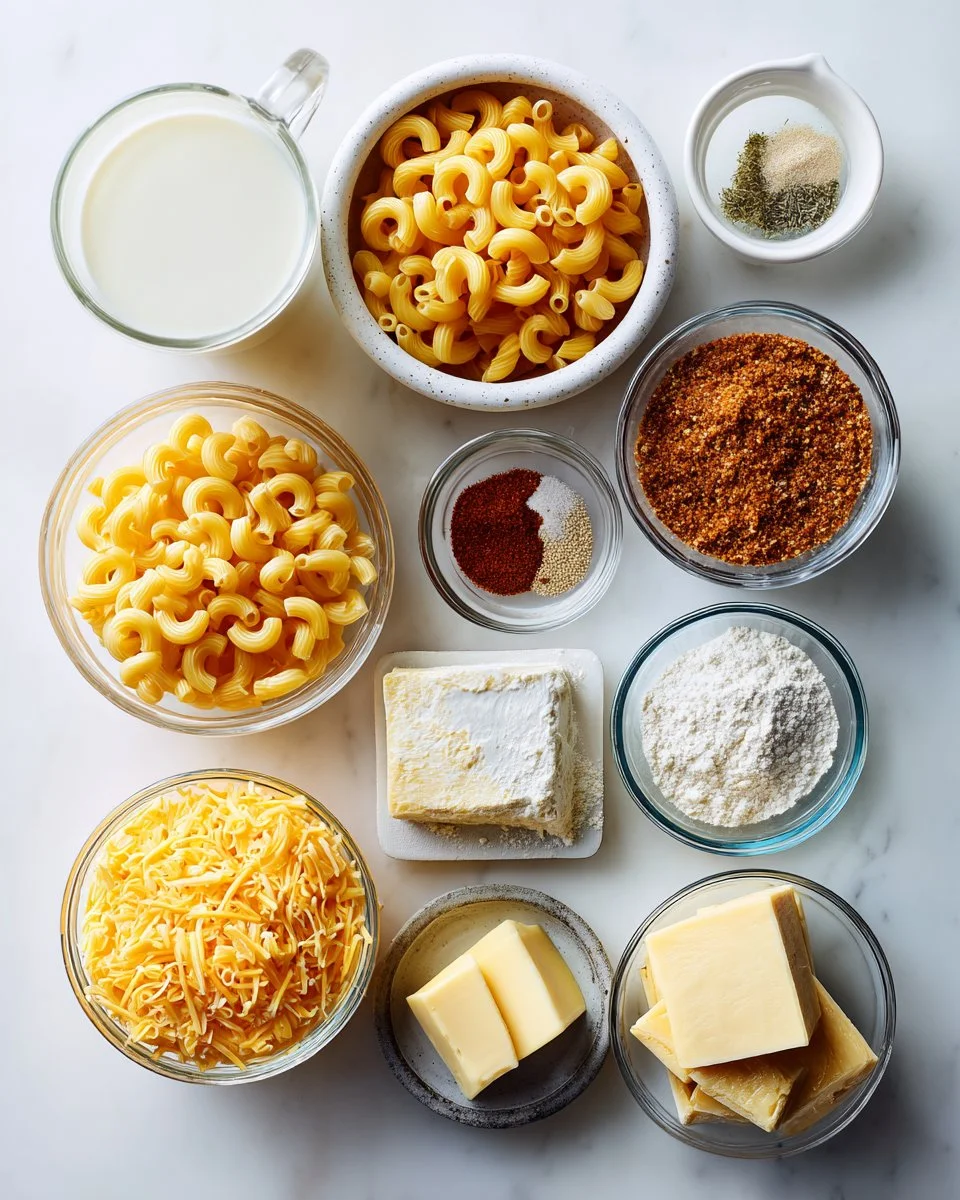
Ingredients
- 1 lb elbow macaroni (or your favorite pasta)
- 1/2 cup unsalted butter (I love using Kerrygold for its creamy flavor)
- 1/2 cup all-purpose flour
- 5 cups whole milk (use whole for creaminess; alternatives like almond milk can be used, but they will alter the flavor)
- 3 cups shredded sharp cheddar cheese
- 2 cups shredded Gruyere or Monterey Jack cheese (feel free to use more cheddar if you’re a cheddar lover)
- 1 cup freshly grated Parmesan cheese (always go for fresh; it makes a world of difference)
- 1 1/2 tsp kosher salt (plus more to taste – adjust to your liking)
- 1 tsp onion powder
- 1/2 tsp black pepper
- 1/2 tsp paprika
- 1/2 tsp garlic powder
- 1 cup panko breadcrumbs (these add a delightful crunch!)
- 2 tbsp melted butter (for mixing with the breadcrumbs)
- Pinch of salt
- 1/2 tsp dried parsley (for a pop of color on top!)
Prep Notes:
- Ensure your butter is at room temperature for easy mixing.
- If time allows, get your milk to room temperature to create a smoother cheese sauce.
Step-by-Step Instructions
First Steps:
- Cook the Pasta: In a large pot, bring water to a boil and add a generous amount of salt. Cook the macaroni according to package instructions until al dente, about 6-8 minutes. Drain and set aside.
Make Cheese Sauce:
Prepare the Roux: In a large saucepan, melt the butter over medium heat. Once melted, whisk in the flour and cook for about 1-2 minutes until it’s a light golden color.
Chef’s Tip: Don’t rush this step; a properly cooked roux adds depth to the flavor.Add Milk: Gradually whisk in the whole milk, stirring constantly until the mixture is smooth and thickens, about 5-7 minutes.
Cheese Galore: Remove the sauce from heat, and slowly add in cheddar, Gruyere, and Parmesan cheeses. Stir until melted and creamy.
Combine Pasta and Sauce:
- Mix Together: Add the cooked pasta to the cheese sauce, along with the onion powder, salt, black pepper, paprika, and garlic powder. Stir until the pasta is fully coated.
Topping:
- Prepare the Crunchy Topping: In a small bowl, mix panko breadcrumbs with melted butter, pinch of salt, and dried parsley.
Assembling and Baking:
Assemble the Dish: Preheat your oven to 350°F (175°C). Pour the cheesy pasta into a greased 3-quart baking dish. Top with the seasoned panko mixture, ensuring an even layer.
Bake to Perfection: Bake in the preheated oven for 25-30 minutes until bubbly and golden brown on top.
Chef’s Tip: Let it rest for about 5-10 minutes before serving for a cleaner cut when portioning it out.
Expert Tips & Tricks
Storage: Leftovers can be stored in an airtight container in the refrigerator for up to 3-4 days. Reheat in the oven for a crispy top or microwave for a quicker fix.
Make Ahead: Prepare the macaroni and cheese ahead of time, cover it tightly, and store it in the refrigerator. Bake it when you’re ready, adding a few extra minutes to the bake time.
Preventing Clumps: Make sure to add the cheese off heat to prevent clumping.
Troubleshooting: If your sauce is lumpy, use an immersion blender to smooth it out.
Serving Suggestions
This Old Fashioned Baked Macaroni and Cheese is perfect alongside a light green salad or your favorite roasted vegetables. For an added touch, consider serving it with a drizzle of truffle oil on top to elevate those creamy flavors.
Ideal for cozy family nights, brunch gatherings, or holiday meals, it is sure to leave your guests oooh-ing and aaah-ing with each cheesy forkful!
Variations & Substitutions
Vegetarian Options: Add steamed broccoli, spinach, or caramelized onions for added nutrition and flavor.
Spicy Twist: Incorporate diced jalapeños or a dash of hot sauce into the cheese sauce for a spicy kick.
Warming Winter Dish: Try incorporating seasonal ingredients like butternut squash or pumpkin for a fall twist, making it a perfect holiday offering!
Nutrition & Storage Info
- Prep Time: 15 mins
- Cook Time: 30 mins
- Total Time: 45 mins
- Yield: Serves about 8
- Estimated Calories: About 450-500 per serving
Storage Instructions:
- Store leftovers in the refrigerator for up to 4 days.
- Can also be frozen for up to 3 months; however, you may need to add a little milk when reheating to restore its creaminess.
FAQ Section
Can I use different pasta shapes?
Absolutely! While elbow macaroni is classic, feel free to use shells, penne, or any type of pasta you love.How do I make it spicy?
Add some diced jalapeños or a teaspoon of cayenne pepper to the cheese sauce before mixing in the pasta.Can I prepare this in advance?
Yes! Prepare it beforehand and keep it in the refrigerator until you’re ready to bake.How can I make it healthier?
You can substitute whole milk with low-fat milk and whole wheat pasta for a healthier version.Can I use different cheeses?
Definitely! Feel free to experiment with different cheese combinations such as gouda, fontina, or even a sprinkle of blue cheese for depth.How do I store leftovers?
Store in an airtight container in the refrigerator for up to 4 days, or freeze for up to 3 months.What can I serve it with?
It pairs beautifully with salads, grilled meats, or roasted vegetables.Why is my cheese sauce grainy?
This usually happens if the cheese isn’t fully melted or if it was added while the sauce was too hot. Make sure to remove the sauce from heat before adding cheese.Can I bake it from frozen?
Yes! Just add an extra 10-15 minutes to the baking time if cooking from frozen.Is mac and cheese gluten-free?
It can be! Just use gluten-free pasta and ensure all other ingredients are certified gluten-free.
Conclusion
Making this Old Fashioned Baked Macaroni and Cheese Recipe is more than just preparing a dish; it’s about creating memories, indulging in comfort, and sharing love with every cheesy bite. I encourage you to give it a try and see the smiles it brings to your family’s faces. Don’t forget to let me know how it turned out in the comments below!
And if you love this recipe, be sure to check out my other comfort food creations on the blog that will warm your heart and tantalize your taste buds. Happy cooking!

Old Fashioned Baked Macaroni and Cheese
Ingredients
Method
- In a large pot, bring water to a boil and add a generous amount of salt. Cook the macaroni according to package instructions until al dente, about 6-8 minutes. Drain and set aside.
- In a large saucepan, melt the butter over medium heat. Once melted, whisk in the flour and cook for about 1-2 minutes until it's a light golden color.
- Gradually whisk in the whole milk, stirring constantly until the mixture is smooth and thickens, about 5-7 minutes.
- Remove the sauce from heat, and slowly add in cheddar, Gruyere, and Parmesan cheeses. Stir until melted and creamy.
- Add the cooked pasta to the cheese sauce, along with the onion powder, salt, black pepper, paprika, and garlic powder. Stir until the pasta is fully coated.
- In a small bowl, mix panko breadcrumbs with melted butter, pinch of salt, and dried parsley.
- Preheat your oven to 350°F (175°C). Pour the cheesy pasta into a greased 3-quart baking dish. Top with the seasoned panko mixture, ensuring an even layer.
- Bake in the preheated oven for 25-30 minutes until bubbly and golden brown on top. Let it rest for about 5-10 minutes before serving for a cleaner cut when portioning it out.