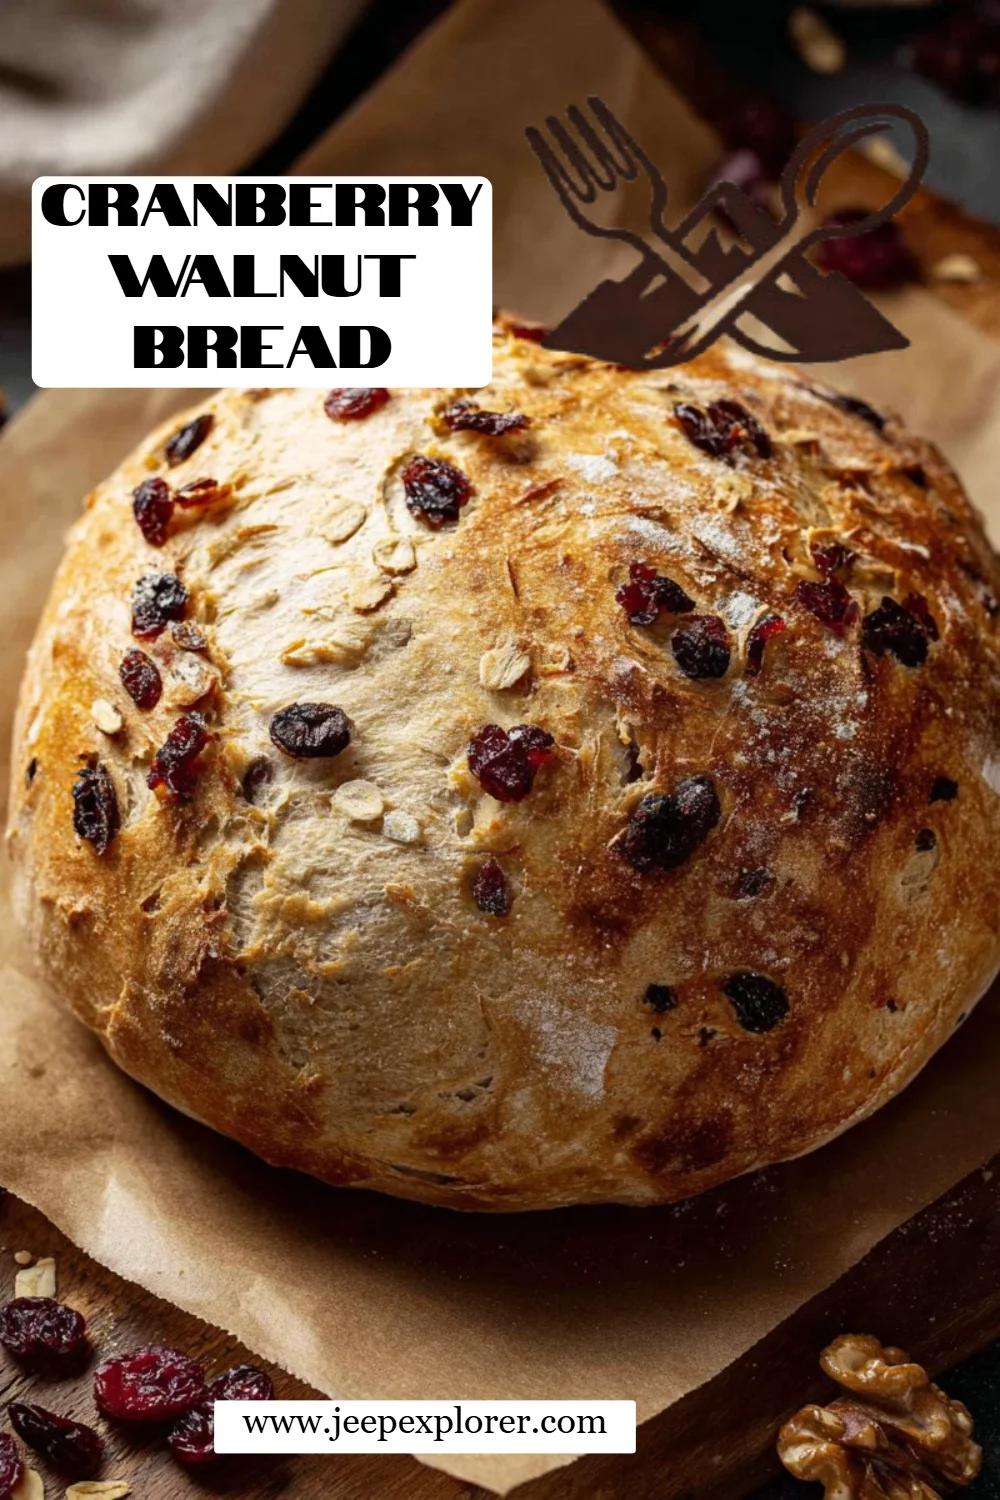
I still remember the first time I pulled a loaf of Cranberry Walnut Bread out of my oven. The high, golden crust cracked open, releasing the sweet and nutty aroma that wafted through my kitchen like a comforting hug. It was a rainy Sunday afternoon, and I was trying to find a way to bring some warmth to the dreary weather. I invited family over, and as I sliced the bread, I encountered a flood of joy and nostalgia—this was not just bread; it was a heartfelt memory. The tartness of cranberries blended perfectly with the earthy crunch of walnuts—every bite was a reminder of home.
You might be wondering why this recipe stands out in a sea of others. Well, it’s not just about the delicious taste. Unlike store-bought versions, my Cranberry Walnut Bread is made with love, simple ingredients, and a long fermentation process that yields an incredible depth of flavor. Plus, it is remarkably easy to make and requires minimal hands-on time!
In this post, I promise to guide you step-by-step to create your own magic loaf at home. Whether you want to impress guests or simply treat yourself, you’ll be armed with all the tips and tricks to nail this recipe!
What Are Cranberry Walnut Bread?
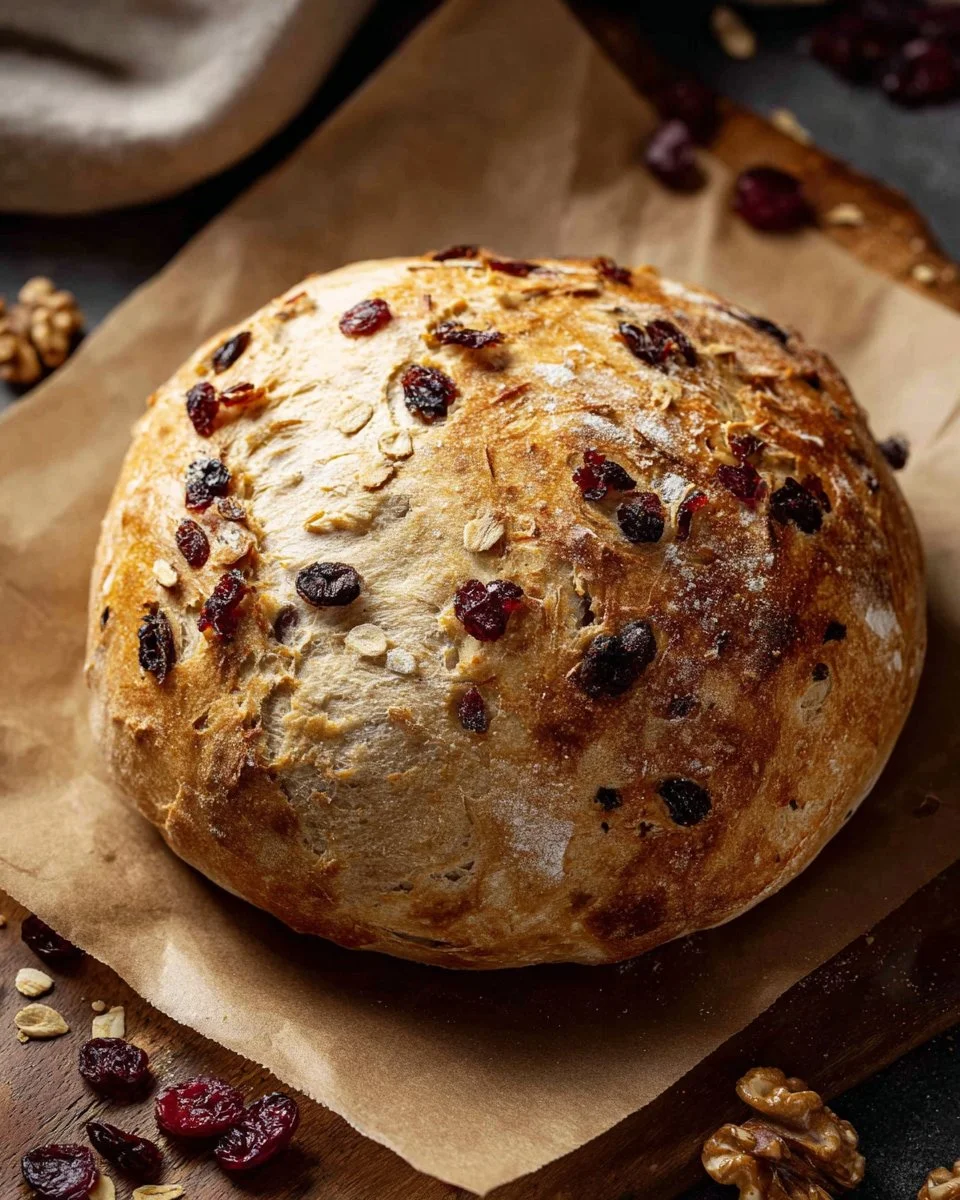
Cranberry Walnut Bread has a delightful history that celebrates the fusion of flavors between sweet and savory. Originating from rustic homes in the northern states where cranberries grow abundantly, it combines the tartness of seasonal cranberries with the crunch of walnuts for a perfect balance.
The taste profile is heavenly: sweet macaroon-like notes from the cranberries contrast beautifully with the nutty undertones of toasted walnuts. Texture-wise, you can expect a crunchy crust that gives way to a soft, chewy interior—each slice feels both indulgent and wholesome.
This bread is perfect for various occasions: serve it up during the holidays as a show-stopping centerpiece, enjoy a slice for breakfast with a smear of cream cheese and a drizzle of honey, or savor it on a cozy winter night with a cup of tea. No matter when you choose to make it, your kitchen will be filled with enchanting aromas that instantly lift your spirits!
Why You’ll Love This Recipe
Homemade Goodness: There’s an unmatched satisfaction in creating a loaf from scratch that simply can’t be compared to buying factory-made bread. Each slice holds a piece of your effort and love.
Cost-Effective: Let’s face it—artisan bread can cost a pretty penny. Making your own Cranberry Walnut Bread at home cuts costs significantly while ensuring you have fresh bread at your fingertips.
Customization Options: Not a fan of walnuts? Swap in pecans or almonds! Want an extra twist? Try adding in orange zest for a citrusy kick or a sprinkle of cinnamon for warmth.
Easy to Make: This isn’t a recipe that requires extensive baking skills or fancy gadgets. It’s a straightforward, hands-off process with detailed instructions, making it accessible for every level of baker.
Time to Get Cozy: While it does need about 18 hours to rise, most of that time is hands-off, making it perfect for a lazy weekend project. Imagine waking up to freshly baked bread just waiting for you to enjoy with your morning coffee.
Ingredients
- 3 cups (375 g) all-purpose flour: Look for high-protein bread flour for a chewier texture.
- 1 teaspoon kosher salt: This is crucial for flavor; avoid table salt as it can be too salty.
- 1 teaspoon rapid-rise yeast: This yeast helps your bread rise quickly, but if you have active dry yeast, it can work just as well.
- 1 1/2 cups water, room temperature: Make sure it’s not too hot, as it can kill the yeast.
- 2 tablespoons honey: This natural sweetener enhances the flavor of the bread. Maple syrup can be used as a substitute.
- 1 cup (110 g) dried cranberries: Use sweetened cranberries for a delightful taste; if you prefer tart, go for unsweetened.
- 1/2 cup (58.5 g) walnuts, roughly chopped: Toasted walnuts provide extra depth—just toss them in the oven for 5-7 minutes at 350°F.
Make sure to have your ingredients at room temperature before you begin kneading; it makes a world of difference in bread making!
Step-by-Step Instructions
Combine Dry Ingredients: In a large mixing bowl, combine 3 cups (375 g) of all-purpose flour, 1 teaspoon of kosher salt, and 1 teaspoon of rapid-rise yeast. Whisk these together until blended.
Mix in Wet Ingredients: Add 1 1/2 cups of room temperature water and 2 tablespoons of honey into the bowl. Mix until all the ingredients come together into a shaggy dough.
Add Cranberries and Walnuts: Fold in 1 cup (110 g) of dried cranberries and 1/2 cup (58.5 g) of roughly chopped walnuts, ensuring they are evenly distributed through the dough.
First Rise: Transfer the dough to a clean, greased bowl, cover it with plastic wrap, and let it rise at room temperature for 18 hours. After this time, it should have doubled in size.
Shape the Dough: Once ready, place the dough onto a floured piece of parchment paper. Gently stretch and fold it over itself to form a round ball. Lightly spray this dough ball with nonstick cooking spray, cover it with plastic wrap, and let it rest for an additional 30 minutes.
Preheat the Oven: Place your Dutch oven into a cold oven, then preheat the oven to 450°F. Let the pot heat up as the oven warms for a golden crust.
Score the Loaf: Using a sharp knife, score the top of the dough with an “X” to allow steam to escape during baking.
Bake the Bread: Once the oven is preheated, carefully transfer the dough on the parchment paper into the hot Dutch oven. Cover with the lid and bake for 30 minutes. Then, remove the lid and bake for an additional 15 minutes, or until the top is golden brown.
Cooling Time: Remove the loaf from the Dutch oven, letting it cool on a wire rack for about 30 minutes before slicing and serving.
Chef’s Tip: The bread can be sliced even better when it’s slightly cooled rather than hot out of the oven—trust me!
Expert Tips & Tricks
- Ingredient Quality: Always use the freshest ingredients you can find; this makes a significant difference in flavor.
- Hydration Level: If your dough feels too dry, add a tablespoon of water at a time until you reach the desired consistency; the bread should be slightly sticky.
- Storage: If you have leftovers, store them in an airtight bag at room temperature for up to 3 days. You can freeze individual slices for up to three months!
- Make Ahead: The dough can be prepared and mixed the night before and left to rise overnight. Your morning selves will thank you for the easy breakfast.
- Troubleshooting: If your bread doesn’t rise well, check the freshness of your yeast and ensure you’ve activated it properly.
Serving Suggestions
Cranberry Walnut Bread is delicious on its own; however, it pairs beautifully with a range of accompaniments. Try toasting slices and topping them with whipped cream cheese and honey for an indulgent breakfast or serve alongside a hearty soup for a cozy dinner. Presentation is key; consider serving your bread on a wooden board surrounded by fruits or cheese for a rustic touch.
I recommend using it as a centerpiece for holiday gatherings; it adds warmth and invites conversation.
Variations & Substitutions
- Different Flavor Combinations: For a fall twist, use dried figs instead of cranberries and flaxseeds in place of walnuts.
- Dietary Restrictions: Gluten-free or paleo? Substitute all-purpose flour with a gluten-free blend or almond flour, adjusting the liquid as necessary.
- Seasonal Variations: Incorporate zests from oranges or lemon for summer, or mix in spices like nutmeg and cloves during the winter holidays to create a festive flair.
Nutrition & Storage Info
- Prep Time: 15 minutes
- Cook Time: 45 minutes
- Total Time: 18 hours and 1 hour
- Yield: About 12 slices
- Estimated Calories: Approximately 160 calories per slice
- Storage Instructions: Store at room temperature for up to 3 days. Freeze for up to 3 months.
FAQ Section
Can I use whole wheat flour instead of all-purpose?
Yes, but you may need to adjust the liquid as whole wheat flour absorbs more moisture.What can I use instead of honey?
Maple syrup or agave nectar works well as a direct substitute.Is it possible to make this bread without nuts?
Absolutely! You can omit walnuts or replace them with seeds if necessary due to allergies.Why is my bread dense?
A dense loaf might be due to not enough yeast, not kneading enough, or using too much flour.Can I add additional toppings before baking?
Yes! Topping with seeds or oats adds a nice crunch. Just be sure they won’t burn.How do I know if my bread is done baking?
The bread should be golden brown on top and sound hollow when tapped on the bottom.What if I forgot to use honey?
While it adds sweetness, you can omit it, but the flavor will differ slightly.Should I slice my bread while it’s hot?
For best results, let it cool for about 30 minutes before cutting. This helps preserve the texture.Why does my dough not rise?
Possible reasons could be expired yeast, too cold environment, or not enough time allowed for rising.Can I make the dough in advance and bake later?
I recommend shaping and refrigerating your dough for up to 12 hours before you bake.
Conclusion
Cranberry Walnut Bread is more than a recipe; it’s an experience that embodies warmth, comfort, and joy. The blend of flavors and textures creates a loaf that is not only pleasing to the palate but also to the soul. I encourage you to try this recipe and create your own beautiful memories around the kitchen table. If you enjoyed this bread or made any variations of it, drop a comment below—I’d love to hear your feedback! And if you’re hungry for more delicious recipes, don’t miss out on my other bakes on the blog.
Irresistible Monster Cookie Cheesecake: Your New Favorite Dessert Adventure!
Happy baking!

Cranberry Walnut Bread
Ingredients
Method
- In a large mixing bowl, combine 3 cups of all-purpose flour, 1 teaspoon of kosher salt, and 1 teaspoon of rapid-rise yeast. Whisk together until blended.
- Add 1 1/2 cups of room temperature water and 2 tablespoons of honey into the bowl. Mix until all ingredients come together into a shaggy dough.
- Fold in 1 cup of dried cranberries and 1/2 cup of roughly chopped walnuts, ensuring they are evenly distributed through the dough.
- Transfer the dough to a clean, greased bowl, cover with plastic wrap, and let it rise at room temperature for 18 hours.
- Place the dough onto a floured piece of parchment paper. Gently stretch and fold it over itself to form a round ball. Lightly spray with nonstick cooking spray, cover with plastic wrap and let it rest for an additional 30 minutes.
- Place your Dutch oven into a cold oven, then preheat the oven to 450°F.
- Score the top of the dough with an ‘X’ to allow steam to escape during baking.
- Transfer the dough on parchment paper into the hot Dutch oven. Cover with the lid and bake for 30 minutes, then remove the lid and bake for an additional 15 minutes or until golden brown.
- Remove the loaf from the Dutch oven and let it cool on a wire rack for about 30 minutes before slicing and serving.