Growing up, the kitchen was where my family gathered—not just for meals but for memories. I can still picture my grandmother’s kitchen, fragrant with the sweet scent of layers of cake being assembled with whipped cream and cherry filling. Among the diverse desserts my family loved, White Forest Cake held a special place in our hearts. The combination of fluffy white cake, rich cream, and tart cherries always felt like a celebration. Today, I’m thrilled to share my take on this classic treat, which I believe surpasses many store-bought versions.
What sets this White Forest Cake apart is not just its delectable flavors, but the techniques I’ve honed over the years, ensuring every bite melts in your mouth. Beyond just a recipe, this cake is a labor of love—a way to bring joy to your table during holidays or special gatherings. I still remember the look on my family’s faces when I made this for the first time; it was priceless! Today, I want to share those same flavors and memories with you and promise to guide you through every step to create your own White Forest Cake masterpiece.
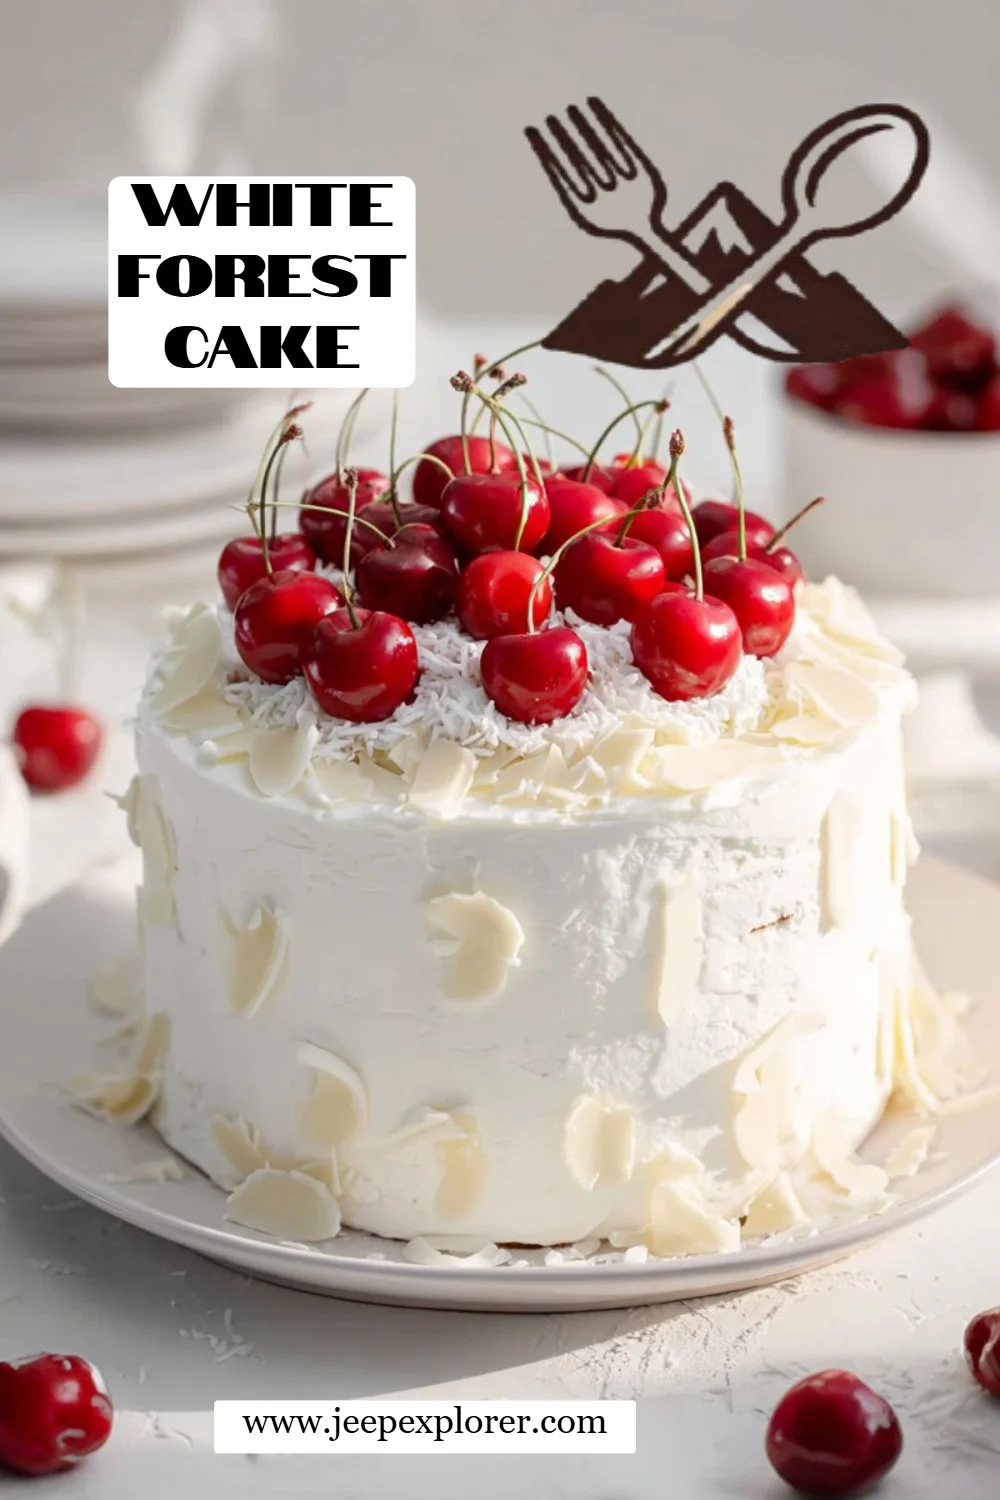
What Are White Forest Cakes?
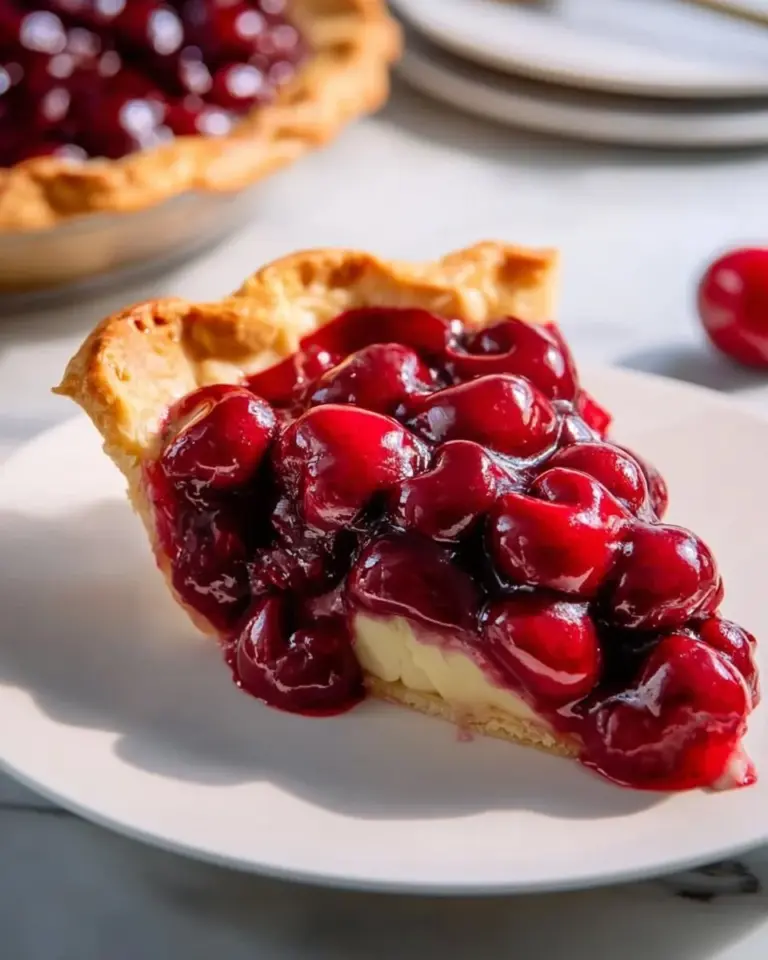
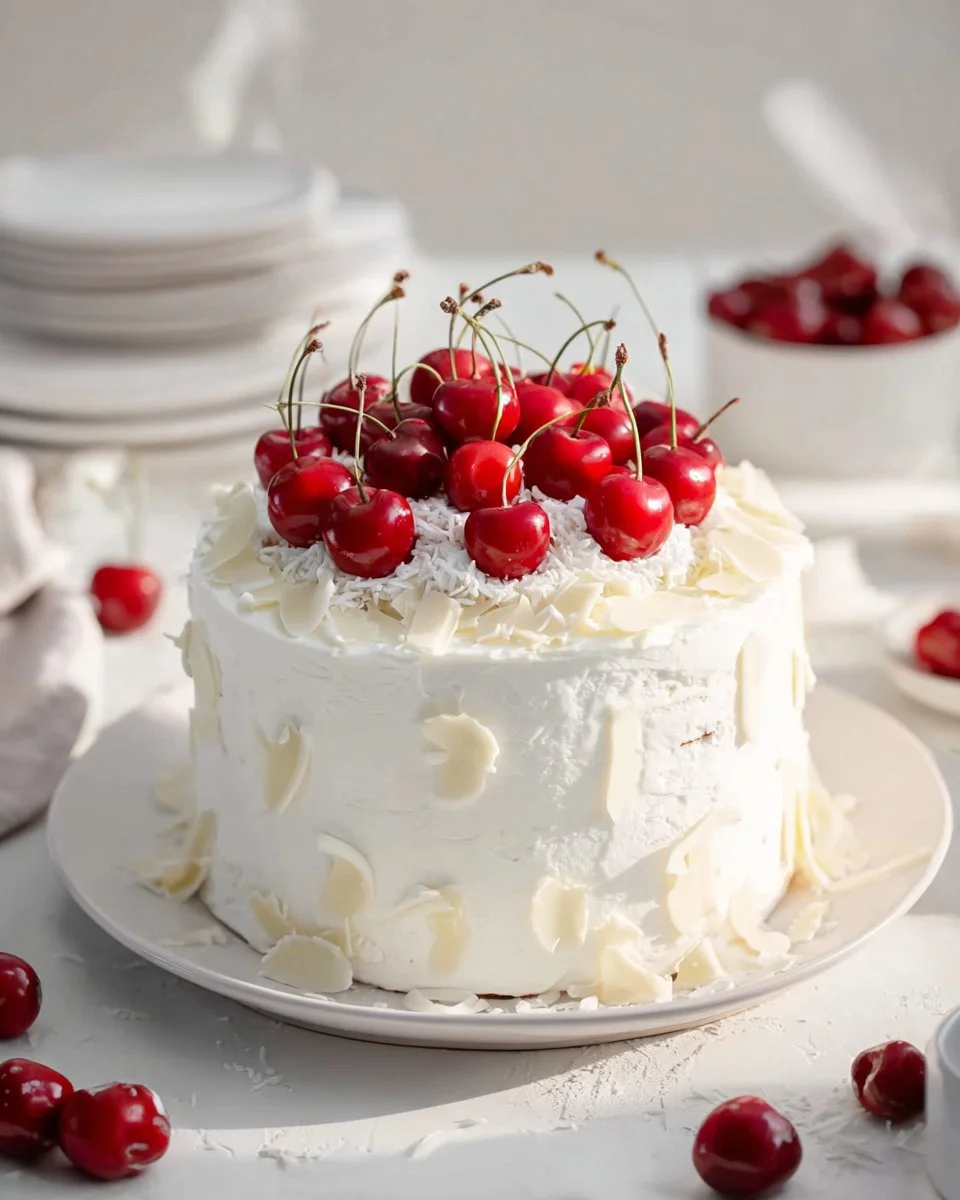
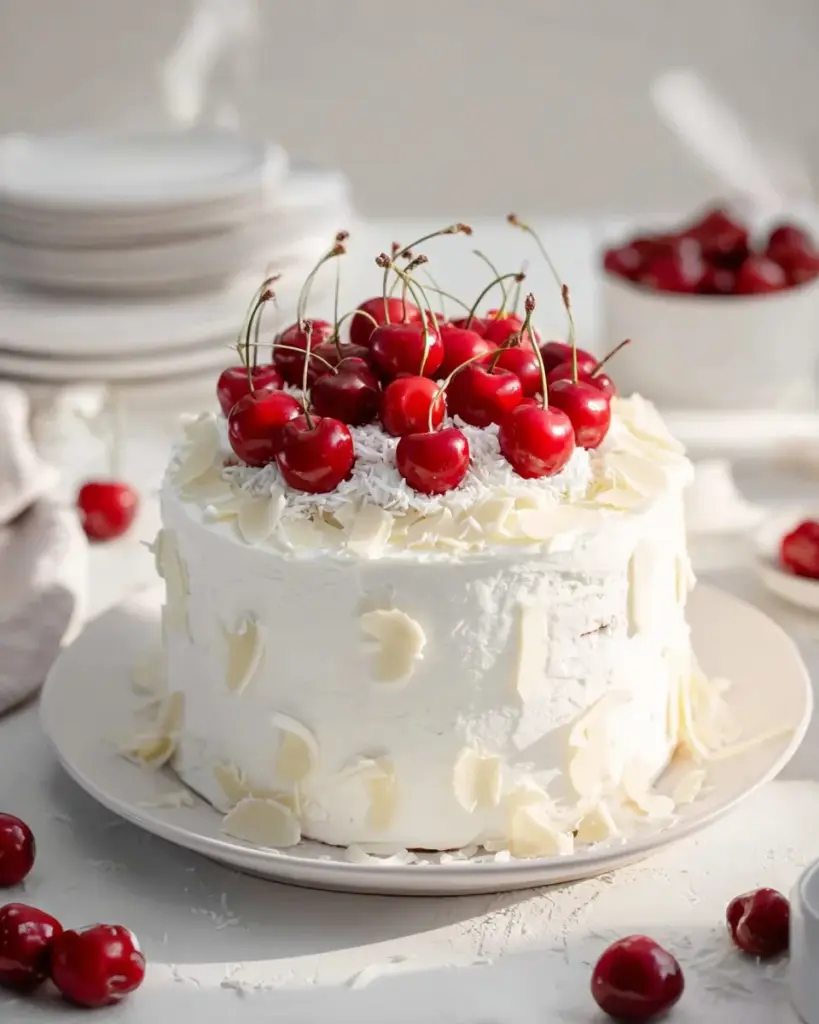
The White Forest Cake is a delightful twist on the traditional Black Forest Cake, tracing its roots back to the Black Forest region of Germany. While the Black Forest is known for its rich chocolate layers paired with cherries and whipped cream, the White Forest Cake beautifully swaps chocolate for a lighter, fluffy white cake. The resulting treat is a delicate balance of flavors, featuring soft, moist layers paired with creamy frosting and vibrant cherries.
With a taste that strikes a balance between sweet and slightly tart, biting into a piece of this cake is like experiencing a slice of pure joy. The velvety texture of the cake, combined with the luscious whipped cream and bursts of cherry filling, makes it a dessert that’s perfect for celebrating any occasion—from birthdays to holidays. Whether served at a lavish dinner party or a casual family gathering, this cake is not just a dessert; it’s an experience that unites family and friends.
Why You’ll Love This Recipe
Let me share a few reasons why this White Forest Cake recipe stands out from the rest:
Homemade Goodness: Unlike most store-bought cakes that can be overly sweet or filled with preservatives, this recipe offers a fresh, homemade flavor that you can genuinely taste in every bite.
Cost-Effective: Making your own cake at home is not only more rewarding but also more affordable. With just a handful of ingredients, you can whip up this decadent dessert without breaking the bank.
Customization Galore: Feel free to play with flavors! Want to add a twist? You can integrate different fruits or flavor extracts to suit your taste. Maybe a hint of lemon or a splash of rum? The possibilities are endless.
Satisfying Experience: This recipe isn’t just easy but enjoyable! It allows you to connect with your cake while you’re making it, ensuring that the experience is as rewarding as the result.
Skill-Level Friendly: Whether you’re a seasoned baker or just starting, this White Forest Cake recipe gives you the chance to shine without feeling overwhelmed. With simple steps, you’ll feel like a pro in no time.
Are you ready to dive into making the perfect White Forest Cake? Let’s gather our ingredients and get started!
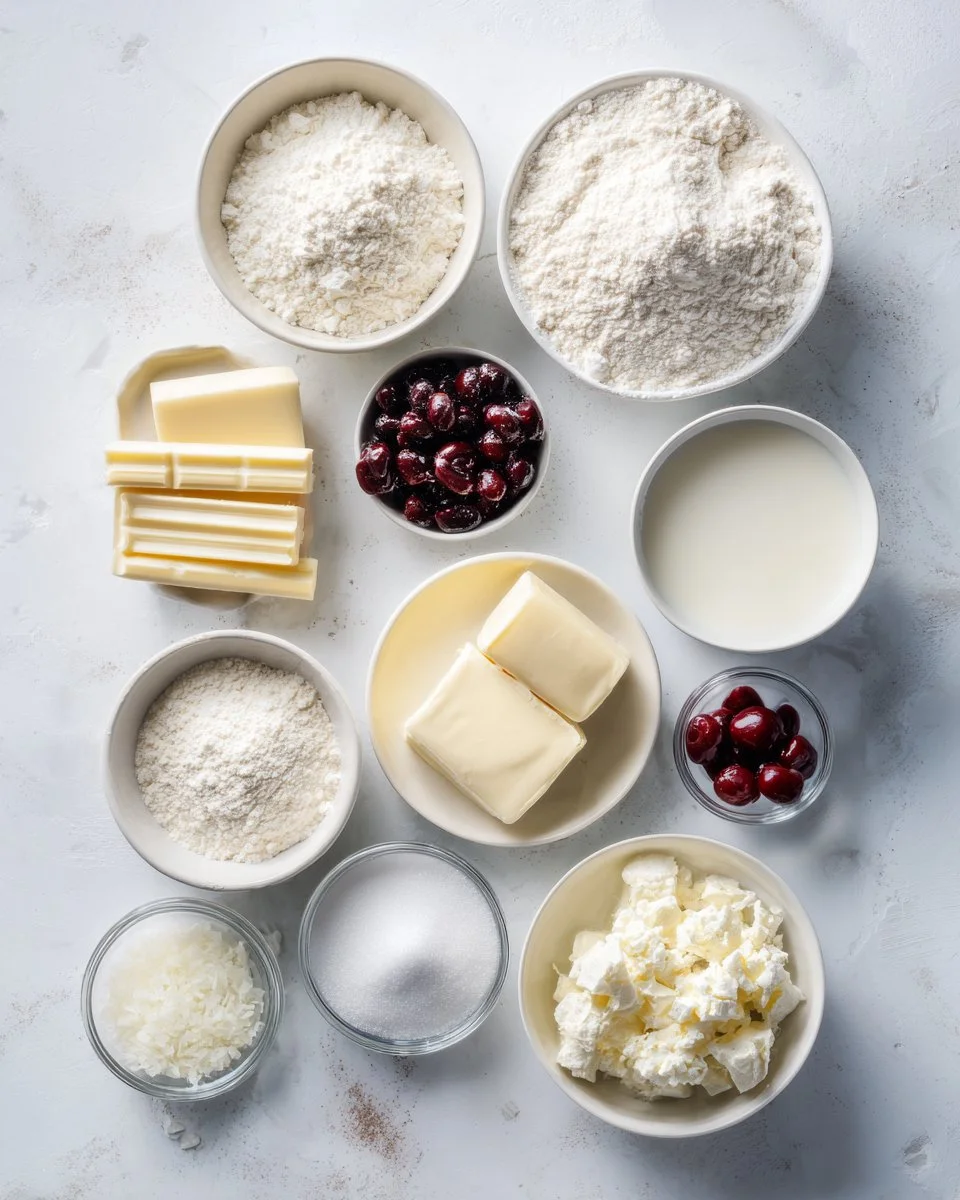
Ingredients
For the Cake:
- 2 ¾ cups (357 g) cake flour (look for high-quality brands like King Arthur for best results)
- 2 teaspoons baking powder
- ¾ teaspoon kosher salt
- 2 ½ cups (500 g) granulated sugar (I love using organic sugar for a richer flavor)
- 1 cup (2 sticks / 227 g) unsalted butter, room temperature
- 2 teaspoons vanilla extract (real extract makes a difference!)
- 1 teaspoon almond extract
- 5 large egg whites, room temperature
- 1 cup (245 g) whole milk, room temperature
For the Whipped Cream Filling:
- 2 ounces cream cheese, softened
- ½ cup (100 g) granulated sugar
- 2 cups (476 g) heavy whipping cream, very cold
- ½ teaspoon vanilla extract
- 1 pinch kosher salt
For the Topping:
- 1 can (21 ounces) cherry pie filling, divided (I prefer brands that use real fruit)
- 4 ounces white chocolate bar, made into curls, divided
- Fresh cherries, for garnish
Prep Notes:
- Ensure your butter and egg whites are at room temperature for proper mixing.
- For the cream, chill your mixing bowl and beaters beforehand for best results.
Step-by-Step Instructions
Preheat the oven to 350°F (175°C). Line the bottoms of three 8-inch round cake pans with parchment paper and spray them lightly with nonstick cooking spray. This ensures easy release.
Prepare the Dry Ingredients: In a large bowl, whisk together the cake flour, baking powder, and salt. This helps to evenly distribute the baking powder throughout the flour.
Cream the Butter and Sugar: In the bowl of a stand mixer, beat together the granulated sugar and unsalted butter on medium speed until light and fluffy—around 5 to 7 minutes. The color should lighten and the mixture should look airy.
Add Flavors & Eggs: Next, add in the vanilla and almond extracts. Then, incorporate the egg whites one at a time, making sure to mix well after each addition.
Combine Dry and Wet: Gradually mix in the flour mixture and milk in alternating batches, starting and ending with flour (flour, milk, flour, milk, flour). Blend until just combined.
Bake the Cakes: Divide the batter evenly among the three prepared pans. Bake for 22-24 minutes, or until a toothpick inserted in the center comes out clean. Keep an eye on them—the tops should be lightly golden and spring back when touched.
Cool Down: Allow the cakes to cool in the pans for about 10 minutes. Then, carefully transfer them to a wire rack to cool completely.
Make the Whipped Cream: In the chilled mixing bowl, combine the softened cream cheese and sugar until smooth. Add the cold heavy cream, beating until soft peaks form. Finally, whip in the vanilla and a pinch of salt. You want the whipped cream to be fluffy, not too stiff.
Layer the Cake: It’s time for assembly! Place one cake layer on a serving platter. Spread a layer of whipped cream on top, followed by cherry pie filling, and sprinkle some white chocolate curls. Repeat for the next layer.
Frost and Garnish: For the outer layer, frost the cake generously with the remaining whipped cream. Garnish with fresh cherries and additional white chocolate curls on top.
Serve & Enjoy: Slice up your masterpiece and revel in the joy this cake will bring.
Chef’s Tips:
- Keep an eye on the cakes towards the end of the baking time—every oven is different.
- To avoid crusty edges, avoid over-mixing your batter.
Common Mistakes to Avoid:
- Overbaking will lead to a dry cake, so always check with a toothpick before the timer goes off!
- Ensure your heavy cream is cold before whipping for the best volume.
Expert Tips & Tricks
Here are some pro tips to ensure your White Forest Cake turns out perfectly:
Quality Ingredients Matter: Opt for high-quality butter and real extracts. Fresh ingredients can make a significant difference in flavor and texture.
Ensure Room Temperature: Both butter and eggs need to be at room temperature for easy and effective mixing.
Traveling Convenience: If you plan to transport the cake, consider assembling it once you reach your destination. The assembled cake is delicate and might fall apart during transit.
Storage Recommendations: This cake can be stored in the refrigerator for 3-4 days. Keep it covered to avoid it drying out.
Make-Ahead Directions: You can bake the cakes a day in advance. Just wrap them tightly in plastic wrap and refrigerate to maintain freshness.
Troubleshooting: If your whipped cream isn’t whipping up, it may be that your bowl wasn’t cold enough—chill everything before starting.
Serving Suggestions
This White Forest Cake is excellent on its own, but you can elevate its presentation by serving it with a scoop of vanilla ice cream or alongside fresh berries. For an added touch, decorate your serving plates with a drizzle of chocolate sauce or a sprinkle of crushed nuts.
Use it as a centerpiece for special occasions, whether it’s birthdays, anniversaries, or festive holiday gatherings. Our family often pairs it with a warm cup of coffee or tea. It truly makes for an indulgent afternoon treat!
Variations & Substitutions
Feeling adventurous? Here are a few alternatives to try:
- Fruit Swap: Instead of cherries, use strawberries or even raspberries for a summertime twist.
- Chocolate Lovers: Add a layer of dark chocolate ganache in between layers for an indulgent version of your White Forest Cake.
- Gluten-Free Version: Substitute with a gluten-free all-purpose flour blend; just ensure your baking powder is also gluten-free.
- Nutty Finish: Add crushed pistachios between layers for a nutty crunch.
Nutrition & Storage Info
- Prep Time: 30 minutes
- Cook Time: 24 minutes
- Total Time: 1 hour
- Yield: Serves 10-12 people
- Estimated Calories: 450 per slice
Storage Instructions:
- Store it in the fridge for up to 4 days.
- You can freeze individual slices for up to 2 months, neatly wrapped in plastic.
FAQ Section
Can I make this cake ahead of time?
Yes, you can bake the layers a day before. Just wrap them properly and refrigerate until assembling to keep them moist.What’s the best way to store the cake?
Covered in the fridge, it will stay fresh for about 3-4 days before it starts to dry out.Can I use frozen cherries instead of canned?
Absolutely! Just ensure they are thawed and drained well before use.How do I ensure my cake layers are even?
Use an offset spatula to smooth the batter in the pans, ensuring even layers when baking.What if I don’t have almond extract?
You can simply double the vanilla extract or use a different flavor extract like hazelnut for a nice twist.Can I freeze the cake?
Yes, I recommend freezing individual slices to enjoy later; just wrap them tightly.Is it okay to skip the cream cheese in the whipped cream?
You can opt to leave it out, but it adds a lovely tang and richness to the cream.Can I use a different size pan?
Yes, just adjust the baking time accordingly. A larger pan will require longer baking, while smaller pans will bake quicker.What type of cherries should I use?
Fresh cherries are ideal for garnishing. For filling, I recommend using good quality canned cherries or homemade cherry compote.What can I do if my whipped cream doesn’t whip?
Ensure your cream is cold and make sure your mixing bowl is also cold.
Conclusion
Creating a White Forest Cake is more than just baking; it’s a way to share joy and love with those around you. It’s a comforting reminder of family gatherings and exquisite flavors—each slice is a tribute to beautiful memories. So why not roll up your sleeves and give it a try? I would love to hear your feedback and any tips you might have. Don’t forget to check out other delicious dessert recipes like Strawberry Thumbprint Cookies there’s a world of baking joy waiting for you!
White Forest Cake
Ingredients
Method
- Preheat the oven to 350°F (175°C). Line the bottoms of three 8-inch round cake pans with parchment paper and spray them lightly with nonstick cooking spray.
- In a large bowl, whisk together the cake flour, baking powder, and salt.
- In the bowl of a stand mixer, beat together the granulated sugar and unsalted butter on medium speed until light and fluffy—around 5 to 7 minutes.
- Add in the vanilla and almond extracts. Then, incorporate the egg whites one at a time.
- Gradually mix in the flour mixture and milk in alternating batches, starting and ending with flour.
- Divide the batter evenly among the three prepared pans. Bake for 22-24 minutes, or until a toothpick inserted in the center comes out clean.
- Allow the cakes to cool in the pans for about 10 minutes, then carefully transfer them to a wire rack to cool completely.
- In the chilled mixing bowl, combine the softened cream cheese and sugar until smooth.
- Add the cold heavy cream, beating until soft peaks form. Whip in the vanilla and a pinch of salt.
- Place one cake layer on a serving platter. Spread a layer of whipped cream on top, followed by cherry pie filling, and sprinkle white chocolate curls. Repeat with the next layer.
- Frost the outer layer generously with the remaining whipped cream. Garnish with fresh cherries and additional white chocolate curls.
- Slice up your masterpiece and enjoy.