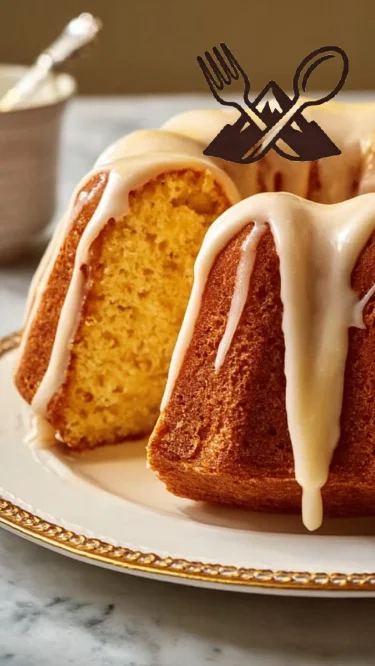
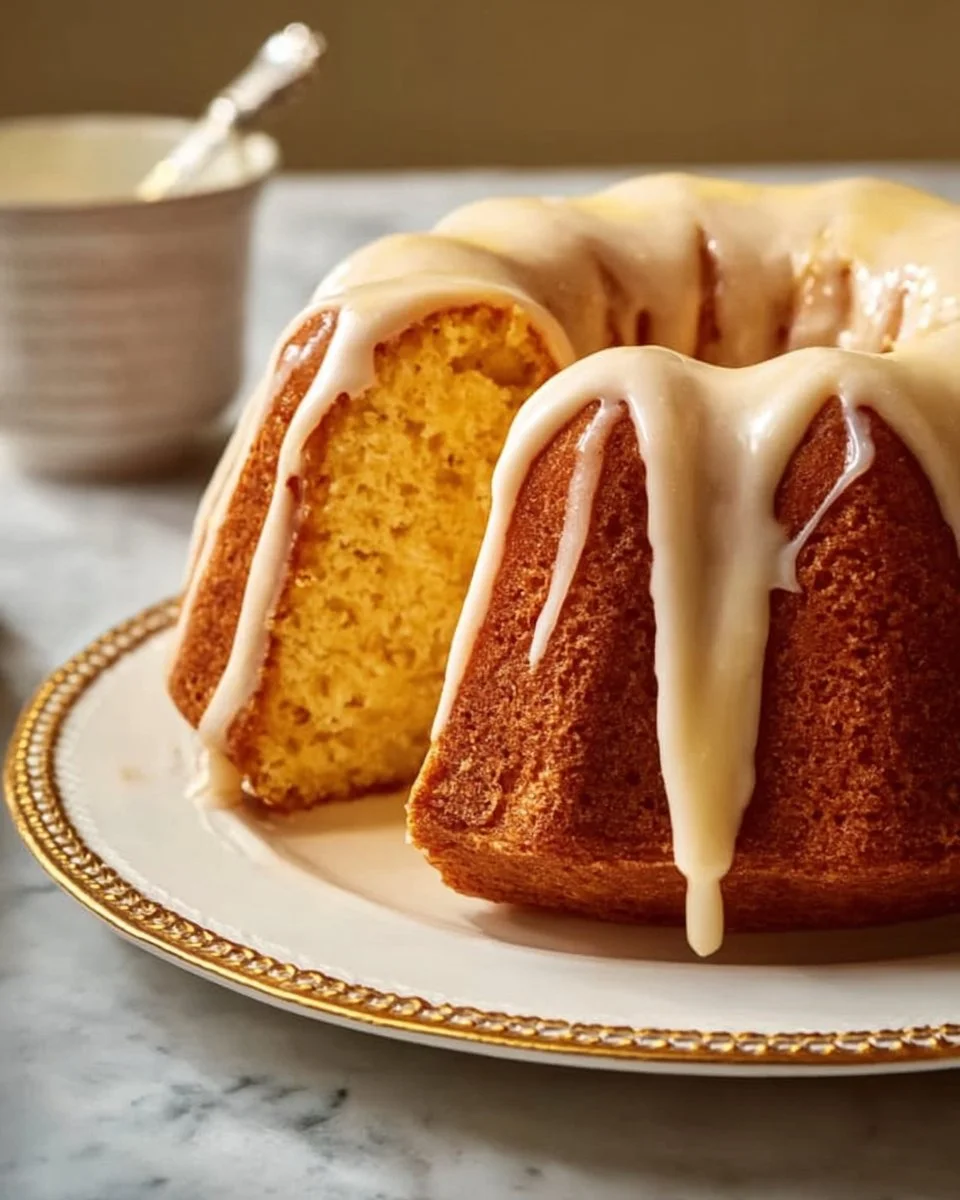
Every bite of a Kentucky Butter Cake is like a warm embrace from the south, and I’ll never forget the first time I tasted it. I was a young girl, sitting at my grandmother’s table, surrounded by the sweet aroma of vanilla wafting through the air. It was her signature dish, one that brought the entire family together on holidays and long summer afternoons. What makes this cake so special is not just its buttery richness but the love and the stories baked right into it.
Unlike many cakes that can feel overly sweet or dry, Kentucky Butter Cake strikes the perfect balance. It’s dense yet tender, with a decadent glaze that makes each bite melt in your mouth. Trust me, once you try this recipe, you’ll see why it’s vastly superior to anything from a store or restaurant. It’s a recipe steeped in warmth, tradition, and nostalgia, a true comfort food that many have cherished for generations.
In this post, I’m thrilled to share my family’s Kentucky Butter Cake recipe with you, along with tips and tricks that ensure your cake comes out perfect every single time. Grab your apron, and let’s dive into the exciting world of baking!
What Are Kentucky Butter Cakes?
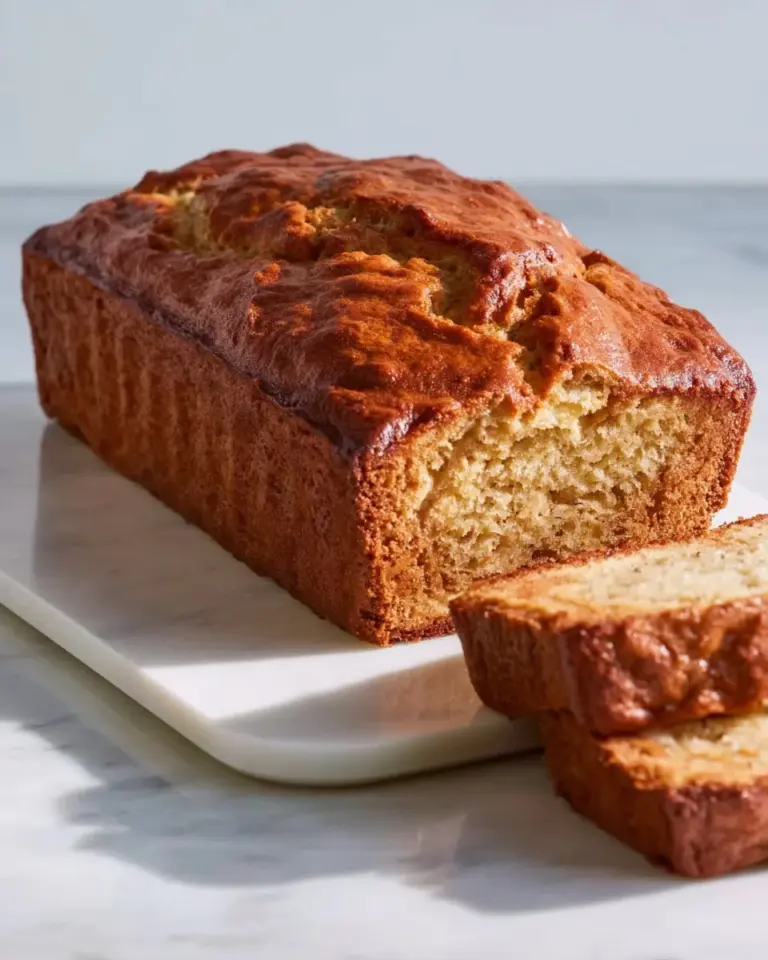
Kentucky Butter Cake finds its origins in the heart of the Bluegrass State, a classic southern dessert that has been beloved for generations. This delightful cake is known for its buttery flavor and irresistible glaze, making it a favorite for gatherings and celebrations.
With each slice, you’ll experience a slightly crunchy exterior that contrasts beautifully with the soft and moist interior. The rich glaze marries perfectly with the cake, soaking in and amplifying the buttery goodness. Whether it’s served at birthday parties, family reunions, or Sunday brunch, this cake has a timeless appeal that never goes out of style.
Kentucky Butter Cake is not just a dessert; it’s a memory-maker, a slice of comfort meant to be shared. Why whip one up? Because sometimes, nothing can lift the spirit quite like this heavenly treat, be it a rainy day or a joyous occasion.
Why You’ll Love This Recipe
Unmatched Flavor: I’ve tried cakes from bakeries, but nothing compares to the homemade goodness of this Kentucky Butter Cake. The combination of rich butter and the sweet glaze simply can’t be beaten!
Cost-Effectiveness: With pantry staples like flour, sugar, and eggs, this recipe allows you to create an impressive dessert without breaking the bank. Homemade always wins!
Customizable: Love chocolate? Add cocoa powder! Want a fruity twist? Incorporate lemon zest or berries! The possibilities for experimenting with this base are virtually endless.
Easy and Accessible: This recipe is beginner-friendly, so even if you’re a newbie baker, you’ll shine like a pro. Plus, most steps can be done within an hour, making it a quick go-to dessert.
Nostalgic Connection: There’s something magical about creating a recipe passed down through generations. Each time I bake this cake, I’m not just preparing dessert; I’m weaving family stories into the batter.
Ingredients
To create the magic of Kentucky Butter Cake, here’s what you’ll need:
2 cups all-purpose flour
- For the structure. Always use fresh flour for the best results.
1 ½ cups granulated sugar
- Pure sweetness. Organic sugar can enhance the flavor.
½ teaspoon salt
- Balances the sweetness.
1 teaspoon baking powder
- For that perfect rise.
½ teaspoon baking soda
- Works with the buttermilk for a tender crumb.
1 cup unsalted butter, softened
- Use high-quality butter, like Kerrygold, for rich flavor.
1 cup buttermilk
- Adds moisture and tenderness. If you don’t have buttermilk, you can easily make your own by adding a tablespoon of vinegar to a cup of milk.
4 large eggs
- Room temperature is ideal for easy blending.
2 teaspoons vanilla extract
- A must-have for that wonderful aroma and flavor.
**Glaze:
- 1 cup sugar
- ½ cup unsalted butter
- ¼ cup water**
- This heavenly glaze is what elevates the cake to another level!
Prep Notes: Ensure your butter is at room temperature; this helps in creating a smooth, creamy batter. Also, consider using high-quality vanilla extract—it really shines through!
Step-by-Step Instructions
Preheat the oven: Set your oven to 350°F (175°C) and grease and flour a bundt pan. Make sure the pan is well-prepped for easy release!
Mix dry ingredients: In a large bowl, combine 2 cups of flour, 1 ½ cups of sugar, ½ teaspoon of salt, 1 teaspoon of baking powder, and ½ teaspoon of baking soda. Whisk together until well combined.
Add the wet ingredients: In another bowl, add 1 cup of softened butter and 1 cup of buttermilk, and beat on medium speed until smooth.
Incorporate eggs: Add the eggs, one at a time, mixing well after each addition. Stir in 2 teaspoons of vanilla extract. The batter should be velvety and delightful!
Batter into the pan: Pour the luscious batter into the prepared bundt pan, smoothing the top with a spatula.
Bake: Place the pan in the oven and bake for 60-70 minutes. A toothpick inserted into the center should come out clean. Don’t forget to set a timer so it doesn’t overbake!
Prepare the glaze: While the cake is baking, melt ½ cup of butter in a saucepan, then add 1 cup of sugar and ¼ cup of water. Boil for about 3-4 minutes until the sugar dissolves.
Cool the cake: Once the cake is done, allow it to cool in the pan for 10 minutes. Then carefully invert it onto a serving plate.
Glaze the cake: Pour the warm glaze over the cake, making sure to cover every edge. Let it absorb in before serving.
Chef’s Tips: For a shiny glaze, don’t skip boiling it. And make sure your cake is warm but not hot when you pour the glaze to allow for optimal absorption.
Expert Tips & Tricks
Storage: This cake stays moist for days! Store it in an airtight container at room temperature, and it’ll last up to 5 days. You can refrigerate slices if you prefer a chilled taste.
Make-ahead: You can bake the cake a day in advance and glaze it just before serving. It actually gets better as the flavors meld overnight!
Troubleshooting: If your cake sinks in the middle, it’s usually due to overmixing or underbaking. Always check for doneness with the toothpick test.
Optional Add-ins: Consider folding in chopped nuts or chocolate chips for added texture and flavor.
Freezing: To freeze, wrap slices tightly in plastic wrap and store in a freezer bag for up to 3 months. Thaw individually at room temperature when ready to enjoy!
Perfect Bundt Release: For a flawless cake release, ensure the pan is well-greased and floured, and let the cake cool for a few minutes before inverting it.
Serving Suggestions
Serve your Kentucky Butter Cake with a scoop of vanilla ice cream or a dollop of whipped cream for that extra indulgence! Fresh berries or a sprinkle of powdered sugar also make for beautiful presentation. It’s perfect for occasions like family gatherings, birthday celebrations, or simply as a treat to enjoy with a cup of coffee.
Variations & Substitutions
Flavor Combinations: Experiment with flavor extracts like almond or lemon for a different twist. You can also add cocoa powder to the batter to create a chocolate version!
Dietary Preferences: To make this cake gluten-free, substitute the all-purpose flour with a 1:1 gluten-free baking blend. You could also use coconut oil in place of butter for a dairy-free option.
Seasonal Additions: In the fall, add in some pumpkin puree and spices for a cozy twist. In the summer, fresh berries folded into the batter can make this treat even more delightful.
Nutrition & Storage Info
- Prep Time: 30 minutes
- Cook Time: 60-70 minutes
- Total Time: 1.5 hours
- Yield: 12 servings
- Estimated Calories: 320-350 calories per slice, depending on portion size.
Storage instructions: Keep covered at room temperature for up to 5 days, or refrigerate. The cake can also be frozen for up to three months.
FAQ Section
Can I use regular milk instead of buttermilk?
- Yes, but consider adding a tablespoon of vinegar or lemon juice to make a buttermilk substitute.
Why is my cake dense?
- This can happen if the flour was packed too tightly or if there’s too much liquid. Make sure to measure your ingredients accurately.
Can I make this cake in advance?
- Absolutely! You can bake it ahead of time and glaze it just before serving.
Is it possible to replace the sugar in the recipe?
- You can use coconut sugar or other granulated sweeteners, but it might alter the taste slightly.
How do I know when the cake is done?
- Perform the toothpick test—when a toothpick inserted in the center comes out clean, it’s done.
Can I make a smaller version of this cake?
- Yes! You can halve the recipe and bake in a smaller pan.
What’s the best way to store leftover cake?
- Store it in an airtight container at room temperature for up to 5 days, or you can freeze slices.
How can I enhance the glaze flavor?
- Try adding a splash of vanilla extract or a bit of whiskey for a unique twist!
Can I add fruits to the batter?
- Yes! Just fold in fresh berries or banana for extra flavor, but remember to adjust the baking time!
What is the best type of bundt pan to use?
- A heavy, non-stick bundt pan works best to ensure easy release and even baking.
Conclusion
The Kentucky Butter Cake is more than just a dessert; it’s a heartwarming recipe that connects generations. With its rich flavors and inviting aroma, it’s a showstopper at any gathering. I truly hope you give this recipe a try—your taste buds will be oh-so-grateful! Don’t forget to share your thoughts and any variations you come up with in the comments below. For more sweet inspirations, check out other related recipes on my blog.
A Refreshing Take on the Dirty Grape Float: Your New Favorite Summer Treat!
Happy baking!