Growing up, cotton candy always brought a sense of giddy excitement. I remember the first time I tasted the sugary, airy treat at a county fair—my mouth bursting with the sweet, nostalgic flavor. Fast forward to adulthood, and that memory inspired me to create my own version of joy: the Cotton Candy Cake. This cake isn’t just dessert; it’s a slice of happiness that rekindles childhood memories with every bite!
What makes this Cotton Candy Cake special is its beautiful, fluffy layers infused with the delightful flavor of cotton candy. Unlike other recipes that can come out dry or overly sweet, this one strikes the perfect balance between moistness and flavor, making it a standout treat for every celebration.
In this post, I’ll share not just the recipe, but also tips and tricks that will help you whip up a show-stopping dessert that will have your guests talking. Whether you’re hosting a birthday party, a baby shower, or just a fun family gathering, this cake is guaranteed to bring smiles. So grab your apron, and let’s dive into creating a Cotton Candy Cake that’s as light as a summer breeze!
WHAT ARE Cotton Candy Cakes?
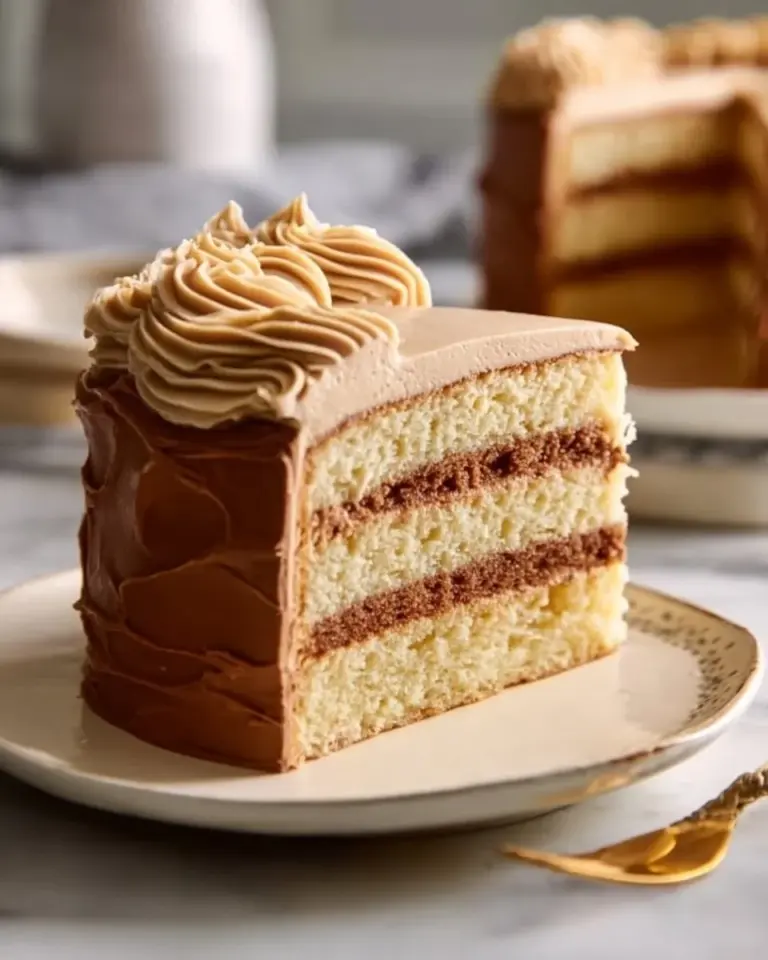
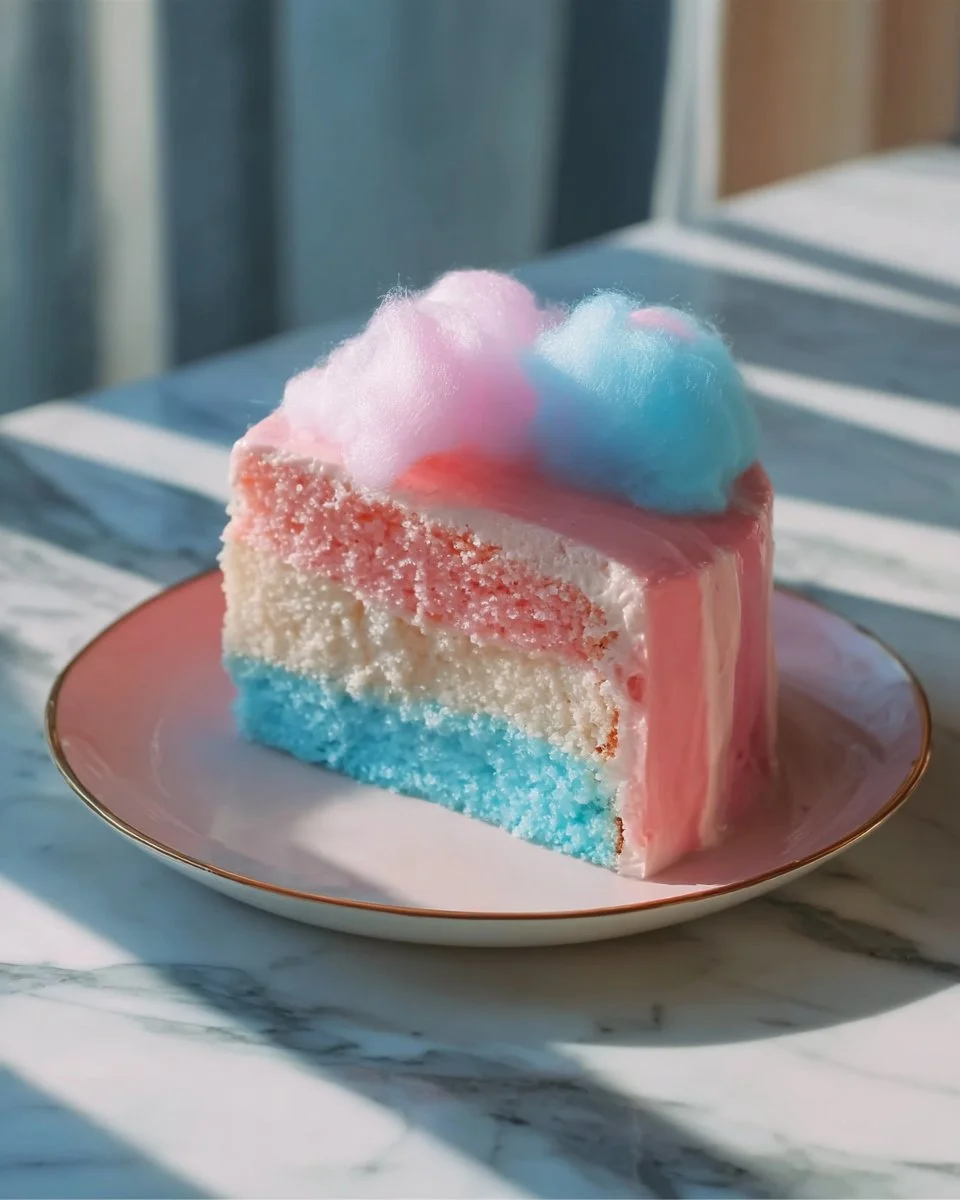
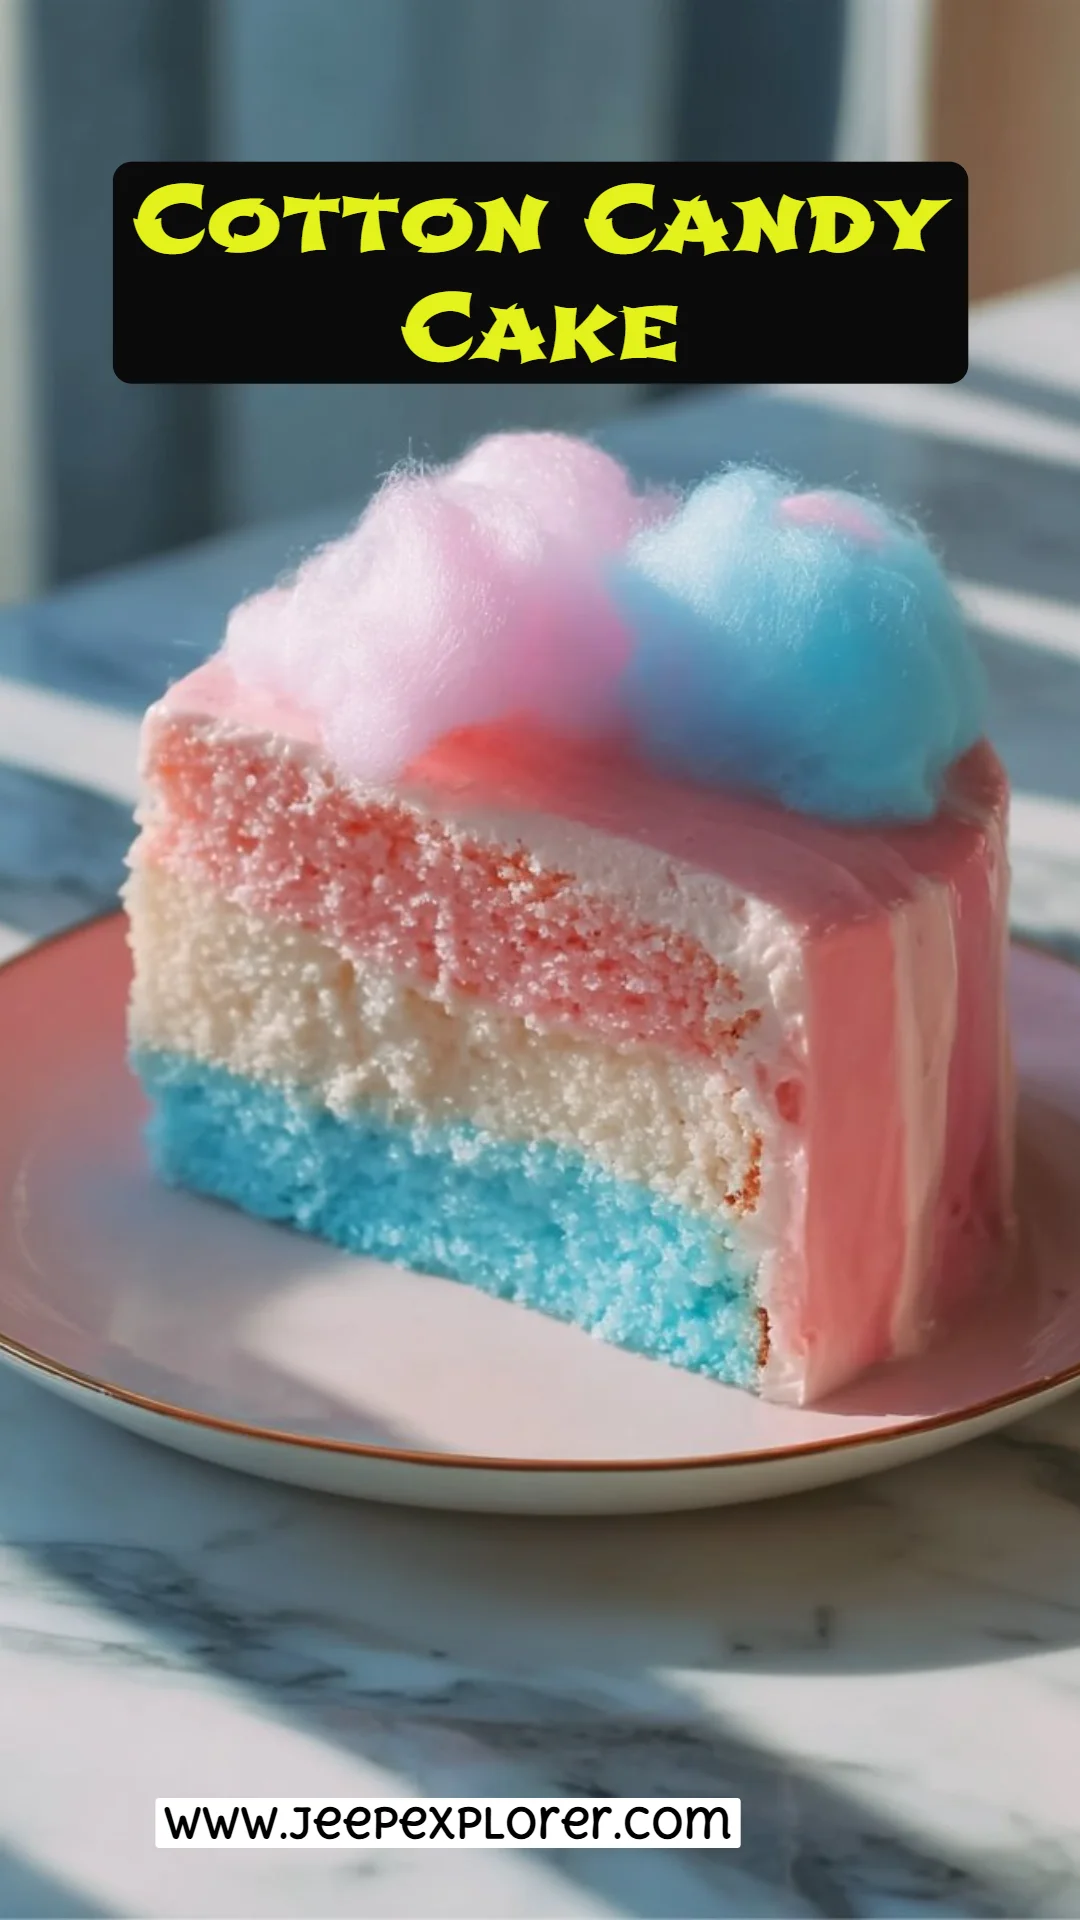
The Cotton Candy Cake is a whimsical dessert that marries the fun of fairground treats with the richness of traditional cake. It’s composed of three colorful layers—one plain, one pink, and one blue—each treated with a fluffy buttercream infused with the unmistakable flavor of cotton candy.
The cake has a soft, moist texture that melts in your mouth, while the layers provide both visual and taste appeal. What makes it unique is not only its eye-catching design but also its ability to evoke sweet childhood memories, making cake cutting a delightful experience.
Ideal for birthday celebrations or any festive event, you can whip up this treat whenever you’re in search of a fun, nostalgic dessert!
WHY YOU’LL LOVE THIS RECIPE
Nostalgic Flavor: The cotton candy flavor takes you back to your childhood, creating an emotional connection with every slice.
Customization Options: Feel free to adjust the colors or flavorings. Want to add a hint of raspberry or lemon? Go for it!
Cost-Effectiveness: When you compare this homemade version to a store-bought cake, you’ll find it’s surprisingly cost-effective—plus, it’s made with love!
Show-Stopping Presentation: With vibrant colors and playful decorations, this cake makes for a stunning centerpiece at any gathering.
Easy to Follow: While it might sound like a complex recipe, I promise it’s straightforward and ideal for bakers of any level.
After making this cake a few times, I assure you the enjoyment it brings to everyone who tries it is well worth the effort!
INGREDIENTS SECTION
Here’s what you’ll need to create this delightful Cotton Candy Cake:
For the Cake:
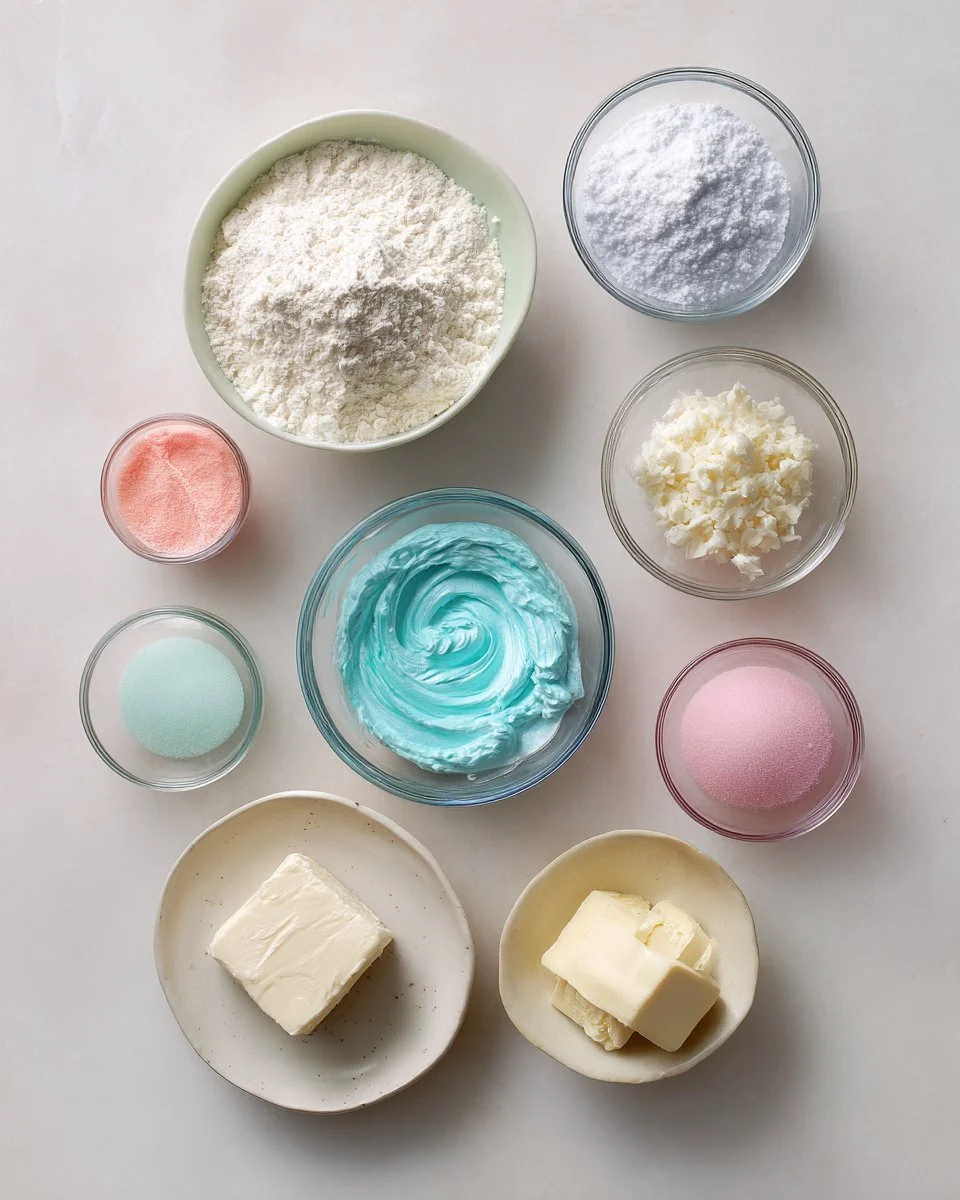
- 2 1/2 cups all-purpose flour
- 1 tbsp baking powder
- 1/2 tsp salt
- 1 cup unsalted butter, room temperature
- 1 3/4 cups granulated sugar
- 4 large egg whites
- 1 tbsp vanilla extract
- 1 cup whole milk
- Pink food coloring
- Blue food coloring
For the Buttercream:
- 1 1/2 cups unsalted butter, room temperature
- 4 1/2 cups powdered sugar, sifted
- 2-3 tbsp whole milk or heavy cream
- 1 1/2 tsp cotton candy flavoring
- Pinch of salt
- 1/2 cup buttercream (reserved from above)
- 1 tsp extra cotton candy flavoring (optional)
- A touch of extra food coloring for vibrant swirls
Ingredient Notes:
- Quality Matters: Use high-quality vanilla extract and cotton candy flavoring for authentic taste. I prefer McCormick for vanilla and LorAnn for flavoring.
- Room Temperature Ingredients: Make sure the butter and egg whites are at room temperature for easy mixing and better volume.
STEP-BY-STEP INSTRUCTIONS
Preheat the oven to 350°F (175°C). Grease and line three 8-inch round cake pans with parchment paper for easy release.
Combine dry ingredients: In a medium bowl, whisk together the flour, baking powder, and salt.
Cream the butter and sugar: In a large mixing bowl, cream the butter and sugar together on medium-high speed for 3-4 minutes until pale and fluffy.
Add egg whites and vanilla: Incorporate the egg whites one at a time, beating well after each addition. Stir in the vanilla extract.
Mix in the dry ingredients: Gradually add the flour mixture in three parts, alternating with the milk. Start and end with the flour mixture, mixing just until combined.
Color the batter: Divide the batter evenly into three bowls. Leave one uncolored, tint one with pink food coloring and the last with blue. Pour each into a separate prepared pan.
Bake: Bake for 25-28 minutes, or until a toothpick inserted into the center comes out clean. Cool in pans for about 10 minutes before carefully inverting onto racks.
Prepare the buttercream: In a clean bowl, beat the reserved butter until smooth. Gradually add the powdered sugar, mixing, followed by the milk, cotton candy flavoring, and a pinch of salt.
Color the buttercream: Tint portions of the buttercream pink and blue for decoration.
Reserve buttercream: Set aside 1/2 cup of the plain buttercream and add more cotton candy flavoring if desired.
Assemble the cake: Start with the uncolored layer, spreading a layer of marbled filling and repeating with the pink and blue layers.
Apply a crumb coat: Spread a thin layer of buttercream over the entire cake and chill for 20 minutes to set.
Final decoration: After chilling, apply the final layer of frosting and decorate with piped swirls. Optionally, garnish with edible glitter or cotton candy for a whimsical look.
Chef’s Tips:
- Ensure your oven is properly preheated to avoid uneven baking.
- Use a cake leveler for perfectly flat layers—this is key for a professional look!
EXPERT TIPS & TRICKS
Storage: Store leftovers in an airtight container at room temperature for up to 3 days, or refrigerate for a week. The flavors actually deepen after a day!
Make-Ahead: You can bake the layers a day in advance. Just wrap them tightly in plastic wrap and refrigerate until you’re ready to frost.
Common Problems: If your cake sinks, it might be due to overmixing when adding flour. Mix just until combined for the best rise.
Flavor Adaptations: Try using almond or lemon flavoring instead of cotton candy for a unique twist.
Frosting Troubleshooting: If your buttercream is too stiff, add more milk, a tablespoon at a time, until the desired consistency is reached.
Butter Alternatives: For a dairy-free version, swap out the butter for vegan alternatives. Just ensure all other ingredients comply!
SERVING SUGGESTIONS
Pair your Cotton Candy Cake with a scoop of vanilla ice cream or serve it alongside fresh fruit for a refreshing contrast. To present your cake beautifully, stack layers on a colorful cake stand and add some sprinkles or candy on top to enhance the festive look. This cake is perfect for birthdays, baby showers, or any celebration where joy and whimsy reign.
VARIATIONS & SUBSTITUTIONS
- Flavor Combinations: You can switch up the cotton candy flavor for other fun flavors like bubblegum or strawberry.
- Dietary Considerations: To make this cake gluten-free, replace the all-purpose flour with a gluten-free blend, and check that all your other ingredients are gluten-free.
- Seasonal Variations: For a fall-themed cake, add spices like cinnamon and nutmeg, and use orange and yellow food coloring!
NUTRITION & STORAGE INFO
- Prep Time: 30 minutes
- Cook Time: 28 minutes
- Total Time: Approximately 1.5 hours
- Yield: Serves 12
- Estimated Calories: Around 300 calories per slice, depending on serving size.
- Storage Instructions: Keep cake covered at room temperature for up to 3 days or refrigerate for up to a week. This cake can also freeze well for up to 2 months. Just wrap it tightly in plastic and foil.
FAQ SECTION
Can I make this cake in advance?
- Yes! Bake the layers a day ahead and frost them when you’re ready to serve.
What do I do if my cake layers are domed?
- Trim the tops with a serrated knife to create a flat surface for stacking.
Can I use other types of milk?
- Absolutely! You can substitute any milk of your choice, including almond or oat milk.
Is this recipe suitable for kids?
- Yes! This sweet cake is perfect for kids’ parties and brings smiles to faces of all ages.
How can I make it vegan?
- Substitute dairy products with their vegan counterparts, such as vegan butter and non-dairy milk.
Can I decrease the sugar?
- Reducing sugar may affect texture and moisture, but you can try using less—start with a 1/2 cup less.
What’s the best way to frost the cake?
- Use an offset spatula for even spreading and a rotating cake stand to achieve smooth edges.
How can I make it more colorful?
- Don’t be shy with the food coloring! A few drops can create vibrant swirls.
Can I use a different flavoring?
- Definitely! Anything from vanilla to fruit flavors can work beautifully.
Do I have to use three layers?
- Not at all! You can easily make a two-layer cake if you prefer.

CONCLUSION
This Cotton Candy Cake recipe is a delightful journey of flavors and nostalgia, bound to be a hit at your next celebration. Whether you’re reminiscing about childhood fairs or simply enjoying a sweet moment in the present, this cake does it all. I encourage you to give it a try, and once you do, I’d love to hear your feedback! Have you made any fun variations? Don’t forget to check out more whimsical recipes on my blog for your next baking adventure!
Delight in Creamy Shrimp Alfredo Pasta: A Family Favorite You’ll Adore
Happy baking!

Cotton Candy Cake
Ingredients
Method
- Preheat the oven to 350°F (175°C). Grease and line three 8-inch round cake pans with parchment paper for easy release.
- In a medium bowl, whisk together the flour, baking powder, and salt.
- In a large mixing bowl, cream the butter and sugar together on medium-high speed for 3-4 minutes until pale and fluffy.
- Incorporate the egg whites one at a time, beating well after each addition. Stir in the vanilla extract.
- Gradually add the flour mixture in three parts, alternating with the milk. Start and end with the flour mixture, mixing just until combined.
- Divide the batter evenly into three bowls. Leave one uncolored, tint one with pink food coloring and the last with blue. Pour each into a separate prepared pan.
- Bake for 25-28 minutes, or until a toothpick inserted into the center comes out clean. Cool in pans for about 10 minutes before carefully inverting onto racks.
- In a clean bowl, beat the reserved butter until smooth. Gradually add the powdered sugar, mixing, followed by the milk, cotton candy flavoring, and a pinch of salt.
- Tint portions of the buttercream pink and blue for decoration.
- Set aside 1/2 cup of the plain buttercream and add more cotton candy flavoring if desired.
- Start with the uncolored layer, spreading a layer of marbled filling and repeating with the pink and blue layers.
- Spread a thin layer of buttercream over the entire cake and chill for 20 minutes to set.
- After chilling, apply the final layer of frosting and decorate with piped swirls. Optionally, garnish with edible glitter or cotton candy for a whimsical look.