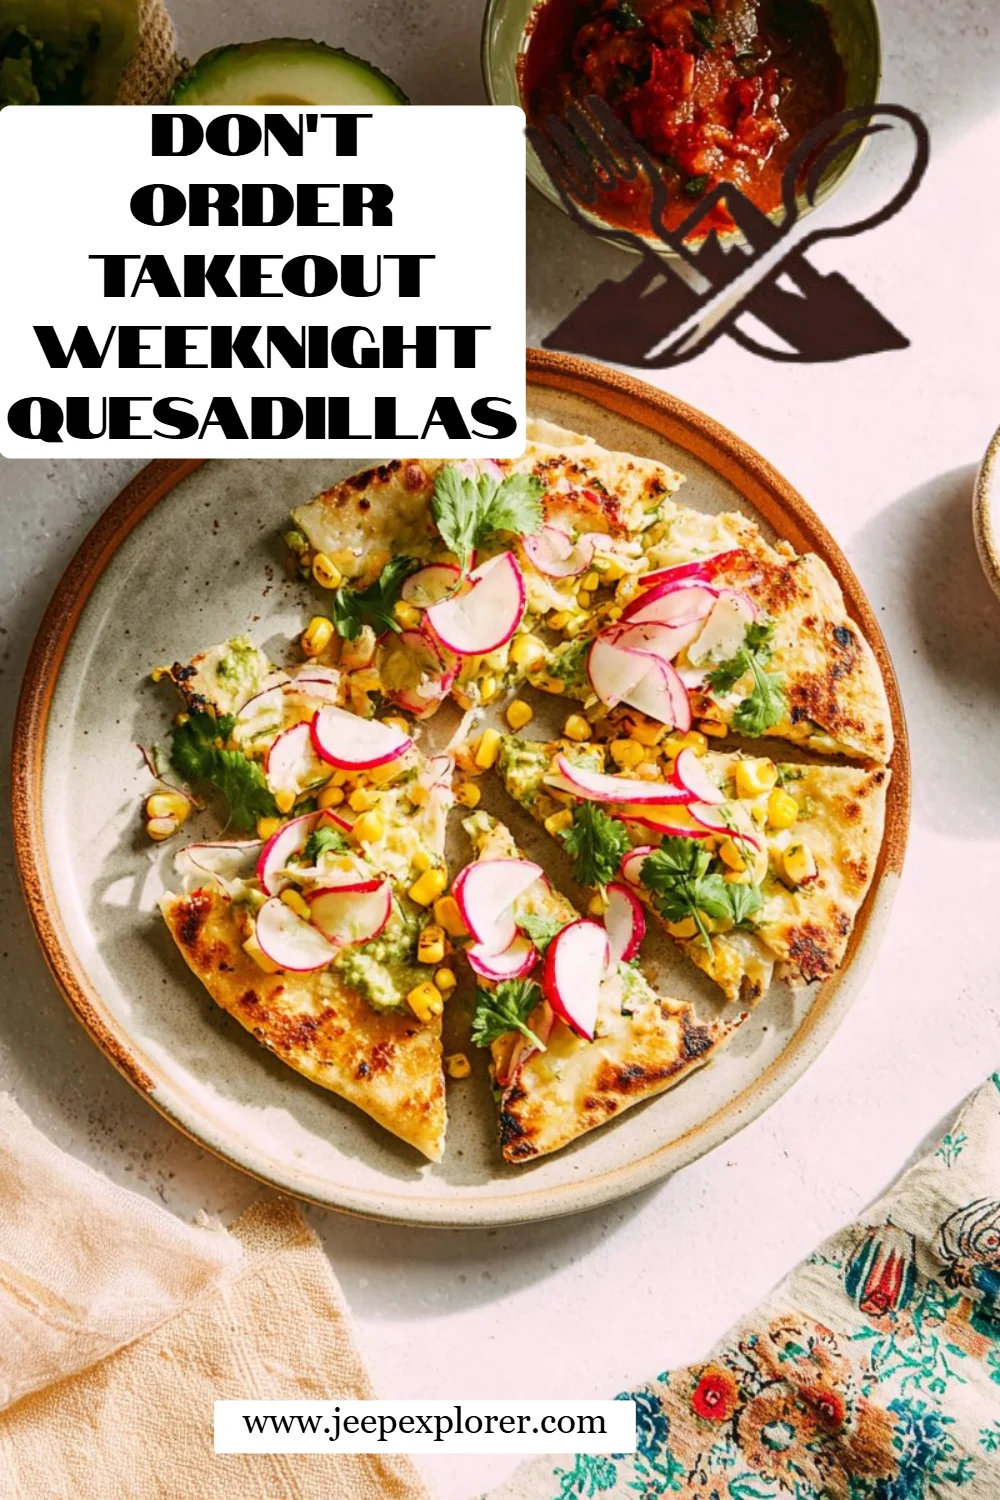
Every time I hear the phrase “Don’t Order Takeout Weeknight Quesadillas,” I am transported back to busy evenings at home when the kids would come racing through the door, starving and ready to devour anything in sight. There’s something magical about the aroma of melting cheese, sizzling tortillas, and a colorful medley of vegetables that fills the kitchen. Instead of reaching for the phone to place a takeout order, I discovered how easy it is to whip up these cheesy delights in under 30 minutes!
What makes this recipe special is the endless customization options—chicken, beef, tofu, or simply a rainbow of fresh veggies can create a meal that resonates with everyone at the table. The crispy edges paired with that gooey, melted cheese create the comforting texture we all crave at the end of a long day. Plus, they’re so much healthier and wallet-friendly compared to takeout options!
In this post, I’ll guide you through everything you need to know to create your own Don’t Order Takeout Weeknight Quesadillas that are bursting with flavor. From ingredient tips to foolproof techniques, get ready to become a quesadilla-making aficionado!
What Are Don’t Order Takeout Weeknight Quesadillas?
Don’t Order Takeout Weeknight Quesadillas are not just a recipe; they’re a staple in my home. Originating from the simple yet flavorful Mexican cuisine, these quesadillas are crafted with large flour tortillas lovingly filled with melty cheese and any number of delicious fillings. When you bite into one, you’ll experience a delightful crunch followed by a warm, cheesy center—a combination that’s simply irresistible.
What makes these quesadillas unique is how versatile they are. You can adapt this recipe to suit what you have on hand, whether it be leftover chicken from the night before or a bounty of seasonal veggies from your local farmers’ market. This adaptability makes them perfect for any occasion, whether it’s a busy weeknight dinner, a laid-back lunch, or even a fun gathering with friends and family.
So why make these over other versions? Because they are quick, stunningly simple, and provide the comfort food experience we love, all while allowing you to use fresh ingredients that you choose.
Why You’ll Love This Recipe
Here are five compelling reasons why you’ll absolutely adore making your own Don’t Order Takeout Weeknight Quesadillas:
Cost-Effective: Takeout can rack up costs quickly. With this recipe, you’ll likely have most ingredients on hand, saving you both time and money! You can feed a family of four for less than the price of one takeout order.
Limitless Customization: These quesadillas welcome creativity. Whether you want to go classic with chicken and cheese or explore veggie-forward options with roasted zucchini and bell peppers, the choice is all yours.
Quick and Simple: Who doesn’t love a meal that can be ready in 30 minutes? This recipe is straightforward, making it perfect for even the most hectic school nights.
Healthier Than Takeout: Homemade means you’re in control of the quality of ingredients. Say goodbye to mystery sauces and hello to fresh veggies and wholesome fillings!
Family Bonding: Cooking together is one of the greatest ways to connect. Get the kids involved by letting them choose their fillings or help with assembly. A kitchen filled with laughter while making quesadillas is a beautiful sight.
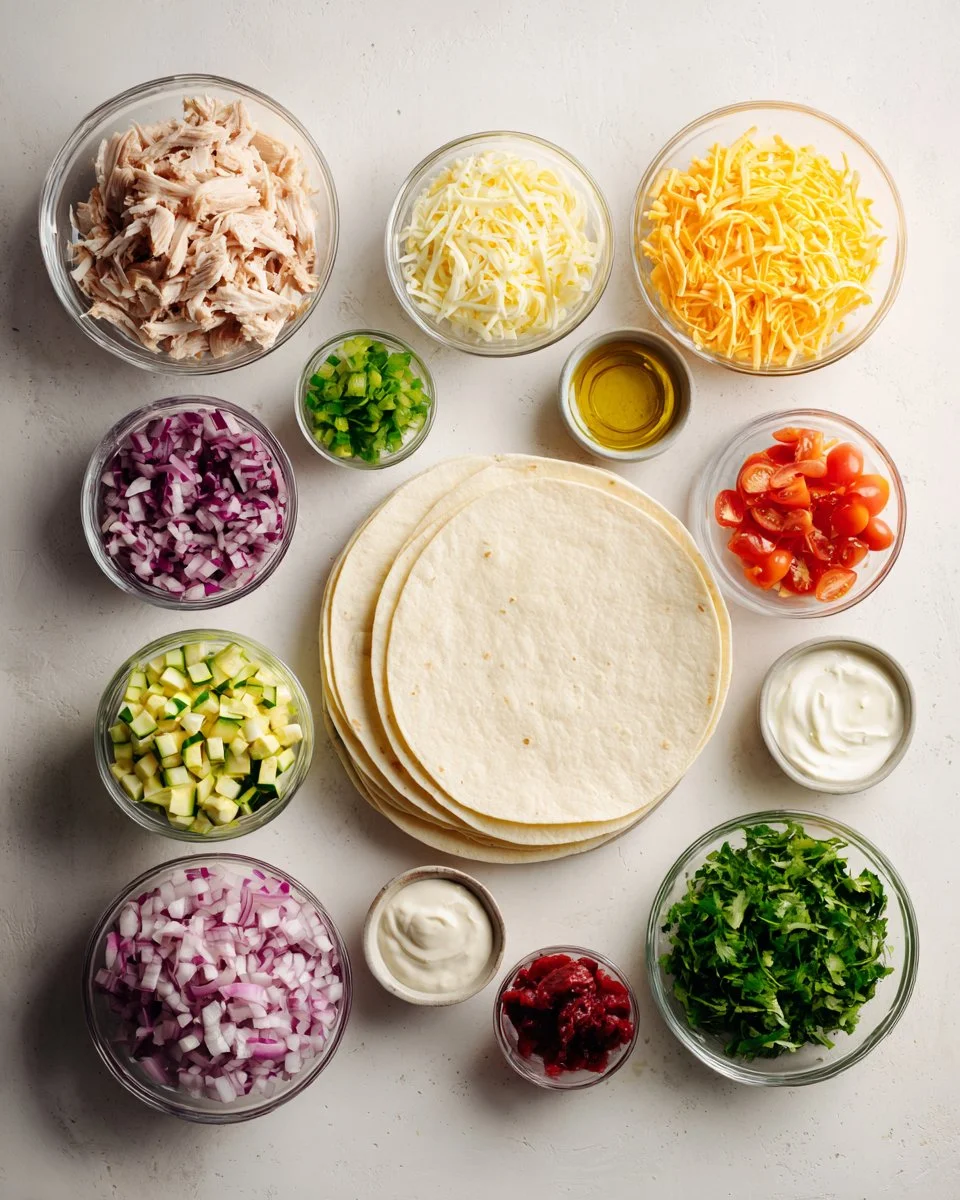
Ingredients
- Large flour tortillas: Soft and easy to fold. Look for quality brands like Mission or Tortilla Land.
- Shredded cheddar cheese: A classic choice for great melting; think Tillamook or Cabot.
- Protein Option: Shredded chicken (or you can opt for cooked fish, beef, pork, tofu, or beans).
- Finely chopped red onion: For some bite; feel free to use green onions or jalapeños for a spicy kick.
- Cooked veggies: A handful of finely chopped cooked veggies like zucchini, bell peppers, corn, or eggplant adds flavor and nutrition. I love adding sautéed greens for that extra nutritional punch!
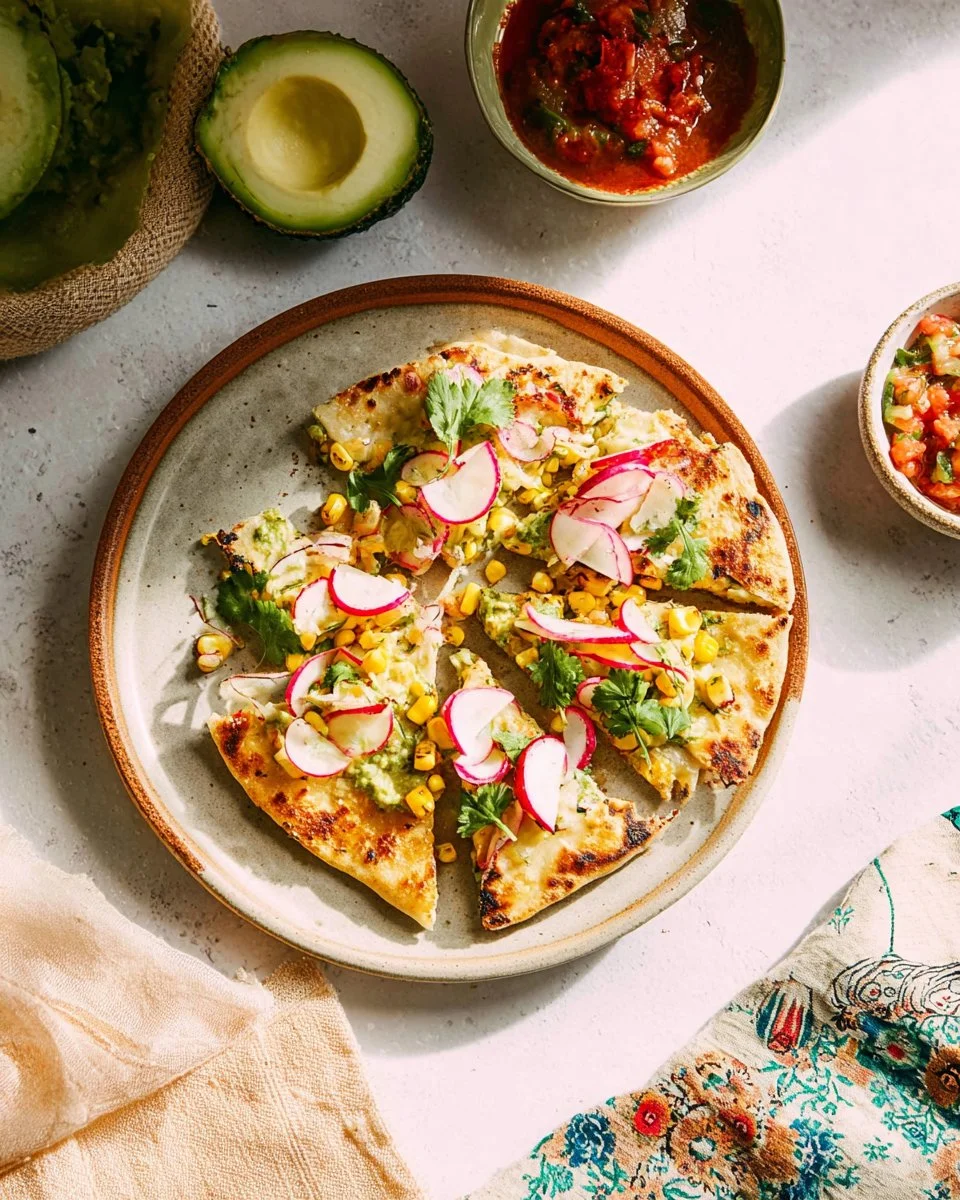
- Fresh veggies: A handful of chopped raw vegetables such as tomatoes, radishes, or lettuce brings freshness to each bite.
- Dips: Avocado, salsa, sour cream, or Greek yogurt are all delightful drizzled or dolloped on top.
Quality Tips & Substitutions: Choose organic or locally sourced veggies whenever possible for maximum flavor. If flour tortillas aren’t your thing, try corn tortillas or even lettuce wraps for a gluten-free option.
Prep Notes: Make sure your tortillas are at room temperature (but you can also warm them slightly) and have your cheese prepped and ready to melt.
Step-By-Step Instructions
Prepare the Ingredients: Gather and prep all your ingredients ahead of time. This includes chopping up any vegetables and having your cheese shredded. The more organized you are now, the smoother the process will be!
Heat the Pan: Heat a large griddle or non-stick pan over medium heat. If you have a cast-iron skillet, it’s ideal for getting that crispy exterior!
Assemble the Quesadillas: Lay out as many tortillas as guests you’re serving. Divide your toppings among the tortillas, generously covering half of each.
Fold and Cook: Carefully fold each tortilla over on itself to close. Cook until the bottom is browned and the cheese melts, about 5 minutes—check them halfway through to avoid burning. If they’re browning too quickly, it’s perfectly okay to reduce the heat a bit.
Serve and Enjoy: Once golden and crispy, remove from heat and slice them into wedges. Serve immediately with your choice of dips and fresh veggies for garnish.
Chef’s Tip: If your quesadilla isn’t browning, your pan may not be hot enough. If they’re browning too fast, turn the heat down to ensure the cheese melts properly without burning the tortilla.
Common Mistakes to Avoid: Don’t overstuff your quesadillas; fewer toppings will keep them intact and crispy!
Expert Tips & Tricks
Storage: If you have leftovers (which I doubt will happen!), store them in airtight containers in the fridge for up to 3 days. To reheat, pop them in the skillet for a few minutes for that freshly crisped texture!
Make-ahead Instructions: You can prep ingredients ahead of time, just keep them separately stored until you’re ready to assemble and cook them.
Troubleshooting: If the cheese is not melting, make sure your cooking temperature is appropriate. If using a non-stick pan, make sure to use a bit of oil or butter to avoid sticking.
Seasoning: Don’t forget to season your fillings well! A pinch of salt, pepper, and a dash of cumin can elevate the flavor significantly.
Skipping the Skillet: If you’re feeling edgy, try cooking your quesadilla in a sandwich press for a hands-off approach!
Serving Suggestions
Serve your quesadillas with a side of your favorite salsa, guacamole, or a crisp, fresh salad. For an elegant touch, plate them up with fresh cilantro sprigs and lime wedges for that burst of citrus when you bite in. These quesadillas work beautifully for casual family dinners, lively friends’ gatherings, or even a fun movie night at home!
Variations & Substitutions
Feeling adventurous? Here are some other flavor combinations:
- Margarita Quesadilla: Fresh mozzarella, fresh tomatoes, and basil leaves for a caprese twist!
- Spicy Southwest: Fill with black beans, corn, diced green chilies, and pepper jack cheese for a zesty variation.
- Sweetsus: Use ricotta cheese, fresh fruit, and a drizzle of honey for a unique, dessert-style quesadilla!
Additionally, for dietary considerations, you can easily make these dairy-free by opting for vegan cheese or a combination of avocado and nutritional yeast.
Nutrition & Storage Info
- Prep Time: 10 minutes
- Cook Time: 15 minutes
- Total Time: 25 minutes
- Yield: Serves 4
- Estimated Calories: Approximately 400 calories per serving (depending on fillings)
Storage Instructions: Keep covered at room temperature for up to 2 hours. Refrigerate leftovers in an airtight container for up to 3 days. They can be frozen for up to a month; stack with parchment paper in between.
FAQ SECTION
Can I use whole wheat tortillas?
Yes, whole wheat tortillas are a great option for a healthier alternative!What if I only have smaller tortillas?
You can make personal-sized quesadillas using smaller tortillas. Just adjust the amount of fillings accordingly.Can I make these ahead of time?
Absolutely! You can prep the fillings in advance, and they’ll save you tons of time on a busy night.Can I bake quesadillas instead?
Yes! Preheat the oven to 400°F, and bake them on a parchment-lined baking sheet for about 10-15 minutes until crispy.What is the best way to reheat?
Reheat in a skillet over medium heat or use an oven toaster if you’re short on time.What else can I put inside a quesadilla?
Literally anything! Leftover meats, cheeses, or veggies, even fruit can work if you’re feeling adventurous.How do I prevent the quesadilla from getting soggy?
Make sure to drain any excess moisture from cooked veggies and use less wet ingredients.What’s the best cheese to use?
Cheddar cheese is a classic choice, but mozzarella or pepper jack also work beautifully!Can I just use raw veggies?
Yes, but be mindful that they may not cook thoroughly without sautéing. Pre-cooking them can soften and enhance the flavors.Are there gluten-free options for this recipe?
Absolutely! Use corn tortillas or gluten-free alternatives available at health food stores.
Conclusion
In a nutshell, these Don’t Order Takeout Weeknight Quesadillas are your secret weapon for easy, delicious meals that leave the whole family smiling. By incorporating fresh ingredients and tailoring them to your taste, you’ll create a dish that is comforting, fun, and family-friendly.
I can’t wait for you to try this recipe and share your feedback with me! Have a favorite filling you love? Let me know in the comments below. And if you’re hungry for more, check out my related recipes for burritos, nachos, and more scrumptious twists on Brown Butter Pecan Chocolate Chip Cookies ! Happy cooking!