When it comes to comfort food, ice cream has always held a special place in my heart. I can vividly recall the sweltering summer afternoons spent with my family, sitting on the porch with bowls of rich, homemade ice cream. One standout flavor that had us all returning for second and third helpings was a scrumptious No Churn Salted Caramel Ice Cream. The harmonious blend of creamy sweetness and a touch of saltiness created an indulgent experience that we savored together, laughter echoing in the warm breeze.
What I love about this No Churn Salted Caramel Ice Cream recipe is how approachable it is for everyone, regardless of your baking expertise! Unlike traditional ice cream recipes that require time-consuming churning and fancy machinery, this version whips up effortlessly, using just a few simple ingredients. The texture is luxuriously creamy, and the flavor packs an unforgettable punch of sweet caramel goodness. You don’t need to be a professional ice cream maker to achieve this delightful dessert; all you need is a mixing bowl and a little bit of patience while it freezes!
In this post, I’ll share all my tips and tricks for making the best No Churn Salted Caramel Ice Cream that will satisfy you and your loved ones. Curious about how to make this heavenly treat? Let’s dive in!
What Are No Churn Salted Caramel Ice Cream?
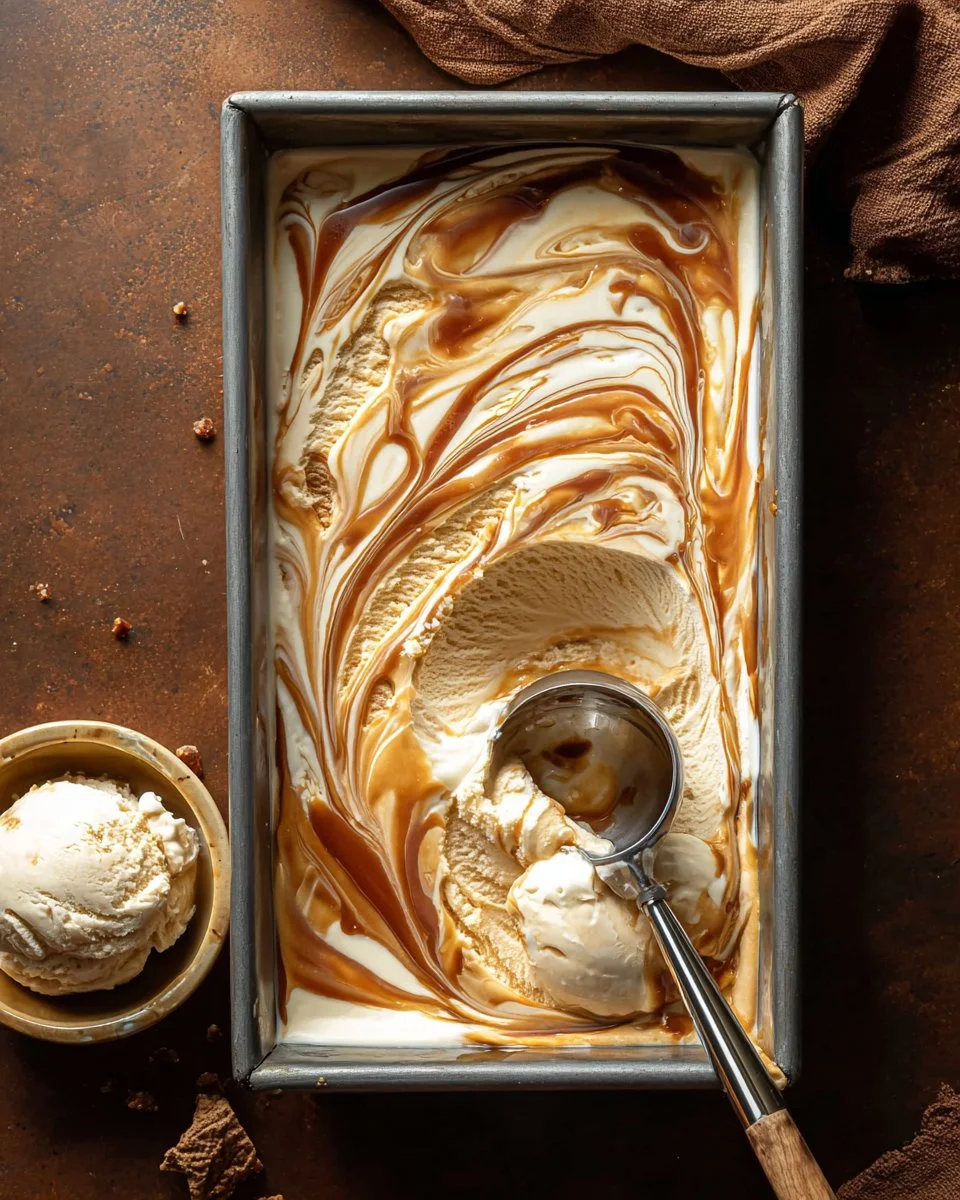
No Churn Salted Caramel Ice Cream is essentially a creamy masterpiece that is easy to create at home without an ice cream machine. Emerging from the need for a simple, delicious dessert during those lazy summer days, this recipe uses a combination of whipped cream and sweetened condensed milk to achieve its dreamy consistency.
The taste is divine—imagine the smooth, buttery flavor of caramel mixed with the airy lightness of whipped cream. The texture is decadently creamy with just the right amount of sweetness, punctuated by a touch of sea salt that elevates the flavors.
You’ll want to make this treat when you’re in the mood for an easy dessert, whether it’s a summer BBQ, family gathering, or simply to indulge yourself after a long day. Trust me: once you try this No Churn Salted Caramel Ice Cream, it will become a go-to recipe in your dessert repertoire!
Why You’ll Love This Recipe
1. Effortless Preparation
You won’t need to be a culinary whiz to create this ice cream. The simple mixing and folding technique makes it a breeze, and you can be enjoying your homemade creation in just a few steps.
2. Richer Flavor Over Store-Bought
Forget the bland store-bought varieties! This No Churn Salted Caramel Ice Cream is made with real ingredients and has a richness that can’t be matched. You truly control the flavors here, which means a more personalized dessert.
3. Cost-Effective
Making ice cream at home is not only fun but also saves you money! This recipe calls for just five basic ingredients that won’t break the bank. Compare that to pricey gourmet cones, and you’ll be thrilled with the savings!
4. Customizable Delight
Feel free to switch up the caramel sauce or experiment with mix-ins like crushed cookies, nuts, or even chocolate chunks. The possibilities are endless, allowing you to tailor the ice cream to your taste preferences or seasonal inspirations.
5. No Special Equipment Needed
One of my favorite things about this No Churn Salted Caramel Ice Cream is the lack of required equipment. No ice cream maker necessary! Just a mixing bowl, a whisk, and a loaf pan for freezing.
With these compelling reasons in mind, let’s get scooping!
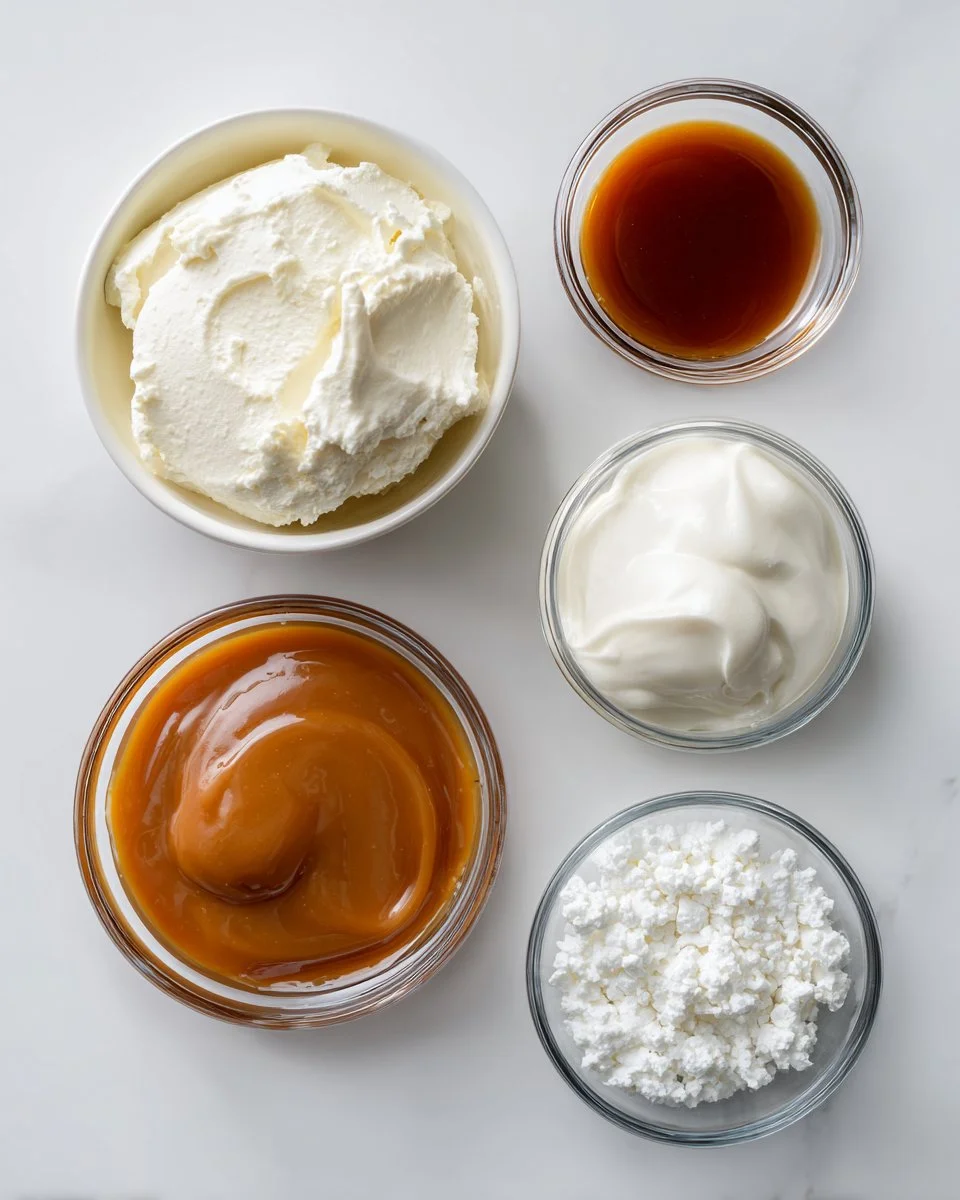
Ingredients
- 2 cups heavy whipping cream, cold: Using a high-fat content cream will produce the richest texture. If you’re looking for a lighter option, you can use half-and-half.
- 1 can sweetened condensed milk (14 ounces): This is the secret ingredient that adds creaminess and sweetness. Look for high-quality brands such as Eagle Brand.
- 1 teaspoon vanilla extract: Always go for pure vanilla extract for the best flavor. I love using Nielsen-Massey Vanilla; it adds a lovely depth to the ice cream.
- 1/4 teaspoon kosher salt: This enhances the caramel flavor and balances the sweetness.
- 1 cup caramel sauce: You can either buy a jar or make your own if you’re feeling adventurous! I recommend using homemade for the ultimate flavor.
Prep Notes:
- Make sure your heavy cream is well-chilled; it will whip better.
- If using homemade caramel sauce, allow it to cool before incorporating it into the ice cream.
Step-by-Step Instructions
Chill Your Pan: Place a 9×5-inch loaf pan in the freezer to chill—this will help your ice cream set faster.
Whip the Cream: In a stand mixer, add the cold heavy cream. Start mixing at low speed and gradually increase to medium. Beat until the cream begins to thicken. Then, switch to high speed and whip until stiff peaks form, which usually takes about 3-5 minutes. (Chef’s Tip: Keep an eye on it—you don’t want to over-whip into butter!)
Combine Ingredients: In a large mixing bowl, combine the sweetened condensed milk, vanilla extract, kosher salt, and 1 cup of the whipped cream. Stir gently until well mixed.
Fold & Layer: Gently fold the rest of the whipped cream into the sweetened condensed milk mixture. This keeps your ice cream light and airy!
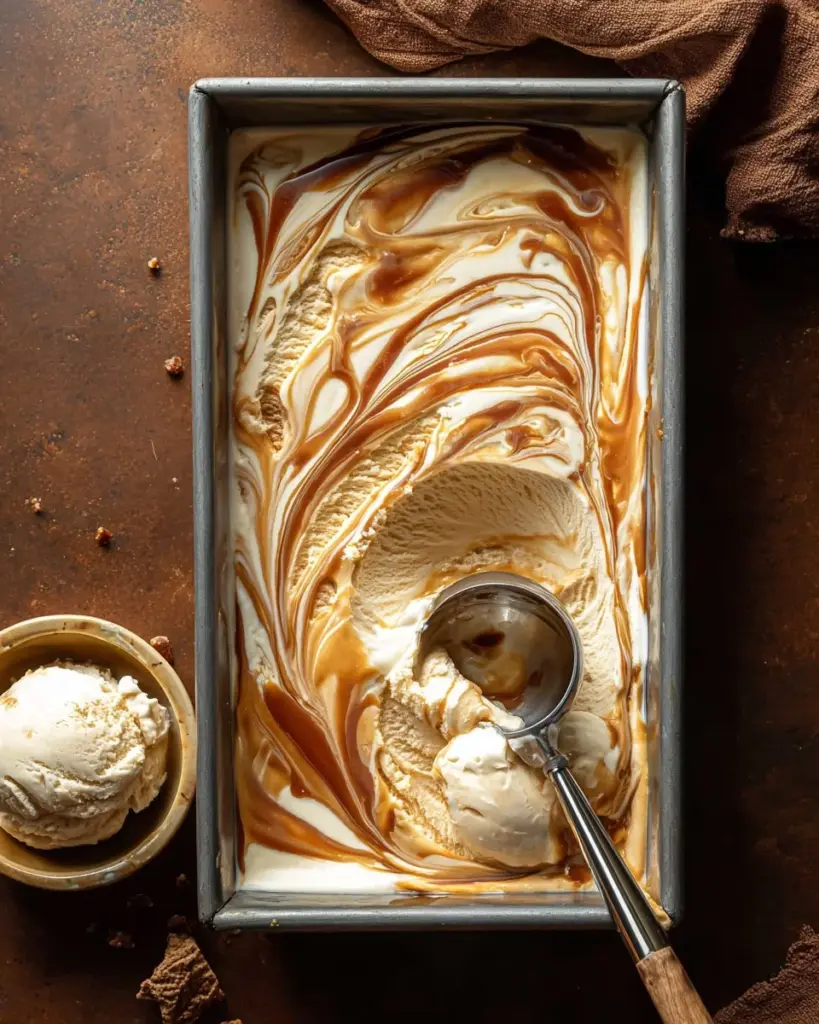
Layer in the Pan: Pour half of the mixture into the chilled loaf pan and drizzle with half of the caramel sauce. Pour in the remaining mixture, and top with more caramel sauce.
Swirl it Up: Using a knife or skewer, gently swirl the caramel into the cream mixture for a marbled effect. (Common Mistake: Don’t over-swirl; you want to maintain patches of caramel.)
Freeze: Cover the pan with plastic wrap and freeze for at least 5 hours, or until firm. (Chef’s Tip: For best results, freeze overnight!)
Serve & Enjoy: Once frozen, scoop out hefty servings of your creamy creation. Pair it with cookies or serve it alongside a slice of pie for an indulgent treat.
Here’s a common mistake to avoid: Check that your heavy cream is really cold for the best volume when whipping.
Slice and serve with a drizzle of caramel on top for extra flair!

Expert Tips & Tricks
Ingredient Quality: The better the ingredients, the more delicious your ice cream will be. Always opt for heavy cream with minimal additives.
Storage Instructions: Store your ice cream in an airtight container for up to two weeks in the freezer for the best flavor and texture.
Make-Ahead Instructions: This ice cream can be made a few days in advance, making it an ideal dessert for parties!
Avoid Ice Crystals: To minimize ice crystals, cover the surface of the ice cream with a piece of parchment paper before sealing with plastic wrap.
Troubleshooting: If your ice cream seems too soft upon serving, give it an additional hour in the freezer before scooping.
Serving Suggestions
This No Churn Salted Caramel Ice Cream is delightful on its own, but it can be the star of a show! Pair it with:
- Warm Brownies or Chocolate Cake: The combination of rich chocolate and creamy caramel is to die for.
- Fresh Fruit: A simple bowl of berries or slices of banana adds a fresh touch.
- Presentation Ideas: Serve in classic waffle cones or fancy bowls and top with extra drizzles of caramel and a sprinkle of sea salt.
For special occasions, consider dressing it up with colorful sprinkles or a dusting of cocoa powder!
Variations & Substitutions
- Flavor Combinations: Try making a swirled berry version with strawberry or raspberry sauce instead of caramel, or add crushed Oreos for a cookies and cream twist!
- Dietary Restrictions: For a dairy-free option, substitute with coconut cream and almond milk sweetened with maple syrup.
- Seasonal Variations: Add a pinch of cinnamon for a fall-inspired twist, or incorporate peppermint extract during the holidays.
Nutrition & Storage Info
- Prep Time: 15 minutes
- Cook Time: 0 minutes
- Total Time: 5+ hours (including freeze time)
- Yield: Approximately 8 servings
- Estimated Calories: 250 calories per serving
Storage Instructions:
- Room Temperature: Not recommended; ice cream melts!
- Fridge: Store for up to 1-2 days before it’ll start losing texture.
- Freezer: Keeps for up to 2 weeks. To serve again, just allow it to soften slightly at room temperature before scooping.
FAQ Section
Can I use low-fat cream instead of heavy cream?
- Low-fat cream won’t whip up as well, leading to a less creamy texture.
Can I leave out the salt?
- You can, but a pinch of salt truly enhances the caramel flavor!
What kind of caramel sauce should I use?
- Homemade or store-bought—just make sure it’s a good-quality caramel for that rich flavor!
Can this ice cream be made without dairy?
- Yes, substitute with coconut cream or any plant-based milk for a delicious dairy-free version.
Can I add mix-ins like chocolate chips?
- Absolutely! Gently fold in your favorites after the cream mixture is prepared.
How do I scoop the ice cream perfectly?
- Use a warm ice cream scoop by dipping it in hot water before serving.
Is there a way to make this ice cream vegan?
- Use coconut cream instead of heavy cream and vegan sweetened condensed milk available on the market.
Can I make this recipe in advance?
- Yes, this ice cream is perfect for making ahead of time; just leave it in the freezer until ready to serve.
Why did my ice cream turn icy?
- This usually happens when it isn’t mixed enough or not chilled completely before freezing.
What’s the best way to serve it?
- Serve it in bowls or on cones, topped with nuts, extra caramel, or a cherry for a classic sundae!
Conclusion
Making No Churn Salted Caramel Ice Cream at home is not just an easy way to indulge in a creamy treat, but it’s also a chance to create joyful memories with family and friends. I encourage you to give this recipe a try—you’ll be patting yourself on the back with each delightful scoop!
I’d love to hear your thoughts and any variations you come up with! Be sure to drop a comment and check out my other ice cream recipes on the blog for even more deliciousness.
Delightful Peach Cobbler Smoothie: A Creamy Twist on a Classic Favorite
Happy scooping!
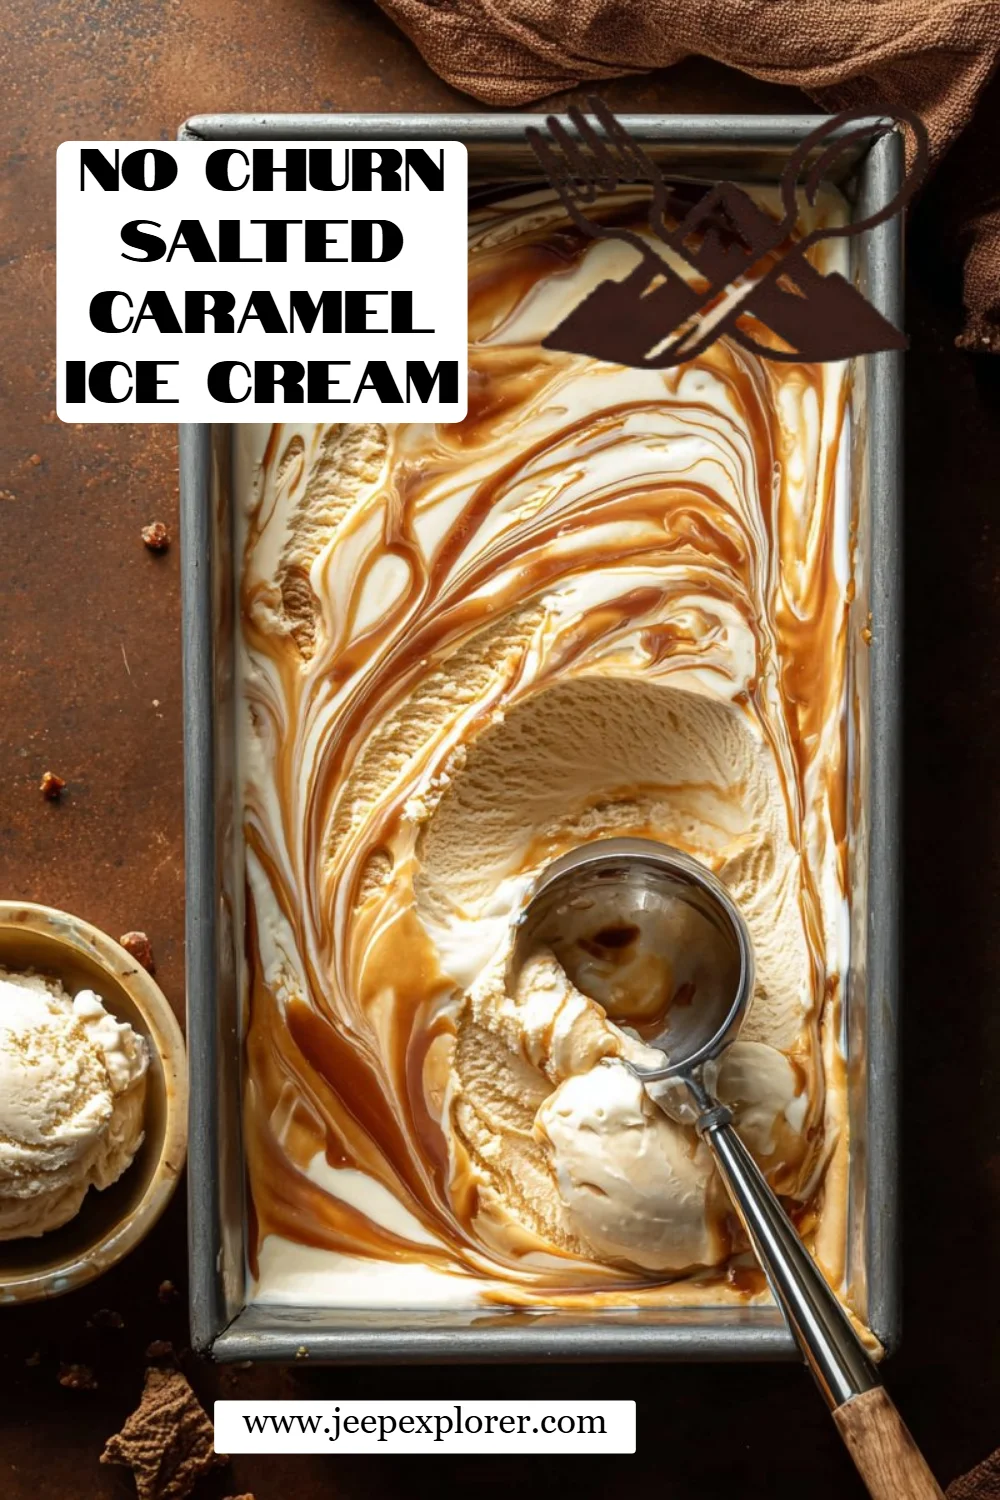
No Churn Salted Caramel Ice Cream
Ingredients
Method
- Chill your 9×5-inch loaf pan in the freezer to help your ice cream set faster.
- In a stand mixer, add the cold heavy cream and beat until stiff peaks form, typically taking about 3-5 minutes.
- In a large mixing bowl, combine the sweetened condensed milk, vanilla extract, kosher salt, and 1 cup of the whipped cream. Stir gently until well mixed.
- Gently fold the rest of the whipped cream into the sweetened condensed milk mixture to keep it light and airy.
- Pour half of the mixture into the chilled loaf pan and drizzle with half of the caramel sauce, then pour in the remaining mixture and top with more caramel sauce.
- Using a knife, gently swirl the caramel into the cream mixture avoiding over-swirl, so patches of caramel remain.
- Cover with plastic wrap and freeze for at least 5 hours or overnight for best results.
- Serve scoops of the ice cream and enjoy it with cookies or alongside pie.