When I think back to my childhood, the sweet aroma wafting from my grandmother’s kitchen is one of my fondest memories. It seems like every holiday season, the highlight was her Cream Cheese Thumbprint Cookies. Soft, buttery, and just the right amount of tart and sweet from the jam, these cookies never failed to bring my family together around the table. Today, I’m thrilled to share my version of these cherished treats, a recipe that I guarantee will evoke the same feelings of nostalgia and joy.
What set my grandmother’s thumbprints apart was the rich blend of cream cheese that gave them a soft, melt-in-your-mouth texture, unlike any store-bought version out there. I wanted to capture that magic in my own baking, and by focusing on quality ingredients and a touch of love, I think I’ve done just that. You won’t believe how easy it is to whip up a batch of these delectable cookies, perfect for holiday gatherings or your next coffee date!
In this post, you’ll learn how to make these delightful cookies from scratch, with tips to ensure they come out perfect every time. The secret to memory-making treats starts here; let’s get baking!
What Are Cream Cheese Thumbprint Cookies?
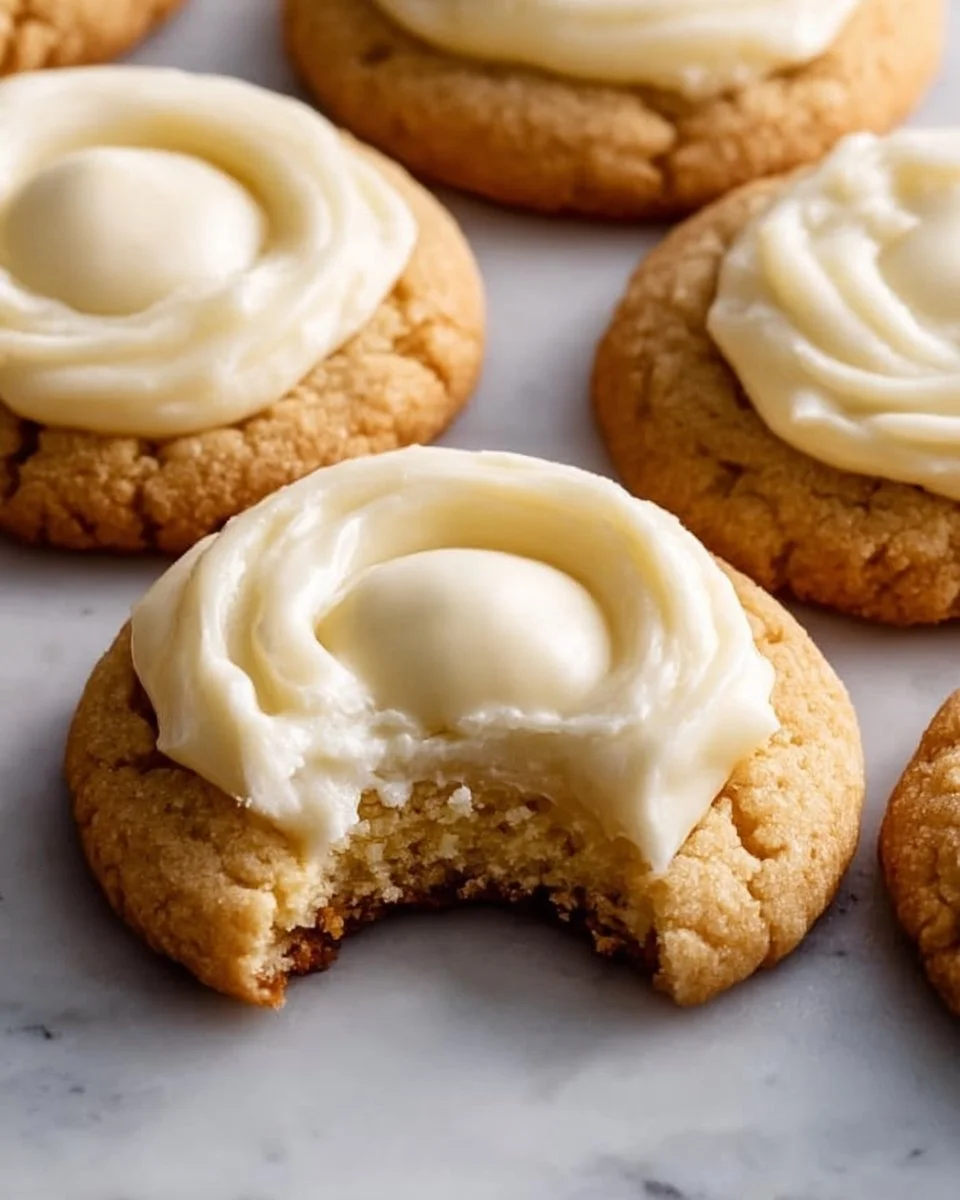
Cream Cheese Thumbprint Cookies have a rich history that many baking enthusiasts cherish. Originating in Eastern Europe and popularized in America, these cookies are distinct for their luscious filling and soft texture. Made with cream cheese in the dough, they’re not your average cookie. The result is a tender bite that’s both satisfying and creamy.
The taste is a delightful balance of buttery sweetness, complemented by the fruity jam at the center. The crunch of the edges and the melt-in-your-mouth chewiness make them a textural delight. Plus, the jewel-toned filling adds a festive touch that makes these cookies perfect for any occasion—be it a holiday gathering, a potluck, or just as a sweet pick-me-up at home.
You’ll want to make these cookies when you’re looking for something comforting or to share with loved ones. If you’ve been searching for a recipe that stands out and holds a special place in your heart, these Cream Cheese Thumbprint Cookies are about to become your go-to favorite.
Why You’ll Love This Recipe
Nostalgic Flavor: This recipe brings back the delightful memories of family gatherings, reminiscent of Grandma’s kitchen filled with love and laughter.
Quality Over Convenience: Unlike store-bought cookies, you can control the ingredients, ensuring that only the best goes into your treats. The cream cheese adds richness that pre-packaged cookies simply can’t match.
Customization Galore: Whether you prefer strawberry, raspberry, or apricot preserves, the choices are endless. You could even use lemon curd for a citrus twist!
Budget-Friendly: These cookies are incredibly cost-effective. For the price of a mediocre box of cookies at the store, you can whip up a dozen or more from scratch that taste divine.
Easy Peasy: Don’t worry if you’re a beginner—this recipe is straightforward and comes together in about 30 minutes. The results will impress even the most experienced bakers!
You’ll find that making Cream Cheese Thumbprint Cookies is a delightful experience that’s manageable for any skill level, and the result is a batch of treats that will earn you compliments from family and friends. Ready to dive in?
Ingredients
Always start with high-quality ingredients for the best results in your Cream Cheese Thumbprint Cookies. Here’s what you’ll need:
- 2 cups all-purpose flour (Make sure it’s fresh for the best texture)
- 1/2 teaspoon baking powder (Double-check the expiration date for optimal leavening)
- 1/4 teaspoon salt (Just a pinch enhances the sweetness!)
- 1/2 cup unsalted butter, softened (Room temperature is key for easy creaming)
- 1/2 cup cream cheese, softened (Full-fat cream cheese provides the creamiest consistency)
- 3/4 cup granulated sugar (You’ll love the contrast this adds!)
- 1 teaspoon vanilla extract (Use pure vanilla for the best flavor)
- 1 egg yolk (This adds richness and helps bind the dough)
- Your choice of jam or preserves for filling (Raspberry and strawberry are classics, but don’t overlook peach!)
- Optional: icing for decoration (A simple glaze can elevate the presentation!)
Prep Notes: Always ensure that your butter and cream cheese are softened to room temperature for easy mixing. This will guarantee a light and fluffy dough.
Step-by-Step Instructions
Preheat the Oven: Set your oven to 350°F (175°C). This ensures proper baking from the get-go.
Mix Dry Ingredients: In a medium bowl, whisk together the flour, baking powder, and salt. This will incorporate the baking powder evenly throughout the flour.
Cream the Mixture: In a separate large mixing bowl, beat together the softened butter, cream cheese, and sugar using an electric mixer until the mixture is light and fluffy. This should take about 2-3 minutes.
Add Vanilla and Egg Yolk: Mix in the vanilla extract and egg yolk until thoroughly combined and smooth.
Combine Ingredients: Gradually add the dry ingredients to the wet mixture, mixing until just combined. Avoid overmixing to keep the cookies tender.
Form the Dough: Roll the dough into tablespoon-sized balls and place them on a baking sheet lined with parchment paper, spaced about 2 inches apart.
Make Indentations: Use your thumb or the back of a spoon to create an indentation in the center of each ball. Don’t be shy—make it deep enough to hold a generous amount of jam!
Fill with Jam: Carefully spoon your choice of jam or preserves into each indentation until just full.
Bake: Place the baking sheet in the oven and bake for 12-15 minutes, or until lightly golden around the edges. The centers might look a bit soft, but they’ll firm up as they cool.
Cool Completely: Allow the cookies to cool completely before drizzling with icing, if desired.
Chef’s Tip: Keep an eye on your cookies as they bake. Ovens can vary, and you want to pull them out just as they start turning golden, otherwise, they may dry out!
Expert Tips & Tricks
Storage: Store your cookies in an airtight container at room temperature for up to a week. For longer freshness, refrigerate; they’ll last up to two weeks.
Make-ahead: You can prepare the dough ahead of time and refrigerate it for up to three days. Just roll into balls and fill before baking.
Troubleshooting: If your cookies spread too much, check that the butter was softened but not melted. If they seem dry, try adding a splash of milk.
Flavor Boost: For an unexpected twist, try adding a zest of lemon or orange to the dough for a hint of freshness.
Don’t Skimp on Butter: Using unsalted butter allows you to control the saltiness of your cookies, ensuring a better flavor balance.
Serving Suggestions
These Cream Cheese Thumbprint Cookies make the perfect accompaniment to an afternoon cup of tea or coffee. If you’re hosting a gathering, consider serving them alongside a charcuterie board with various cheeses and fruits.
For presentation, arrange them on a beautiful platter, dusted with powdered sugar or elegantly drizzled with icing for that visible “wow” factor. They’re also fantastic for special occasions like holidays or birthdays.
Variations & Substitutions
Flavor Combinations: Consider experimenting with different types of preserves—blueberry, cherry, or even chocolate ganache can lead to delightful surprises.
Dietary Adaptations: If you’re looking to make these gluten-free, substitute the flour with a 1:1 gluten-free blend. For a dairy-free option, you can replace butter and cream cheese with vegan equivalents.
Seasonal Twists: During the fall, swap in pumpkin spice or cinnamon for a seasonal approach, and fill with apple or pumpkin jam.
Nutrition & Storage Info
- Prep time: 15 mins
- Cook time: 15 mins
- Total time: 30 mins
- Yield: 24 cookies (depending on size)
- Estimated calories per cookie: 100 calories
Storage Instructions:
- Room Temperature: Store in an airtight container for up to 1 week.
- Refrigerator: Can last up to 2 weeks.
- Freezer: Cookies can be frozen before baking for up to 3 months. Just thaw before baking.
FAQ Section
Can I use margarine instead of butter?
It’s not recommended as margarine can change the texture, making cookies more oily. Stick with unsalted butter for the best outcome.What can I substitute for cream cheese?
Neufchâtel cheese, a lower-fat alternative, works great. For a dairy-free option, try cashew-based cream cheese.Can I freeze these cookies?
Yes! Freeze them either baked or unbaked. Place them in an airtight container with parchment between layers.How do I prevent cookies from spreading?
Ensure butter is softened, not melted, and refrigerate your dough for 30 minutes before rolling.What jams work best?
Classic choices like raspberry, strawberry, and apricot are favorite choices. Feel free to get creative!Can I make these cookies gluten-free?
Absolutely! Use a 1:1 gluten-free baking flour for an easy swap.How do I know when my cookies are done?
Look for a light golden color on the edges, while the centers may still appear a tad soft. They’ll firm up as they cool.How do I decorate them?
A simple icing made from powdered sugar and milk can add a beautiful touch. For an elegant effect, use a piping bag.Are they suitable for kids?
Yes! These cookies are perfect for kids and make for great baking projects with family.What’s the best way to serve these cookies?
They shine best served warm with a hot drink. Pair with tea for a lovely afternoon treat!

Conclusion
I hope you’re as excited as I am to indulge in these scrumptious Cream Cheese Thumbprint Cookies. Their unique blend of softness, sweetness, and nostalgia makes them a delightful treat that’s hard to resist. I encourage you to try this recipe and create new memories with your loved ones. I’d love to hear about your experiences or any tweaks you made to make it your own!
For more delicious recipes, check out my other creations on the blog.
Marshmallow Monster Cookies: The Ultimate Comfort Treat!
Happy baking, friends!