As I sit by the twinkling lights of our Christmas tree, I can’t help but recall the magic of the holiday season growing up. Every family gathering was infused with laughter, carols, and the delightful scent of meringue baking in the oven. One recipe that always made it to our holiday festivities was the Christmas Pavlova Wreath. Imagine a stunning wreath of fluffy, crisp meringue, adorned with luscious whipped cream and vibrant seasonal fruits. Not only does it taste divine, but it also brings everyone together, sharing stories with each bite.
What sets this Christmas Pavlova Wreath apart from other desserts is its beautiful presentation and the lightness of its texture. I’ve tweaked this recipe over the years to make it easy enough for anyone to whip up, without sacrificing that elegance that wows guests. It’s the perfect blend of nostalgia and creativity, making it one of my go-to comfort desserts.
In this post, I’m excited to share my favorite version of the Christmas Pavlova Wreath with you. You’ll learn the essential techniques for perfect meringue, my personal tips for decorating, and how to make this stunning centerpiece that will not only taste great but will also spark family memories of joy and laughter during the holidays.
What Are Christmas Pavlova Wreaths?
Christmas Pavlova Wreaths are an enchanting dessert that originated from the land down under, Australia and New Zealand, in honor of the Russian ballerina Anna Pavlova. The beauty of Pavlova lies in its delicate meringue shell — crispy on the outside and marshmallowy soft on the inside. The wreath shape adds a festive twist, making it an eye-catching centerpiece for your holiday table.
When you take a bite of a Christmas Pavlova Wreath, you experience a delightful crunch followed by a light, fluffy interior, topped with luscious whipped cream and seasonal fruits. The unique combination of flavors and textures—not to mention the vibrant colors—makes them the perfect dessert for any Christmas gathering. Whether you’re celebrating with family at home or hosting a festive party, this dessert is a showstopper that elevates any occasion.
Why You’ll Love This Recipe
Stunning Presentation: A Christmas Pavlova Wreath is sure to impress with its beautiful, wreath-like shape and festive colors. Your guests will be wowed by the visual feast before they even take a bite!
Light Yet Decadent: Unlike traditional heavy desserts, this Pavlova is light and airy, making it the perfect end to a holiday meal without leaving you feeling overstuffed.
Cost-Effective: Compared to store-bought options, homemade Pavlova is not only less expensive but also infinitely tastier. You can create a gourmet dessert in less time than it takes to drive to the store.
Customization Galore: Want to add your twist? You can easily customize with flavors like vanilla, chocolate, or citrus zest, and top it off with your favorite fruits—think berries in summer or roasted nuts and caramel in winter.
Simple to Prepare: If you follow my steps, this recipe is easier than you might think. The most time-consuming part is the baking, which gives you plenty of time to whip up some holiday music playlists!
With just a little effort, you can bring a taste of Christmas magic to your table, and I promise it will become a cherished recipe in your home too.
{image_template}
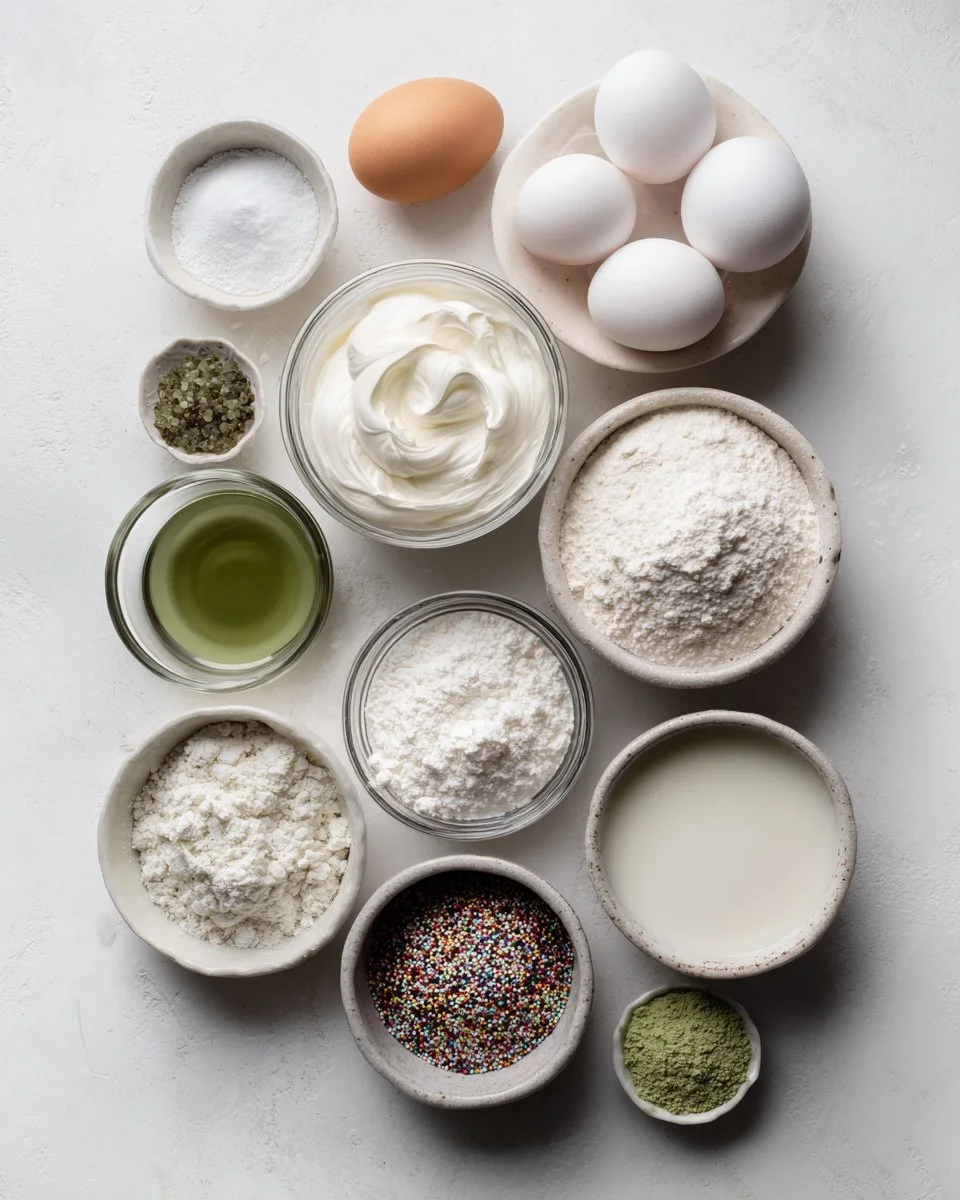
Ingredients
- 6 large egg whites, room temperature: Using room temperature egg whites helps them whip up to maximum volume for a light and airy meringue. I always buy organic eggs for the best flavor.
- 1/2 teaspoon cream of tartar: This stabilizer helps the egg whites maintain their structure while beating. It’s essential for a perfect Pavlova!
- 300 g superfine sugar (about 1 ½ cups): Superfine sugar dissolves easily for a smooth meringue. You can also make your own by blending regular sugar in a food processor.
- 1 tablespoon cornstarch: Adds to the meringue’s soft texture. You can use arrowroot as a substitute if you need a gluten-free option.
- Green gel food coloring: Optional, but recommended for a festive touch! It’s vibrant and mixes in beautifully without adding moisture.
- Sprinkles: Choose your favorite festive sprinkles for decoration, enhancing the Christmas vibe!
Prep Notes: Make sure your mixing bowl and beaters are clean and free from any grease. Also, allow the egg whites to come to room temperature for at least 30 minutes for the best results.
Step-by-Step Instructions
Preheat the Oven: Set your oven to 250°F (120°C). Preparing at a low temperature is key to achieving that perfect outer crust while keeping the inside soft.
Beat the Egg Whites: In a large mixing bowl, beat the 6 large egg whites on high speed using an electric mixer until soft peaks form, about 2-3 minutes. Chef’s Tip: Ensure there’s no trace of yolk in the whites; even a tiny bit can prevent proper whipping.
Add Cream of Tartar: While still mixing, add 1/2 teaspoon cream of tartar to stabilize the meringue. Continue beating until medium peaks form, about 1 minute more.
Mix Sugar and Cornstarch: In a separate bowl, whisk together the 300 g superfine sugar and 1 tablespoon cornstarch to combine.
Gradually Add Sugar: With the mixer still on, slowly add the sugar mixture a tablespoon at a time. This allows for a gradual incorporation, which helps achieve that glossy, stiff peak meringue. Visual Cue: The mixture should be thick and glossy when done.
Divide and Color the Meringue: Once peaks are stiff and glossy, divide about a third of the meringue into a separate bowl. Color this portion using a few drops of green gel food coloring, mixing gently until you achieve your desired shade.
Prepare Baking Sheet: Line a baking sheet with parchment paper. To create a guide, trace a 6-inch circle on the parchment with a pencil, then flip it over so the ink side is down.
Pipe the Base: Using a piping bag fitted with a star tip, pipe the white meringue around the traced circle, forming a circular wreath shape. Pipe a second layer on top for added height and sturdiness.
Pipe the Trees: Use the green meringue to pipe small tree shapes on top of the white base using a small round piping tip, adding decorations as you go with sprinkles.
Bake: Place the meringue in the preheated oven. Bake for 1.5 hours, or until the outer shell feels dry and sounds hollow when tapped.
Cool: After baking, turn off the oven and leave the door ajar for about 30 minutes to allow the meringue to cool slowly. This helps prevent cracking.
Serve: Once completely cooled, transfer the Pavlova to a serving platter. Top with whipped cream and an assortment of fresh fruits.
Professional Techniques: Watch for any browning on the meringue; if it starts to brown, you can lower the temperature slightly.
Common Mistakes: Don’t open the oven door while baking, as it can cause the meringue to collapse.

Expert Tips & Tricks
- Storage Recommendations: Store leftover pavlova in an airtight container at room temperature to maintain its crispness. It won’t last more than two days, but trust me, it’s unlikely to survive that long!
- Make-Ahead Instructions: You can bake the meringue a day in advance and assemble with whipped cream and fruits just before serving.
- Troubleshooting Common Problems: If your meringue is too runny, ensure your egg whites were beaten to stiff peaks before adding sugar. If the meringue cracks while baking, reduce the oven temperature and bake longer.
Serving Suggestions
A Christmas Pavlova Wreath is delicious on its own but pairs beautifully with a spiced holiday tea or a glass of bubbly. Serve it alongside a fruit salad to complement the lightness of the Pavlova. For an elegant touch, consider adding a drizzle of balsamic reduction over the fruits before serving. Perfect for Christmas gatherings and New Year’s celebrations alike!
Variations & Substitutions
- Flavor Variations: Try adding a touch of cinnamon or chocolate extract to the meringue for added depth.
- Dietary Restrictions: Want to make it dairy-free? Serve the Pavlova with coconut whipped cream instead of traditional cream to keep things light.
- Seasonal Adaptations: In spring, use lemon curd and fresh berries! In autumn, why not swap in some poached pears and candied nuts?
Nutrition & Storage Info
- Prep Time: 20 minutes
- Cook Time: 1 hour 30 minutes
- Total Time: 1 hour 50 minutes
- Yield: Serves 8-10
- Estimated Calories: About 200 calories per serving
- Storage Instructions: Best stored at room temperature for up to 2 days. This dessert doesn’t freeze well due to the meringue texture.
FAQ Section
Can I make the meringue ahead of time?
Yes! You can bake the meringue a day in advance and assemble it with cream and fruits just before serving.What’s the secret to a perfect meringue?
Make sure your mixing bowl and beaters are clean, and don’t allow any yolk in the egg whites. Whipping at room temperature also helps.Can I use regular sugar instead of superfine?
Yes, but it’s best to pulse regular sugar in a food processor to break it down a bit for smoother meringue.What fruits work best on top?
Fresh berries, kiwis, passion fruit, or even poached pears make wonderful choices.Is it possible to flavor the whipped cream?
Absolutely! Add vanilla, citrus zest, or even a splash of liqueur to elevate the whipped cream’s taste.How do I store leftovers?
Store leftovers in an airtight container at room temperature.Can I substitute egg whites with a vegan option?
For vegan meringue, aquafaba (the liquid from canned chickpeas) can be whipped to mimic egg whites.Why did my meringue collapse?
This can happen if moisture got into the egg whites or if they weren’t whipped enough before adding sugar.How can I make it gluten-free?
This recipe is naturally gluten-free! Just be cautious with store-bought cornstarch brands.When should I serve this dessert?
Serve it right after assembling, preferably after a meal for a festive treat!
Conclusion
The Christmas Pavlova Wreath is more than just a dessert; it’s a representation of joy, family warmth, and the spirit of the holiday season. I encourage you to give this recipe a try and experience the magic that happens when sweet meringue, cream, and fruits come together. If this holiday beauty becomes a family favorite, don’t forget to share your thoughts in the comments below.
For more holiday treats, check out my other recipes like the Gingerbread House or Delightfully Zesty Lemon Basil Chicken Kebabs: A Flavorful Grill Experience. Let’s keep the festive spirit alive in every bite!

Christmas Pavlova Wreath
Ingredients
Method
- Preheat the Oven: Set your oven to 250°F (120°C).
- Beat the Egg Whites: In a large mixing bowl, beat the egg whites on high speed until soft peaks form, about 2-3 minutes.
- Add Cream of Tartar: While still mixing, add cream of tartar and continue beating until medium peaks form, about 1 minute more.
- Mix Sugar and Cornstarch: In a separate bowl, whisk together superfine sugar and cornstarch.
- Gradually Add Sugar: With the mixer still on, slowly add the sugar mixture a tablespoon at a time until glossy, stiff peaks form.
- Divide and Color the Meringue: Divide a third of the meringue into a separate bowl and add green gel food coloring.
- Prepare Baking Sheet: Line a baking sheet with parchment paper and trace a 6-inch circle on it.
- Pipe the Base: Use a piping bag to pipe the white meringue into a circular wreath shape.
- Pipe the Trees: Use the green meringue to pipe small tree shapes on top of the white base.
- Bake: Bake for 1.5 hours or until the outer shell feels dry.
- Cool: After baking, turn off the oven and leave the door ajar for about 30 minutes.
- Once cooled, transfer the Pavlova to a serving platter. Top with whipped cream and an assortment of fresh fruits.